
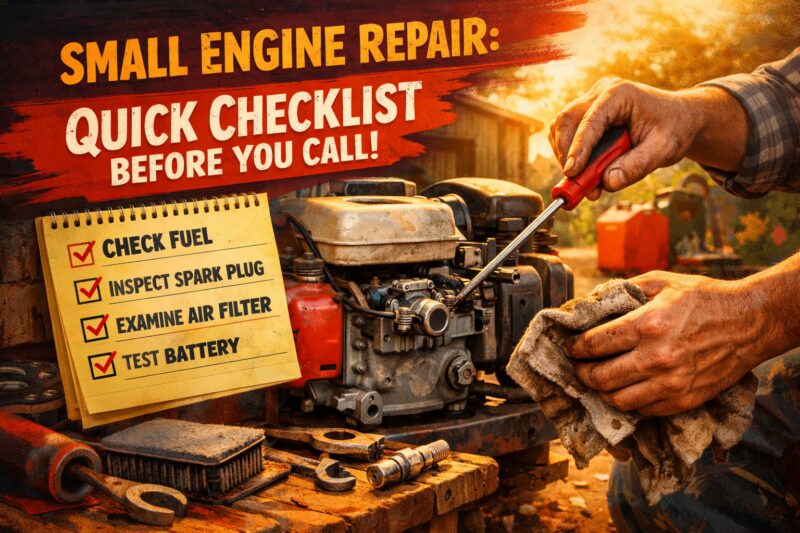
If your small engine won’t run as expected, a Small Engine Repair call will be faster and cheaper when you bring the right evidence instead of guessing. This quick checklist helps you decide what you can safely troubleshoot, what to document for a shop, and when the risk of DIY outweighs the potential savings—especially for common power equipment like lawn mowers, trimmers, generators, and pressure washers.
In 2026, many failures still trace back to the same three pathways: fuel delivery, spark/ignition, and air restriction. Whether you’re dealing with a “won’t start,” “starts then dies,” or “surges under load” problem, this guide walks you through a commercial-ready pre-call process: observe, record, do only safe checks, and then choose an appropriate repair path. If you’re in the Austin, TX area, the same evidence-based approach will also help you get clearer quotes from a local repair shop nearby.
This checklist is general for most brands and most machine types without requiring a specific model number. Still, safety and compliance matter: if you suspect fuel system leaks, electrical arcing, or high-voltage issues on generators, stop DIY immediately and contact a technician.
Pre-Call Checklist: Gather the Right Clues for Small Engine Repair
You’ll get the most accurate diagnosis for Small Engine Repair when you can clearly describe the symptom category, timing pattern, and what changed right before the fault. A shop can’t “diagnose the machine you meant to bring,” so your job is to create a clear picture that reduces guesswork and labor time.
Start by confirming two things: the equipment type (mower, trimmer, chainsaw, generator, pressure washer, etc.) and the symptom category. “Won’t start” often points toward fuel, spark, or compression/air pathways, while “starts then dies” suggests choke, idle mixture, or airflow leakage. “Surges” or “stalls under load” frequently indicates fuel delivery restriction, partial jet/filtration issues, or airflow starving at throttle.
Next, document context: when it started happening and what preceded it. For example, does the problem begin after seasonal storage, after refueling, after mowing in wet grass, after a tip-over, or after running a tank down to empty? These details change the likely root cause quickly. A mower that previously ran fine but now dies after warming up can implicate heat-soak behavior, a deteriorating carburetor diaphragm, or a failing ignition component—while a machine that fails only after refueling may indicate fuel quality or a clogged filter.
Then collect baseline details the shop will ask for. If you know the engine type (2-stroke vs 4-stroke) include it, and list approximate hours, last maintenance (oil, spark plug, air filter, fuel filter, line/primer bulb), and what fuel you used (including whether a 2-stroke was mixed correctly). Fuel age matters: “fresh” is relative, and many consumer problems come from fuel that looks usable but no longer vaporizes or burns correctly.
Bring quick evidence you can safely observe. If you’re comfortable and safe, check for obvious spark-plug condition (wet vs dry), and look at the air filter for heavy clogging or damage. Also note fuel appearance: if it’s darker, has visible separation, or smells strongly of varnish or stale gasoline, that can steer a diagnostic toward storage contamination rather than spark failure.
Finally, add a repeatability test note. Does it fail immediately, after a few seconds, only when choke is on, only when choke is off, only at idle, or only under throttle/load? Intermittent issues often become solvable when the technician can reproduce “the exact scenario that triggers failure,” and your documentation can make that possible.
Safety & “Stop-DIY” Thresholds Before You Seek Small Engine Repair
Before you attempt any troubleshooting, do safe pre-checks and know when to stop DIY—because secondary damage can turn a simple fuel or air issue into a much bigger Small Engine Repair bill. If the equipment involves fuel leaks, strong fuel odor near hot parts, or any electrical arcing, pause and contact a technician.
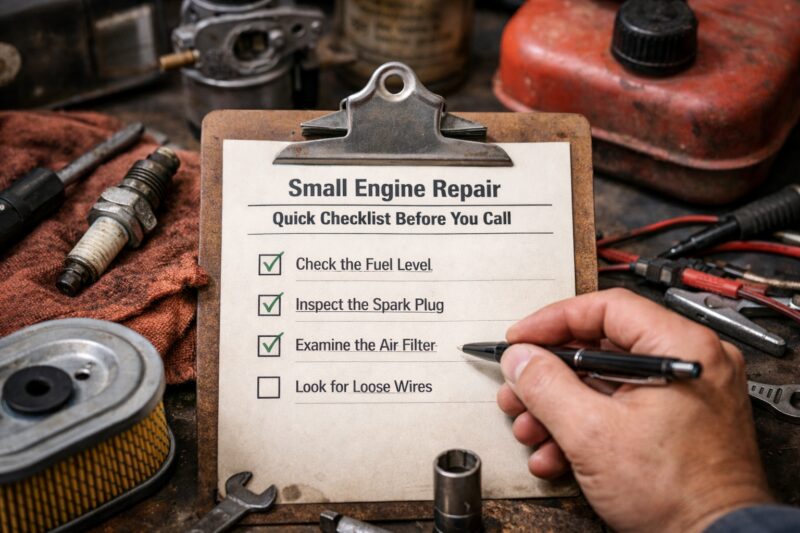
Safe spot checks are primarily visual and non-invasive. Look for obvious hazards: loose spark-plug boots, missing guards, debris packed around cooling fins, damaged fuel lines, or a collapsed/incorrectly seated air filter. Confirm controls are in correct positions (switches, choke lever settings, stop lanyard engagement, primer bulb behavior where present) and clean external debris that could block airflow. These actions rarely create new problems, and they often address the “easy wins” that technicians see constantly.
Use clear “stop-DIY” thresholds. Stop and call if you suspect a fuel leak (especially dripping near hot surfaces), if you see smoke you cannot explain, or if you smell fuel strongly when the machine is operating. For generators, never open electrical panels or attempt internal diagnostics; issues like transfer switch problems, wiring faults, or high-voltage components can be dangerous. If you see sparking where you shouldn’t—beyond the normal spark-plug event—or hear arcing sounds, do not continue testing.
Fuel caution matters more than most guides admit. Don’t keep cranking a flooded engine repeatedly—over time, you can foul the plug and move fuel into places it shouldn’t be. Ensure ventilation when working around fuel vapor, and keep ignition sources away. If you have to drain fuel, do it safely and dispose of it responsibly based on local requirements.
There’s also a regulatory reality. Some older equipment uses carburetor adjustments that may affect emissions compliance. Avoid “turning screws until it runs” beyond cleaning to prevent out-of-spec tuning or illegal adjustment. In a real shop workflow, a misadjusted idle mixture can be harder to diagnose than a clogged filter because it changes symptoms across startup, warm operation, and load.
Safety reduces cost because it prevents additional failures. A technician can only quote what’s wrong; if DIY creates damage—cross-threading a plug hole, tearing an intake gasket, cracking a plastic housing, or contaminating the wrong chamber—you may end up paying for both the original repair and the DIY fallout. If you want the fastest Small Engine Repair path, prioritize evidence and safe cleaning, then stop before risk increases.
Diagnosis Path: Match Symptoms to the Most Likely Small Engine Repair Causes
Use symptom-driven triage to narrow Small Engine Repair causes quickly—start by identifying which failure pattern you have, then test the fuel, spark, and air pathways that best match it. This approach prevents random parts swapping and keeps your evidence useful for a shop.
Here’s a practical decision path you can apply. If the engine “won’t start,” check the three core pathways: fuel delivery (fresh fuel, shutoff/line/filter condition), spark/ignition (spark plug condition and wire/boot integrity), and air/compression constraints (air filter restriction and whether the engine is turning normally). If it “starts then dies,” choke behavior and idle mixture are often the immediate suspects, along with air leaks or blocked idle passages. If it “surges” or stalls under load, the pattern often points to partial fuel restriction (jets, bowl contamination, clogged filter) or airflow restriction.
Interpret observations like a diagnostic tool, not a guess. A black, wet spark plug often suggests excess fuel (commonly flooding or a choke/mixture problem), while a white/blistered plug can indicate a lean condition or overheating tendency. A dry plug that still won’t start may imply spark is absent or fuel isn’t reaching the cylinder. A very dirty air filter can cause symptoms that mimic fuel problems—because the engine can’t get enough air to burn correctly.
Storage and stale fuel deserve special attention, because “stale” isn’t just about how long fuel sat. Gasoline can oxidize and form varnish, and ethanol blends can separate or degrade in ways that don’t always match a simplistic “it’s old so it’s bad” rule. In practice, fuel failure often shows up as hard starting, inconsistent idle, or surging—especially after seasonal storage. When you can, verify fuel freshness and document what you see in the tank and any inline filtration (without disassembling beyond safe checks).
Real-world example: a pressure washer that cranks but won’t maintain idle after a few seconds can be confused with a spark issue. However, if it only fails when the choke changes position, or if it runs better at a slightly different throttle setting, the more likely culprits are choke/airflow calibration, idle restriction, or vacuum/air leak behavior. Another example: a generator that starts, then repeatedly shuts down can be controlled by safety shutdown sensors or fuel delivery stability—so your “when it fails” timing record (immediate vs after warm-up) is critical.
Don’t ignore intermittent faults. Heat-soak failures can cause a machine to start cold and fail hot, and loose grounds or failing ignition modules can behave similarly. Your repeatability test should include temperature and timing: “starts cold on first pull, fails after 8 minutes,” or “fails only when the engine compartment warms up.” Many guides stop at listing possible causes, but technicians often solve intermittents by reproducing the trigger condition you document.
What most guides get wrong is treating diagnostics as a single checklist instead of a pathway. A new spark plug won’t fix a clogged carb jet, and a clean air filter won’t fix a blocked fuel line. Your role is to reduce uncertainty: match the symptom pattern to the fuel/spark/air pathway most likely responsible, then proceed only with safe checks or shop-based bench tests.
What to Check on the Spot: Quick Mechanical & Service Items That Drive Outcomes
Before you call, check the items that most directly affect fuel, spark, and airflow—because these are the fastest Small Engine Repair determinants you can observe without invasive work. The goal is to confirm what’s obviously right or wrong, not to dismantle the machine into parts.
Start with air intake checks. Inspect the air filter type and condition: foam vs paper vs cartridge style, and whether it’s clogged, soaked, or damaged. Cleaning can be appropriate for some types, but a torn or oil-soaked filter is often a replacement case rather than a “just clean it” situation. Look for external obstructions around intake openings and cooling fins; packed debris can cause overheating and performance loss that looks like fuel problems.
Next, do ignition basics. Inspect the spark plug for wetness or heavy deposits and confirm the plug boot is seated securely on the plug (or the coil lead connection is tight where accessible). If your plug is adjustable by spec, compare the current gap to manufacturer guidance using the correct measurement approach. Avoid random gap changes because incorrect settings can worsen misfire behavior and complicate diagnostics.
Then fuel system quick checks. Verify the fuel shutoff (if present), confirm fuel line condition, and check for obvious blockages or cracking. If the equipment uses a primer bulb, observe whether the bulb firms up as expected and whether the behavior changes after switching modes. Inline fuel filter condition matters too—debris or discoloration can indicate contamination. If your machine has a translucent bowl or visible chamber, inspect visually only where safe and do not open seals or gaskets unnecessarily.
Compression and mechanical clues can be harder, but you can still learn a lot. Note recoil resistance consistency: overly easy pulls can suggest a mechanical issue, while grinding sounds or unusual resistance can point to serious wear. Keep in mind that “no start” can be non-obvious even when sound seems normal; internal timing and compression issues sometimes present as intermittent cranking effectiveness rather than loud symptoms.
One key “don’t misdiagnose” caution: a new spark plug doesn’t fix a clogged carburetor, and a clean air filter doesn’t resolve a failing fuel shutoff or restricted line. Choke misuse can mask the true issue by temporarily improving starting while the underlying fuel delivery or air leak remains. If you performed any adjustments, note them—because the technician will need to know what changed.
For authoritative expectations on engine maintenance best practices and safe fuel handling, use official guidance such as the U.S. EPA and manufacturer service info where available. If you’re troubleshooting emissions-related tuning, refer to equipment-specific manuals rather than internet rules of thumb.
Common Mistakes & Misconceptions That Waste Money on Small Engine Repair
Most wasted money on Small Engine Repair comes from misdiagnosis—replacing parts before you validate fuel, spark, and air pathways. If you start “trial-and-error shopping,” you may accidentally create secondary damage or obscure the real failure mode.
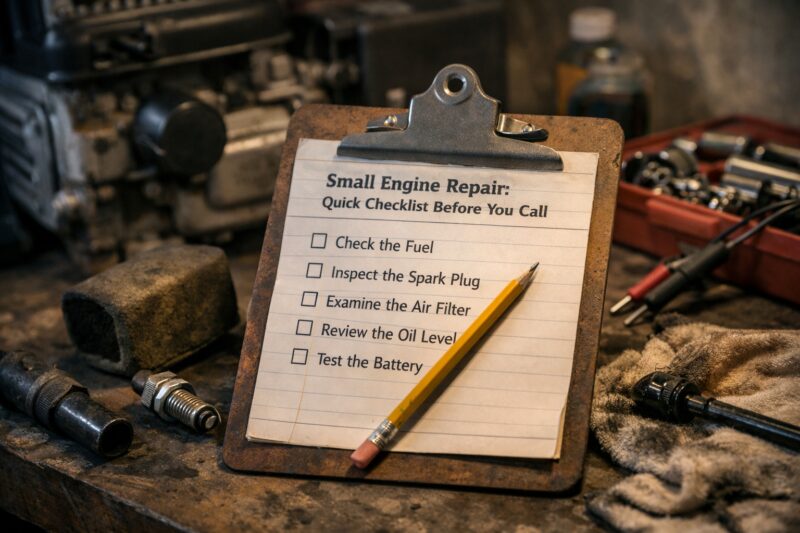
First, address common myths. “If it has fuel, it must be the carb” overlooks the reality that fuel can be the wrong quality, the wrong mixture (for 2-stroke), or blocked by a restricted filter/line. “Old fuel is always the problem” is also incomplete: stale fuel can be the culprit after storage, but fresh fuel with the wrong airflow setup, misadjusted choke behavior, or failing ignition can cause similar symptoms. “More choke always helps” is especially misleading—choke changes air/fuel balance temporarily, and misuse can flood the engine or hide the original problem.
Second, avoid missteps that add new work. Using the wrong fuel/oil mix in a 2-stroke engine is a frequent high-cost mistake. Another is reassembling with air leaks—if intake gaskets aren’t seated correctly or components aren’t aligned, “starts then dies” problems can appear because idle passage airflow is no longer stable. Overtightening housings or cross-threading fasteners also creates future leaks or cracks that complicate repair. Even when you “fix” the symptom, you can create a recurring failure that looks like the original issue returned.
Third, don’t replace parts repeatedly without pathway validation. Replacing plugs and filters multiple times without checking spark consistency, fuel delivery, and air restriction turns diagnosis into roulette. A more economical approach is to document what you saw: plug wetness, air filter condition, when it fails, and what changed after storage/refueling.
Fourth, surging and stalling causes are frequently misunderstood. Idle control vs governor behavior, airflow restriction, and vacuum/air leaks can produce similar symptoms. For example, a mower that surges at idle could be suffering from air starvation caused by a dirty filter, while a different machine might surge due to governor hunting or carb passage contamination. The repeatability test you record before calling is how you separate these patterns.
Finally, beware “timing and aftermarket temptation.” Some equipment requires specific specs for governor or idle systems. Non-matched parts or wrong settings can lead to chronic instability. If you don’t have the service guidance for your machine, stick to cleaning and safe inspection—or hand the evidence to a technician who can verify against the correct specs.
Options & Pricing Choices: DIY vs Tune-Up vs Full Service (How to Decide)
The right approach for Small Engine Repair depends on symptom severity, your tool comfort, and how likely the issue is to be a simple, serviceable item. Use a structured decision so you’re not paying for avoidable diagnostics—or doing DIY that takes longer than the repair shop would.
Consider four realistic options. (1) DIY inspection and serviceable cleaning (air filter, external debris, basic visual fuel checks) is best for “easy win” cases where the problem is obvious or likely airflow-related. (2) DIY diagnostic plus shop parts/labor is a common commercial-friendly middle ground: you verify plug condition, document spark/fuel evidence where safe, and let the shop handle bench testing or parts replacement. (3) Shop diagnostic/estimate only can make sense if the symptoms are intermittent, heat-related, or you don’t have the tools to safely inspect ignition and fuel delivery. (4) Full repair/rebuild is appropriate when evidence suggests worn internal components, major contamination, or repeated failure after prior service.
Choose based on the “time-to-evidence” you can realistically achieve. If your problem is repeatable and the likely pathway is clear, DIY may be economical. If it only fails after warm-up, only under load, or unpredictably, a shop’s diagnostic workflow may be faster and less expensive. Also weigh parts cost vs labor: a cheap plug or air filter isn’t the key cost—labor and misdiagnosis are.
When you request an estimate, ask for clarity on what you’re authorizing. A technician might charge a diagnostic fee, propose a parts list, and then provide an updated quote if internal wear is found. You want to know whether consumables (spark plug, filters, gaskets, fuel treatment, carb kits) are included, what labor covers, and what the turnaround time estimate is for your situation.
Evidence-based estimates reduce back-and-forth. Bring photos of the spark plug, air filter, and any visible fuel contamination, along with a written note describing the symptom timing (cold start vs warm failure) and what you already tested. This is also where a clear communication script helps; you can use a “what to ask your technician” checklist to avoid forgetting the key details during the call. If you’re comparing shop choices, request “small engine repair service options” to understand whether they offer diagnosis-only, parts-only, or full service, and confirm whether they can match your equipment type quickly.
Tradeoffs are real. DIY can uncover issues but may also consume time and create disassembly. Conversely, shop quotes can change if internal wear is discovered during the repair. The commercial win is to reduce uncertainty early with accurate symptom documentation, then authorize repairs with defined thresholds.
| Option | Best For | Typical Tradeoff |
|---|---|---|
| DIY inspection + safe cleaning | Obvious debris, easy airflow/fuel surface checks | May miss hidden fuel or ignition faults |
| DIY diagnostic + shop parts | Repeatable faults you can document | You still rely on shop bench testing for certainty |
| Shop diagnostic + estimate | Intermittent, heat-related, unclear symptoms | Diagnostic fee even if you choose not to repair |
| Full service/repair | Worn components, persistent failures after initial fixes | Highest cost; must confirm scope and warranty |
Beyond the Basics: Edge Cases, Advanced Checks, and What Most Guides Miss
When symptoms are intermittent or heat-dependent, the “standard” troubleshooting steps may not be enough for Small Engine Repair. Edge cases require evidence collection focused on timing, temperature, contamination patterns, and system interactions.
Hard-to-troubleshoot categories include intermittent spark, heat-related failures, carb contamination after partial repairs, and vacuum/air leaks. For example, an engine might start perfectly when cool but die as it warms up—this can implicate ignition modules, fuel volatility changes, or carb internal passage behavior. Vacuum leaks can be deceptive: they may not affect startup but can destabilize idle and cause stalls under load. Your documentation should capture when the fault occurs, which controls were set, and whether moving the choke lever or adjusting throttle changes the outcome.
Modern fuel considerations in 2026 can also complicate diagnostics. Ethanol blends can separate in some conditions, and “phase separation” can make fuel act differently than expected. That doesn’t always mean “replace everything” immediately; it can mean you need to verify contamination, clean the fuel pathway, and confirm the carb or filter system is actually cleared—not just the surface appearance of fuel.
After tipping or impact is another area many guides miss. If a mower or trimmer tipped, fuel can spill into areas it doesn’t belong, and oil can migrate depending on engine configuration. This can mimic spark or fuel delivery failure, because the engine can crank differently and the spark plug may show unusual wetness. Similarly, a generator that suffered physical impact may develop fuel line issues or airflow obstructions that look like “carb problems” but are really mechanical disturbances.
Environmental and load factors matter too. Running in wet grass can overload airflow and cooling, leading to symptoms that appear like fuel instability. A belt/drive drag issue on equipment with drive systems can also confuse diagnosis—because the engine may feel like it lacks power even when the engine itself is healthy. That’s why your symptom documentation should include load context: mowing wet vs dry, using pressure settings, operating at full throttle vs partial.
Finally, validate repairs properly after any work. Success criteria should be observable and repeatable: reliable cold start, stable warm restart, throttle response without hesitation, and consistent idle without hunting. Track outcomes over a day or two, because some faults only show up after heat soak. Many guides stop after “it runs,” but technicians and repeat customers know you need stable behavior across the operating conditions that caused the original failure.
Choosing a Repair Provider: What to Look For Before You Hire for Small Engine Repair
Choosing the right provider is part of Small Engine Repair success: you want a shop that diagnoses with transparency, communicates evidence, and sets clear scope so you avoid surprises. If you’re located in Austin, TX, using a local repair shop nearby can also reduce downtime if they can source parts quickly or offer pickup/drop-off.
Vetting starts with experience and fit. Ask whether they service your equipment type (mowers vs generators vs pressure washers) and whether they have a diagnostic process for fuel/spark/air pathway verification rather than random part replacement. You’re looking for technicians who explain what they tested and why, and who can show photos or bench test results when appropriate. This is also where “small engine repair service options” becomes a real decision factor: do they offer diagnosis-only, partial service, or full repair packages?

Communicate your evidence clearly. Share your symptom timeline, what changed right before failure, what you already checked (air filter condition, plug wetness, fuel type and age), and include photos. This reduces the chance of redoing tests and accelerates an accurate estimate. If you followed safe checks, tell them exactly what you did so they don’t assume the machine is untouched.
Reliability signals include estimate structure and responsiveness. A clear estimate should state diagnostic fees (if any), the parts likely required, labor scope, and warranty terms. The best shops also handle “can’t replicate” issues by documenting what they observed during the attempted testing and explaining what happens if the fault occurs later. If you want to reduce scope creep, confirm what authorization covers before they proceed.
Use this “scope creep” prevention approach: define what you’re authorizing in writing or by clear verbal confirmation. For example, “diagnosis only unless you find X and the total exceeds $Y” is far better than “just fix it.” That protects you when internal wear is discovered or when a carb/ignition component needs replacement based on bench findings.
If you’d like to improve your quote accuracy, prepare your “what to ask your technician” list before the call. For location-specific choices and service coverage, you can review whether a “local repair shop nearby” is actually positioned to help with your equipment and typical turnaround times by checking “areas served” details on your preferred provider’s page.
For additional consumer guidance on choosing service providers and warranty expectations, you can reference general consumer resources such as FTC: Business Guidance and Consumer Protection. It’s not a small-engine manual, but it supports the broader idea that transparent estimates and warranties are a best practice.
Frequently Asked Questions About Small Engine Repair
What should I check before calling a Small Engine Repair shop?
Before calling, document the symptom category (won’t start, starts then dies, surges, stalls under load) and when it started happening. Check basic safety items like switch positions and obvious external blockages, and inspect the air filter and spark plug condition if you can do so safely. Bring photos and note whether the fault is immediate or only after warm-up, since that timing detail often determines the diagnostic pathway.
How can I tell if my small engine has a fuel problem or spark problem?
A wet spark plug often points toward fuel delivery or flooding, while a dry plug can suggest fuel isn’t reaching the cylinder or spark is weak. If the engine cranks but won’t fire, focus on the fuel pathway first (fuel freshness, shutoff/line/filter condition) and then ignition basics (plug condition and secure boot connection) without doing risky electrical work. When in doubt, a shop can validate with safe bench tests rather than repeated trial parts replacement.
Is stale fuel always the cause of small engine starting issues?
Stale fuel is a common cause after seasonal storage, but it’s not the only one. Fuel breakdown depends on storage conditions, fuel formulation (ethanol blends), and how long the fuel sat, so you should verify rather than assume. Evidence like fuel appearance, plug wetness, and whether the issue appears after storage or after refueling helps separate stale-fuel problems from ignition or airflow issues.
What information should I bring to get an accurate estimate for Small Engine Repair?
Bring your equipment type, symptom pattern, and the timeline of when it began (including whether it followed storage, refueling, or tipping). Include maintenance history such as last oil/service interval, spark plug and air filter status, and whether you used correct fuel/oil for the engine type. Photos of the spark plug and air filter, plus any notes on choke behavior, speed up quoting and reduce back-and-forth.
Why does my engine start then stall after a few seconds?
This pattern commonly involves choke/idle calibration, idle circuit restriction, or air leaks that destabilize combustion after the initial start. It can also occur when fuel delivery is inconsistent—such as a partially clogged filter or contamination that affects the carb bowl after a brief run. Your key evidence is whether it stalls at a specific time, only when choke is on/off, or only under throttle/load.
Should I replace the carburetor or clean it for Small Engine Repair?
Clean the carburetor first when symptoms indicate contamination or clogging and you have evidence consistent with fuel pathway restriction. Carb replacement can be cost-effective when the carb has physical damage, severe wear in internal components, or when cleaning won’t restore proper function. In many cases, a shop decision is based on contamination level, parts availability, and expected labor time for cleaning versus replacement.
How do I prevent repeat problems after I pay for Small Engine Repair?
After repair, confirm success criteria beyond “it starts,” such as stable warm restart and consistent idle and throttle response. Use correct fuel practices (proper mix for 2-stroke engines, fuel freshness appropriate to your storage habits) and follow any recommended break-in or setting verification. If you had an air filter or fuel contamination issue, inspect it regularly and store the equipment properly to prevent recurrence.
What are the most common mistakes homeowners make during Small Engine Repair troubleshooting?
The biggest mistakes are replacing parts without validating the fuel/spark/air pathway and ignoring timing patterns that indicate whether the fault is heat-related or load-related. Using wrong fuel/oil mix for 2-stroke equipment, creating air leaks during reassembly, and repeatedly cranking a flooded engine also waste money. Another common error is “over-choking” or making random adjustments instead of documenting changes and stopping DIY when risk increases.
How do shops diagnose intermittent small engine problems when they can’t reproduce the issue?
Shops use controlled tests and customer-provided evidence like timing, temperature, and repeatability conditions. They may compare cold vs warm behavior, inspect for loose grounds or heat-sensitive components, and test fuel delivery consistency. If the customer can capture details like “fails only after X minutes” or “fails when choke changes,” diagnosis becomes more targeted even when the shop can’t reproduce it immediately.
Small engine repair checklist: what to do if the engine won’t start after winter storage?
Start with safe basics: inspect the spark plug condition, check the air filter, and verify switch/choke control positions. Check fuel age and condition—if fuel sat through winter, treat it as suspect and follow safe emptying/refresh practices as needed. If you performed any “restart attempts,” stop when you suspect flooding and avoid repeated cranking; then use the off-road checklist before service approach to gather evidence for the shop.
If you want, you can also compare your notes with an “off-road checklist before service” to make sure you didn’t miss documentation that affects estimates and turnaround time. When preparing to bring the unit in, a careful, evidence-based handoff is usually the difference between quick Small Engine Repair and weeks of guesswork.
Introduction and Summary Wrap-Up (Decision Path Recap)
The fastest way to reduce cost and downtime in Small Engine Repair is to use a pre-call checklist that turns guessing into evidence. When you identify the symptom category, capture timing and context, and perform only safe spot checks, the shop can diagnose faster and quote more accurately.
Your decision path should follow symptom-based triage → safe spot checks → stop-DIY thresholds → option selection (DIY vs partial vs full service). This prevents secondary damage and keeps your repair authorization focused. It also helps you compare approaches and quotes using the same evidence, so you can choose the most cost-effective outcome rather than the most confident salesman.
Before you contact a provider, organize your photos, notes, and fuel/maintenance history so you can clearly explain what you observed. If you are looking for support from a nearby provider, use a “local repair shop nearby” approach that considers coverage and turnaround, and confirm what “what to ask your technician” so you don’t miss key questions about diagnostic fees, scope, warranty, and expected parts timing.
Finally, treat this checklist as an evidence generator you can reuse next time. If the engine doesn’t start after winter storage or fails intermittently, the information you gather now will improve the next estimate and reduce repeat problems—exactly what a commercial repair workflow is designed to accomplish.
Updated May 2026