
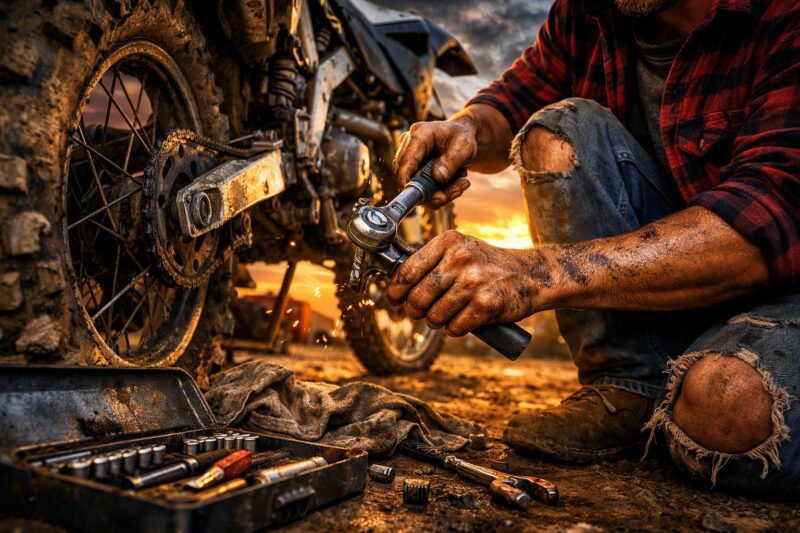
A fast, reliable dirt bike repair checklist should let you triage the problem in minutes, diagnose the likely system without guessing, apply the correct fix with the right torque and parts, then verify under conditions that reveal hidden issues. This is the practical goal of Dirt Bike Repair for riders and shop customers alike: ride-ready sooner, fewer repeat failures, and clearer decisions on whether DIY, mobile service, or a shop is the smarter ROI. In 2026, the commercial reality is simple—downtime costs money and momentum—so readers evaluating a service or doing DIY typically want a decision-first workflow, not a generic “how to” guide. Below, you’ll use a symptom-to-system checklist that moves from triage → diagnose → fix → verify → prevent repeat issues, with “stop conditions” and escalation rules to avoid turning a quick repair into a rework cycle. If you’re planning parts sourcing, choosing a technician, or trying to minimize repeat breakdowns, you’ll find criteria you can apply immediately.
Triage First: Diagnose the Dirt Bike Repair Problem in 10–20 Minutes
The fastest way to make Dirt Bike Repair reliable is to stop treating symptoms like root causes. In a 10–20 minute triage window, you should determine whether you’re dealing with fuel delivery, ignition/electrical, air restriction, or mechanical drag—then decide whether DIY diagnosis is safe or whether you should escalate immediately. This matters because the majority of repeat failures come from “part swapping” without confirming evidence first, which wastes labor hours and delays the fix you actually need.
In practice, triage works by layering quick observations that are hard to fake: fuel shutoff position, kill switch function, starter lever position, obvious harness damage, and any visible impact areas. Start with safety and controls because they immediately reduce diagnostic branching. For example, a bike that “won’t start” often turns out to be as simple as a stuck float, a valve left off, or a kill switch that intermittently opens, but those are only discoverable if you check the control layer first. Then move to evidence: listen for cranking cadence, smell for raw fuel, and feel for unusual heat around connectors, cylinder head area, or the starter circuit.
To keep your Dirt Bike Repair focused and fast, build a symptom-to-system map in your head. “No crank” often points to battery/ground/starting circuit; “cranks but won’t fire” points to fuel/air and ignition; “fires briefly then dies” points to fuel supply stability or an electrical interruption; “starts but feels like it drags” points to mechanical drag (wheel bearings, brake binding, clutch actuation) rather than carburetion alone. Practical application: when you observe one key clue—like strong fuel smell with no ignition signs—you don’t chase the entire bike; you narrow to the system that matches the evidence.
There are also clear stop conditions—moments when you shouldn’t continue DIY. If you suspect frame damage, major coolant or oil loss, or a locked motor (no rotation felt at the kicker or wheel with transmission neutral where applicable), you should stop and escalate. Intermittent faults deserve extra care: record conditions such as outside temperature, whether the issue happens cold or hot, and whether the failure correlates with throttle movement, bumps, or time elapsed. Common mistake: ignoring intermittent patterns and replacing common parts “because it’s cheap,” then discovering the real issue was a harness chafe that only fails after vibration. What most guides get wrong is skipping baseline recording; you can’t verify a fix if you didn’t document how the bike behaved before you touched anything.
Fast Fix Checklist: Tools, Spares, and Setup for Reliable Dirt Bike Repair
A reliable Dirt Bike Repair depends on what you’re prepared to do before you start—tools that remove guesswork and spares that prevent repeat trips. If you have the right capability (torque control, measuring basics, clean surfaces) and the correct consumables staged for likely failure points, your repair cycle becomes predictable. This matters commercially because every additional hour of downtime compounds the cost, and unreliable setups lead to “it works now” failures that return after a short ride.

For shop-ready readiness, think in terms of capability rather than brand. Your minimum toolkit should include quality hand tools for your model family, a torque wrench (with an appropriate range), basic measuring tools (feeler gauges or calipers depending on job), spark-test capability (safe and appropriate for your ignition type), and a cleaning setup for mating surfaces. Setup rules matter more than people expect: use a torque-spec source (service manual or OEM data), keep threads clean, and protect them with the right approach to thread conditioners only where specified. Cleanliness controls prevent repeat failures in areas like carb or intake sealing, valve/cover gaskets, and seal installations—where contamination can create leaks or poor sealing long before the next maintenance interval.
A compact spares strategy should align with failure points you actually see in your environment. For many riders and common shop workflows, that means consumables like filters, gaskets/seals appropriate to the systems you routinely service, and fluids needed for the repair. Then add small “mission critical” items: correct clamps/hoses where relevant, fresh spark plugs for diagnostic certainty, and any hardware that is single-use or commonly damaged during disassembly. Practical application: if you’re doing recurring service in dusty conditions, filters and air leaks become higher-probability issues; if you’re doing a lot of clutch/drivetrain work, friction-related kits and proper seals become a better use of inventory than stocking rarely needed components.
Verification should occur after each fix, not at the end of the entire job. Bench test and checks can be staged: leak check (visual and, where safe, pressure/soak checks depending on system), free-rotation/binding checks, and functional checks of controls before you commit to a full start/ride. Tradeoffs: staging more verification steps can cost time up front, but it prevents the expensive scenario where you burn an entire day chasing a problem that was actually present due to misrouting or a missed ground. Deeper insight includes parts compatibility pitfalls—model-year differences, clutch/ignition variants, and seal lip orientation can sabotage fast repairs even when “the part is correct by name.” What most guides get wrong is assuming that “new parts” eliminate the need for proper installation quality checks; misalignment, wrong seal orientation, or incorrect mating surface prep can still create immediate failure.
The Decision Path: What to Repair Now vs Next for Dirt Bike Repair ROI
For commercial outcomes, the best Dirt Bike Repair decision is the one that reduces downtime without increasing risk. Repair now when the issue is safety-critical or reliability-critical for the next ride; repair next when the problem is non-critical or unlikely to cascade into a bigger failure. This matters because replacing every part “just because” often destroys ROI—especially when the real root cause is an evidence mismatch that diagnosis would have confirmed earlier.
Use a prioritization framework based on ride impact and risk. Safety-critical items include brakes that bind, steering/control issues, and any electrical fault that could cause unexpected shutdown mid-ride. Reliability-critical items include fuel starvation patterns that worsen with heat, charging system faults, and mechanical drag that increases load and accelerates wear. Convenience later might include cosmetic repairs or non-essential maintenance items that do not affect immediate drivability. Cost of delay lens: a temporary workaround might be acceptable for a short test to gather additional evidence, but it becomes dangerous when it masks a problem that can damage the engine or drivetrain.
Re-check cadence matters. After any major correction—like changing ignition components, correcting intake sealing, or adjusting clutch actuation—perform fast confirmation before moving to secondary tasks. A practical example: if you fix a starting issue by reseating a connector or replacing a component, you should confirm spark/fuel delivery behavior consistently before you chase secondary symptoms like rough idle that may actually be a normal adaptation or a separate fault. Escalation criteria for technician involvement should be clear: compression anomalies, recurring electrical anomalies (especially intermittent ones), or drivability complaints that don’t match the evidence you collected. Provide information like model year, symptom timeline, what you measured, and photos of any harness routing or suspected damage; that shortens diagnosis time.
Customer objections are common: “Why not just replace the part?” Replacement can make sense when a fault is clearly identified, such as a melted connector pin indicating an electrical issue in that circuit, or when diagnostics pose safety concerns. Typically, diagnosing a problem is less costly and safer when symptoms could stem from various causes. Many guides fail to recognize that simply replacing parts without evidence can lead to further complications, like contamination or mis-torque, if proper triage isn't applied. For a more structured approach to preparing your bike for a mechanic, it’s beneficial to review the questions in off-road repair inquiries, as well as the pre-call checklist for engines, to help mitigate scope creep effectively.
Common Mistakes That Cost Time (and Money) in Dirt Bike Repair
The most expensive Dirt Bike Repair mistakes are not mechanical—they’re decision and setup errors. Skipping diagnosis, applying the wrong torque or fastener choice, contaminating seals, or misrouting wiring and hoses can all turn a short repair into a repeat-failure cycle. This matters because repeat visits and rework increase labor cost, delay riding plans, and reduce trust in the repair process.
One recurring failure-mode loop is symptom causality. Starting issues can be fuel delivery, ignition timing/electrical supply, air restriction, or mechanical drag. If you jump to a likely part without confirming evidence (like checking connector integrity, grounds, and fuel smell/visible delivery), you risk replacing the wrong component and missing the actual fault. Another common mistake is wrong torque or fastener selection: using a hardware type that “fits” but changes clamping force, creating loosening, stripping threads, or warping sealing surfaces. Contaminated seals are equally common—grease, dust, old gasket material, or poor surface prep can prevent seals from seating correctly.
“Appears fixed but isn’t” scenarios often show up quickly. A leak that stops during a bench test but returns after a brief ride usually indicates sealing surface contamination or improper seal orientation. Overheating after a short test can mean a cooling/airflow issue beyond the initially suspected problem, such as oil level mismatch, blocked flow paths, or a misinstalled component that changes thermal behavior. Vibration after repair is a red flag for mounting problems, imbalance, or alignment—people often ignore that because it feels “almost normal,” but the drivetrain will amplify minor issues over time.
Prevent rework with a re-check prevention checklist: document baseline readings before work, mark adjustments during disassembly and reassembly, confirm torque values, then re-verify baseline symptoms are truly resolved. What most guides get wrong is assuming “fresh parts = success.” Mating surfaces matter, alignment matters, and correct installation quality still controls whether a new seal actually seals or a new component stays within tolerance. A useful broader perspective on selecting the right approach and expectations can be found via “Auto shop service selection” https://ntroffroad.edesignerz.com/auto-shop-services/ when you decide whether to escalate to professionals for complex diagnosis.

Choosing Your Repair Approach: DIY Checklist, Mobile Service, or Shop Work
The best Dirt Bike Repair approach balances speed, predictability, and risk—DIY can be fast, mobile service can reduce hauling delays, and a shop can deliver specialized diagnosis. Choosing correctly matters commercially because different approaches excel at different fault types: a simple consumable replacement can be quick DIY, while complex electrical faults may be faster and cheaper in a professional setting with proper test equipment. The goal isn’t “DIY vs shop,” but selecting the shortest path to an evidence-confirmed, verified fix.
DIY using the checklist works best for clear evidence patterns and repairs where you can verify outcomes quickly. Mobile/field service is often ideal when the bike is partially functional but you can’t easily transport it, or when you need on-site triage and immediate correction of common issues. A local repair shop can be the strongest option for repeated intermittent failures, compression/drivetrain diagnosis, or electrical anomalies where controlled testing matters. A hybrid option is often the smartest in 2026: DIY triage to collect evidence and perform safe checks, then take the bike to the shop for confirmation where specialist tools or labor-intensive disassembly is required.
Compare approaches by speed, cost predictability, warranty expectations, and your own tool/knowledge requirements. Selection criteria include credentials or specialization, how they communicate estimates and timelines, and whether they discuss diagnostic steps—not just parts replacement. Good communication includes asking for model year, symptom timeline, photos of harness/hoses, and what’s already been tried. Parts sourcing strategy differs by option: DIYers should bring likely consumables and confirm exact part numbers for their model-year variant; shops may prefer you to provide only the bike and evidence, or may provide parts with their own sourcing and returns policies—reducing your delay risk if a component needs replacement.
Deeper insight includes liability and documentation. If the problem persists after repair, photos, recorded baseline behavior, and what tests were performed protect both buyer and technician. In practice, that means you should photograph the harness routing before unplugging, record any torque/measurements, and keep a simple symptom log. If you’re considering multiple service providers, it can help to review “Off-road repair service questions” https://ntroffroad.edesignerz.com/offroad-repair/ so you know what to ask before work begins and how to compare diagnostic fees. What most guides get wrong is recommending one approach universally; the “right” choice changes depending on whether the fault is mechanical, electrical, intermittent, or sensitive to correct assembly verification.
2026-Ready Reliability: Advanced Checks and Edge Cases Most Guides Miss
2026-ready Dirt Bike Repair reliability requires advanced verification that catches edge cases before they become repeat failures. Many guides stop at the obvious checks, but real-world problems often involve intermittent behavior, grounding issues, or post-repair symptom changes that signal a second fault. The commercial outcome you want—fewer return visits—comes from recording baseline conditions, applying structured electrical and mechanical checks, and verifying under short, controlled load.
For electrical troubleshooting, use a workflow rather than randomness. Start with voltage verification at key points, inspect connectors with logic (look for heat discoloration, looseness, corrosion, and harness wear), and confirm grounds with a clear test sequence. Ground issues are a common “appears fixed” cause: a bike might start once the connection warms, then fail again with vibration. Intermittent faults require careful documentation—record whether the issue occurs after a few minutes, after throttle changes, or with bumpy riding. Edge case: if the bike fails only when hot, prioritize thermal expansion effects in connectors and grounds before replacing multiple ignition components.
Mechanically, go beyond “feels fine” checks. Bearings and axles should be assessed for play with correct methods, and drivetrain drag indicators should be checked when transmission state allows safe free-rotation and binding evaluation. Clutch actuation feel verification is also important: if lever feel changes after a repair or the clutch drags slightly, it can cause “won’t go” symptoms that look like fuel/ignition problems. Practical scenario: after a carb or intake seal repair, the bike may start but overheat after a brief ride—this can indicate airflow routing issues, a misinstalled component affecting cooling, or a secondary leak affecting oil level.
Verification under load should be controlled. Do a short test ride that includes moderate throttle and brief steady acceleration, then apply clear stop rules: if unusual noises appear, if temperatures rise abnormally fast, or if the symptom returns immediately, stop and re-evaluate rather than “pushing through.” What most guides get wrong is diagnosing without recording baseline conditions—if you didn’t note starting behavior cold vs hot, idle quality, or any early vibration, you’ll struggle to identify secondary faults. For deeper prep before service, you can align your expectations and questions with “Pre-call checklist for engines” https://ntroffroad.edesignerz.com/small-engine-repair/ so shops can interpret your evidence faster.
Parts and Consumables: How to Get the Right Fix Fast in Dirt Bike Repair
Getting the right parts for Dirt Bike Repair quickly is less about picking a brand and more about matching the correct application, condition, and compatibility. When you choose consumables correctly—gaskets, seals, filters, and fluids—you reduce repeat failures that come from improper sealing, contamination, or wrong specifications. This matters commercially because part delays are common, but rework delays are even more expensive; using the right part the first time is the simplest route to faster turnaround.
Selection logic should start with the system you’re repairing. For consumables, match the right interface and condition: gaskets and seals must be the correct type for the material and surface finish, filters must match the flow path and mounting design, and fluids should meet the required specification for your engine and clutch/drivetrain design. Correctness isn’t optional for critical parts like shaft seals and clutch friction/plate sets; verify specs exactly, and where possible, compare against the bike’s service manual or OEM data. Practical application: if you replace a seal but install it with the wrong lip orientation or install over a contaminated shaft surface, the seal can leak immediately even though the part is correct by size.
Freshness and storage handling become more important than most riders expect in 2026. Some components degrade if stored improperly—packaging damage, exposure to heat or sunlight, or degraded packaging can lead to early failure. Store parts clean and dry, and avoid using items that have been exposed to moisture or contamination. Installation quality checks should include surface prep, correct sealing method, and break-in expectations where relevant. After install, re-measure or re-check what can drift: leaks, free-rotation, and control feel, not just whether the bike starts.

Deeper insight includes compatibility gotchas across variations. Carb vs fuel-injection differences can change electrical connectors, fuel routing, and even calibration expectations; clutch pack changes across model years can alter actuation feel; and model-year hardware revisions can cause “almost right” fitment problems that lead to immediate leaks or poor shifting. What most guides get wrong is treating “close enough” as safe. If your seal or gasket mates to a surface that has been resurfaced, pitted, or contaminated, you still need correct preparation and correct installation technique. A related decision framework for selecting parts sources and service providers is covered in “Auto shop service selection” https://ntroffroad.edesignerz.com/auto-shop-services/ if you need guidance on how to reduce delays due to incorrect parts ordering.
Location Anchor: Dirt Bike Repair in the United States—How to Plan for Speed and Service Availability
In the United States, planning is what turns Dirt Bike Repair into a fast, reliable workflow rather than a cycle of backorders and uncertain timelines. Parts availability, seasonal demand, shipping speed, and shop workload all affect turnaround—so your strategy should focus on reducing lead-time risk before you commit to a repair path. This matters commercially because a “cheap” part delay can cost you a full weekend of riding and lead to additional diagnostic labor if the bike can’t be tested when expected.
Typical constraints include parts lead times on less common model-year variants, seasonal demand swings when riding weather peaks, and shipping realities when a needed component isn’t locally stocked. Practical application: call ahead to confirm parts sources or diagnostic approach, ask whether diagnostic fees apply toward repair work, and request an estimate with a realistic timeline rather than a vague range. If you’re preparing your bike for service, communicate essential details: model year, symptom timeline, what has already been tried, and photos of any harness damage or fluid leakage points.
Parts sourcing compatible with US logistics usually means choosing a strategy that minimizes return shipping and waiting. If you’re DIYing, order only after you confirm exact part numbers; if you’re using a shop, clarify who supplies parts and what their return policy looks like for incorrect orders. Deeper insight: misestimated labor time is common for shops when the buyer didn’t provide evidence—like whether the fault is intermittent or only occurs cold/hot—so they spend extra time chasing possibilities. Another friction point is backorder surprises; asking whether alternative parts exist (and what risks they introduce) can prevent the “another week” scenario.
To reduce repeat visits, document everything before you drop the bike off and keep your symptom log clear. What most guides get wrong is assuming that availability is the same across regions; in practice, the fastest path is the one aligned to a specific supplier workflow and transparent timeline. If you’re assembling your questions and expectations for US-based providers, review “Off-road repair service questions” https://ntroffroad.edesignerz.com/offroad-repair/ and use a consistent pre-call approach similar to “Pre-call checklist for engines” https://ntroffroad.edesignerz.com/small-engine-repair/.
Frequently Asked Questions About Dirt Bike Repair
What should be included in a dirt bike repair checklist?
A complete dirt bike repair checklist should include triage, symptom-to-system diagnosis, tool and parts readiness, the repair steps you will execute, and post-fix verification. Include at least one evidence record (what you observed before disassembly) so you can confirm the change actually caused the resolution. Also add stop conditions for unsafe faults and a re-check point after each major correction.
How do I diagnose a dirt bike that won’t start quickly?
Diagnose by branching first: check fuel shutoff and kill switch, then look for signs like raw fuel smell, connector heat damage, and whether the bike cranks normally. If it cranks but does not fire, focus on ignition/electrical and fuel delivery rather than guessing internal mechanical issues. Use stop conditions if the motor appears locked or if you suspect major oil/coolant loss.
Should I replace parts first or troubleshoot in dirt bike repair?
Troubleshoot first when multiple systems can produce the same symptom, because “new part” replacement can mask the true root cause. Replace first only when evidence clearly indicates a specific failed component, such as an obviously damaged harness connector or a seal that is leaking from a clear installation or mechanical failure. The most reliable ROI comes from evidence rules paired with correct torque and verification.
How can I tell if my dirt bike problem is electrical or fuel-related?
Look for evidence like raw fuel smell and whether the spark circuit shows signs of failure during safe testing, plus connector condition and ground integrity. Fuel-related issues often correlate with fuel shutoff, clogged filters, or inconsistent delivery, while electrical faults can be heat-related or intermittent. Don’t run extensive trials without recording what changes with temperature and vibration.
What are the most common mistakes people make during dirt bike repair?
Common mistakes include skipping diagnosis, mis-torquing fasteners, installing seals over contaminated surfaces, and misrouting hoses or wiring. Another frequent issue is “appears fixed” rework—leaks returning after a short ride, overheating after brief testing, or vibration that indicates an alignment or mounting problem. These happen when verification under realistic conditions is delayed or omitted.
How do I choose between DIY dirt bike repair and a shop?
Choose DIY when the fault is evidence-clear, you have the correct torque and measuring tools, and you can verify quickly. Choose a shop when the fault is intermittent, electrical complexity is high, or you need specialized tests for compression or drivetrain behavior. Look for clear communication about diagnostic fees, parts sourcing, and a realistic timeline before authorizing work.
What information should I provide to a dirt bike repair technician?
Provide model year, symptom timeline, what you checked, any measurements you took, and photos of the area you suspect (like connector condition or suspected leak points). Note whether the problem happens cold vs hot and whether it correlates with bumps, throttle changes, or time elapsed. This helps technicians avoid repeat diagnosis and reduces labor on guesswork.
Can a quick fix make dirt bike repairs unreliable later?
Yes—temporary fixes can fail when they don’t address the root cause, especially with seals, grounds, or fuel delivery issues that worsen after heat cycles. A patch that “works” briefly may still create a leak, abnormal temperature behavior, or secondary damage under load. Reliability comes from correct installation quality and verification after each major repair step.
How long should a typical dirt bike repair take in 2026?
Time varies by fault type: simple consumable replacements might be quick, while intermittent electrical or compression-related diagnosis can take longer. In many cases, diagnostic time is the real driver, not labor for disassembly and reassembly. Parts availability and shipping delays also strongly influence the total timeline.
Is it worth paying for a diagnostic fee for dirt bike repair?
It’s often worth it when symptoms are ambiguous or the issue is intermittent, because structured diagnosis can prevent multiple incorrect parts replacements. Ask what the diagnostic fee includes, whether it applies toward repairs, and what information you should bring to reduce testing time. A good provider communicates probable causes and next steps instead of expanding scope without evidence.
What should I check after completing dirt bike repair to ensure it’s safe?
After repair, check for leaks, confirm key fasteners and torque-critical areas, verify control function (kill switch, throttle response, lever feel), and ensure the bike starts and idles normally. Then perform a short, controlled test ride with stop rules for overheating, unusual noise, or returning symptoms. Safety checks prevent both immediate risk and early repeat failures.
Updated May 2026