
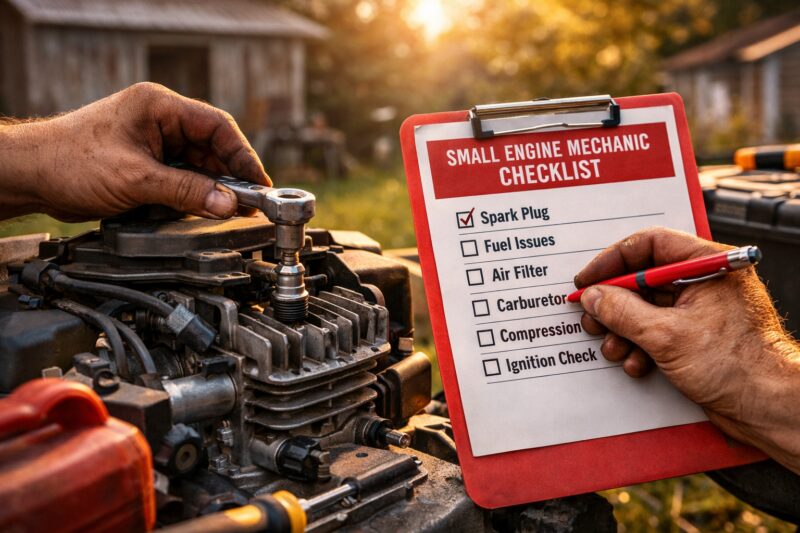
A Small Engine Mechanic checklist is a structured DIY troubleshooting plan that helps you diagnose small engine problems faster, safer, and with fewer “guess-and-replace” part swaps. Use a Small Engine Mechanic-style checklist to verify the right subsystem in the right order—air, fuel, spark, and mechanical integrity—so you can make confident parts decisions. This matters because small engines (mowers, generators, pressure washers, karts, and small power equipment) fail in predictable ways: fuel varnish, clogged vents, failing ignition components, worn ignition coils, and compression/leak issues. Without a checklist, DIYers often chase symptoms randomly, miss safety steps, and accidentally create new faults (like flooding the cylinder or damaging ignition parts). The checklist in this guide is designed to walk you through troubleshooting order, include verification steps, and clearly tell you when to stop and escalate based on evidence quality and safety boundaries.
What is a Small Engine Mechanic checklist for DIY troubleshooting, and how should you use it?
A Small Engine Mechanic checklist for DIY troubleshooting is meant to prevent random parts swapping by forcing you to follow a repeatable sequence: observe the symptom, confirm safety readiness, test one subsystem at a time, and record pass/fail results. Used correctly, it helps you “know what’s true” before you change what’s on the engine, which is how you reduce repair cost and downtime.
Small engines tend to fail in clusters rather than in one-off mysteries. For example, a mower that hard-starts after storage often points to fuel staleness, varnish in the carb, stuck floats, or a clogged tank vent. Meanwhile, an engine that cranks but won’t fire often points to ignition wiring, a weak coil, a grounded kill-switch fault, or spark plug issues. A checklist matters because it prevents confirmation bias—your tendency to interpret new evidence in a way that supports your first assumption.
How it works is straightforward: you move from the easiest, safest checks to deeper tests. You start with “will it crank” and fuel smell/odor clues, then you verify spark (only after basic fuel delivery is known), and you perform compression checks when the crank speed suggests a mechanical limitation. At each step, you define decision points like “if it won’t crank, don’t jump to ignition testing yet; check battery/starter/rope binding first.”
In practical application, treat it like a diagnostic technician’s worksheet: write down starting conditions (cold vs. warm), choke position, throttle setting, fuel freshness, and what you measured. If you have conflicting evidence—for instance, you get spark but it still won’t run—your checklist should instruct you to re-check fuel delivery and intake air leaks before replacing parts. Real-world scenarios include “won’t start but has fresh fuel,” where the checklist prevents you from wasting time rebuilding a carb when the real issue is an intake leak or a flooded cylinder from incorrect choke/priming technique.
The tradeoff is that checklists require discipline and time up front. But that time is usually less than the cost of multiple wrong parts visits, repeated disassembly, and accidental damage. For readers who want a systematic next step after initial DIY checks, this pairs well with a broader service approach like matching track setup to symptoms when dealing with sport equipment where operating conditions change how engines behave (jumps, sustained high RPM, vibration). It also supports a future handoff by keeping your measurements organized—so you can tell a shop exactly what you verified.
Small engine diagnosis workflow: follow a Small Engine Mechanic-style sequence (symptom → safety → subsystems)
The fastest DIY diagnosis follows a Small Engine Mechanic-style sequence: confirm basic crank/fuel/air/spark readiness safely, then test ignition and fuel in a logical order, and only measure compression when the evidence points there. This workflow reduces misdiagnosis by ensuring you don’t “prove” the wrong subsystem first.
Start by translating the symptom into a diagnostic category: “won’t crank,” “cranks but won’t start,” “starts then dies,” “runs rough,” “surges,” or “only runs with choke.” Each category changes your order. If it won’t crank, ignition testing is mostly wasted time; you first need to address starter/rope binding, a failed battery (electric start), a tripped safety switch, or a seized engine. If it cranks normally, you move into fuel and spark verification quickly, but still one subsystem at a time.
Next, do quick safety checks before touching components: keep the work area ventilated, manage fuel vapors, and disconnect power where applicable. Then follow the subsystem path: fuel delivery (tank vent, line, filter, carb inlet/float needle where relevant), spark generation (grounding, wiring inspection, spark test with proper precautions), and intake conditions (air filter, leaks around gaskets, intake manifold sealing). Finally, if the engine cranks slowly or you suspect mechanical restriction, use a compression test under consistent conditions.
Decision points should be explicit. For example, if a spark test shows “no spark,” do not immediately blame the ignition coil without first checking kill-switch grounding and verifying your test procedure. If the plug is wet, treat it as evidence of fuel reaching the cylinder (or incorrect choke/priming), and re-evaluate fuel and carb flooding. A deeper insight is avoiding confirmation bias by recording findings before changing parts; define pass/fail criteria, such as “spark present with a consistent gap” or “fuel flows to carb inlet when primed and tank vent is open.”
Failure modes of a rushed workflow include misattributing a no-start to ignition when the real issue is fuel starvation from a clogged vent or stuck float. Another common error is testing spark with a repeatedly flooded cylinder—your “no spark” conclusion may be wrong because the wet plug can foul and prevent a proper reading. The checklist should therefore include a step to assess plug condition and whether the engine is getting too much fuel.
If you want a structured “first pass” approach, you can also build a repeatable process into your maintenance rhythm—this supports reduce downtime with proper testing when the same equipment fails again. For equipment whose operating conditions differ by use case, remember to “match track setup to symptoms” for performance engines where load changes reveal hidden issues (clogged mufflers, marginal spark under load, or fuel delivery limits).

Safety-first troubleshooting checklist for DIY small engines
A safety-first troubleshooting checklist for DIY small engines ensures you don’t turn a simple diagnosis into an injury, fire, or new mechanical damage. Before any test, verify safe engine state, ventilation, tool readiness, and appropriate boundaries for what you will open or probe.
Begin with pre-checks. Work in a stable area with good lighting. Protect your eyes and hands—small metal edges, hot exhaust components, and spring tension in air/fuel assemblies are common hazards. If fuel is involved, manage vapors: avoid open flames, sparks, or smoking near the engine, and keep a fire extinguisher rated for flammable liquids nearby. For engines with electric start, consider battery safety: disconnect power when inspecting wiring, and verify you won’t short terminals with tools.
Next, match the engine state to the test. Cold engines and warm engines behave differently; choke position and starter technique matter. For example, checking whether an engine “will start” without accounting for cold-start choke can create misleading results. Battery condition also matters for starter cranking: weak cranking speed can mimic fuel or ignition problems because compression and ignition conditions depend on proper RPM.
Work area rules reduce risk beyond personal safety. Keep tools organized to minimize searching while fuel is open. Avoid leaving fuel lines loose where you might spill into hot exhaust or create a static-spark risk. Also, don’t probe sealed or high-pressure fuel systems beyond your capability—some modern equipment uses system designs that require specialized tools and safe depressurization procedures.
Deeper insight: hazards can mimic mechanical problems. A clogged vent can create vacuum-like symptoms that look like “fuel pump failure” even when the carb bowl can never refill. Flooding can cause “fuel smell with no start,” which may trick you into thinking the ignition is dead, when the wet plug and wrong choke/priming procedure is the real issue. Another edge case is heat-soak: an engine that starts cold but fails hot can cause electrical connection faults that appear intermittent; your safety checklist should include patience and cooling time to reproduce accurately without burns.
Common mistake in safety prep is rushing into disassembly without isolating the ignition source. A “spark tester” or inline tester can help, but you still need to ground and secure the plug safely. If you reach a point where you must open components that you cannot safely access or test, stop and escalate—this is how you keep checklist before calling a pro from becoming a last-minute scramble.
Fuel system checks: identify clogged, stale, or incorrect delivery with confidence
Fuel system checks confirm whether fuel is fresh enough, moving through the path, and arriving at the carburetor or injector in the right condition—this is often the most common cause of hard starts and surging. A Small Engine Mechanic-style checklist makes fuel diagnosis evidence-based by verifying freshness, flow, and contamination signs before replacing parts.
Start at the fuel path relevant to your engine type. For typical carbureted small engines: tank vent, fuel line, filter (if present), carb inlet (including the fuel shutoff if equipped), and the float/needle valve behavior. For diaphragm or vacuum-fed systems (common on some equipment), you also check vacuum line integrity and the fuel pump inlet conditions. For small engines with fuel return circuits or pressurized systems, do not guess—follow service guidance because incorrect pressure relief can be dangerous.
Practical mapping from symptoms to tests is where DIYers win time. If an engine hard-starts after storage, check fuel freshness first (stale fuel often creates varnish), verify the tank vent isn’t clogged, inspect the line for blockage, and consider whether the carb has residual varnish restricting flow. If it starts but dies quickly, check whether fuel delivery continues under operating conditions—some carb floats and needle seats behave differently once heat expands. If it surges at throttle or hunts, consider air/fuel mixture instability caused by dirt in the carb, partial blockage, or an intake air leak that changes mixture.
Checklist verification details matter. Freshness criteria are not only about date—smell and appearance help, but varnish can be invisible. If fuel smells sour, looks darker than expected, or has water contamination signs, treat it as suspect. Water contamination can show up as sputtering, misfire, and intermittent start behavior. Also observe whether primer or choke technique changes outcomes: a fuel-delivery issue often improves with priming/choke (temporarily), but an ignition issue usually does not in the same reliable way.
Common DIY mistakes include “dry” tests that ignore float bowl levels. For example, testing line flow while the carb float level is wrong may show fuel “exists” but not at the right delivery rate. Another mistake is replacing a carb kit because the engine surges—without verifying that the tank vent is open or the fuel is clean, which can quickly re-clog new jets. Deeper insight: air leaks in fuel lines can create “false no-start” results by allowing vapor intrusion, and incorrect primer/choke technique can flood the cylinder, leading you to wrongly conclude fuel delivery is working poorly.
For storage-sensitive engines, you can also align troubleshooting with maintenance patterns that prevent repeat problems—this supports reduce downtime with proper testing by focusing on the checks that predict recurrence.
Spark & ignition troubleshooting: how to test without guessing
Spark and ignition troubleshooting confirms whether the ignition system can generate a strong, consistent spark under the conditions your engine requires. A Small Engine Mechanic checklist helps you verify grounding, wiring integrity, and spark strength expectations before concluding a coil, module, or switch has failed.
Begin with observation. Inspect the spark plug for fouling (wet with fuel, oily, carboned) and check ignition wire connections and the condition of boots and terminals. Many “no spark” scenarios are actually grounding or switch faults—like a kill switch stuck open, a corroded connector, or a frayed wire making intermittent contact. Also check that your test procedure doesn’t accidentally bypass the system’s normal grounding path.
How to test safely and correctly matters. The simplest approach for many DIYers is a spark plug test: remove the plug, reconnect it to the lead, ground the metal shell appropriately, and crank to observe spark presence. Use an appropriate tester when available (inline spark testers can reduce uncertainty). For electrical continuity checks, only test with the right power state and safety approach—if your manual indicates sensitivity, follow it rather than probing live circuits.
Tradeoffs and limitations are important. “Spark present” is not always the same as “spark strong enough under compression.” An edge case is a weak spark that looks acceptable in open-air conditions but fails when the cylinder compression loads the ignition system. Conversely, a contaminated or flooded plug can appear to produce no spark at the tester even though the ignition is generating it—wet conditions can confuse results.
Timing considerations are usually less specific for DIY than for larger engines, but the concept is still helpful. If you see consistent “spark but no start,” and the wiring and module are intact, the problem may involve timing-related sensors or flywheel/magnet alignment in concept terms. Don’t assume replacement fixes timing—use the checklist to verify wiring routing, connector integrity, and whether any sensors are loose or damaged.
Common mistakes include repeatedly cranking with a flooded cylinder and concluding ignition is defective. Another is skipping plug inspection: a plug that’s been wetted during prior attempts can mask improvement after you fix fuel delivery. After completing spark verification, return to the workflow: if spark is present and fuel is adequate, then air and compression become more likely. This is especially relevant when troubleshooting sport equipment where symptoms can change with load—aligning your diagnostic path with “match track setup to symptoms” can reveal ignition weakness that only appears under higher RPM.
For foundational safety and ignition-related guidance, consult manufacturer documentation and ignition system best practices like the US EPA small engine emissions and maintenance resources, and use the engine manufacturer’s official troubleshooting guidance when available (many manuals include specific spark test procedures). For electrical safety principles, the NFPA fire safety resources can be useful when working around fuel vapors.
Compression & mechanical integrity: when it’s really a Small Engine Mechanic problem
Compression and mechanical integrity checks determine whether the engine can build and hold cylinder pressure long enough to start and run. In a checklist-based approach, you perform compression testing when symptoms suggest restricted cranking, repeated no-starts despite verified fuel and spark, or when the engine starts poorly and runs only briefly.
First, interpret starter behavior. If the engine cranks slowly, you may have mechanical drag (seized bearing, tight valve train, or internal restriction) or battery/starter issues. Normal cranking speed with persistent no-start shifts your attention toward fuel/air/spark first, then compression. A Small Engine Mechanic checklist should explicitly connect “slow crank” to “possible mechanical limitation,” because compression test results can be misleading if cranking speed is too low.
When you do a compression test, DIY constraints mean consistency is everything. Conditions should match your chosen baseline: throttle (wide open on many small engines during testing), choke position (varies by model—follow manual guidance), battery voltage (electric start), and cranking duration. Gauge variability is real, so interpret numbers cautiously rather than treating them like lab-grade diagnostics. Record your reading and how you obtained it so a later professional can compare.
Decision path: if compression is dramatically low, the problem may involve worn rings/cylinder wear, valve leakage, a head gasket concern, or timing-related mechanical issues. If compression is within a reasonable range but the engine still won’t start, you’ve likely ruled out—or at least reduced—mechanical integrity as the primary cause, and you should revisit air/fuel/ignition evidence quality. For head gasket or valve concerns, don’t “guess” by opening parts repeatedly; that’s where risk boundaries apply.

Deeper insight: compression tests can mislead in edge cases. Leaking valves might not be fully detected if your test technique doesn’t match the manual procedure. A flooded cylinder can mask symptoms even with compression present, and a gauge error (or poor sealing at the test port) can create artificially low readings. Another misconception is thinking “compression is good” means “everything is healthy”; engines can still have vacuum leaks, intake sealing issues, or accessory drag that prevents stable running.
Practical mechanical inspection items that are safer include checking obvious air leaks around seals and intake connections, verifying fastener security where accessible, and looking for obvious scoring or damage without disassembly. If your checklist log shows you have verified fuel, spark, and compression but the engine still fails under the exact cold/warm conditions, that is a reasonable escalation point for professional evaluation.
When you’re preparing for escalation, your notes help a shop move faster—this aligns with checklist before calling a pro and reduces the chance they’ll repeat basic tests you already performed.
Air, carburetion, and intake: fix the problem that “runs but doesn’t run right”
When a small engine runs but doesn’t run right, air and carburetion diagnosis focuses on mixture stability, airflow leaks, and throttle/carb cleanliness. A Small Engine Mechanic checklist should treat “runs rough, surges, or hunts” as evidence of mixture control problems—often caused by intake leaks or carb contamination—rather than immediately assuming the carb rebuild is the answer.
Start with intake basics. Inspect the air filter condition and check that the filter housing is sealed properly; a missing or clogged air filter can cause rich or lean running. Then check for intake leaks around gaskets, manifold connections, and any vacuum lines. Intake air leaks can mimic fuel problems by creating lean misfire and unstable idle, leading you to chase jet sizes or fuel delivery when the real culprit is an unmetered air leak.
For carburetion-related symptoms, use symptom-to-check logic. Rough idle often points to idle circuit issues or an intake leak that affects the idle mixture most. Hunting and surging at steady throttle may indicate partial blockage, float/needle wear, or inconsistent fuel level. Poor high-speed response can be tied to main jet or air bleed passage restrictions, or to restrictions upstream like a tank vent issue that behaves under sustained demand.
Cleaning and adjustment principles should be evidence-led. If you suspect varnish, cleaning jets and passages can help, but repeated failure after cleaning can indicate float/needle wear, damaged carb internals, or persistent fuel contamination from the tank. A checklist should record baseline adjustment positions (like idle screw baseline) and only adjust when you have reason—because returning to unknown settings increases diagnostic noise. Also, verify throttle linkage movement and return spring operation so the carb reaches the expected idle and transition positions.
Deeper insight: vacuum or air leaks around gaskets can create “false fuel” symptoms. For example, a slight leak can cause lean surging that feels similar to a clogged jet or a fuel line restriction. Confirm with targeted checks rather than replacing multiple parts; when possible, listen for intake leak cues and inspect sealing surfaces. If the engine “only runs with choke,” treat that as a diagnostic clue: it often indicates a lean condition from fuel delivery problems, air leak, or carb calibration, and it should guide your next checklist step rather than becoming a justification for random adjustments.
As you move toward performance equipment repairs, remember how operating load changes symptoms; the way it behaves on a kart track can differ from a bench test. That’s why “match track setup to symptoms” can matter, especially when vibration or sustained RPM exposes marginal fuel/air control issues.
Common misconceptions & pitfalls in DIY Small Engine Mechanic troubleshooting
The most expensive DIY failures in small engine repair come from misconceptions: assuming one part fix will solve any symptom, skipping baseline measurements, and creating new variables while diagnosing. A Small Engine Mechanic checklist avoids these pitfalls by requiring evidence recording, stop points, and one-subsystem testing at a time.
Frequent wrong assumptions include “a new spark plug fixes it” and “carb rebuild always solves surging.” A new plug can temporarily improve an ignition issue, but if fuel delivery is contaminated or the tank vent is blocked, the same problem returns quickly. Similarly, surging can be caused by intake air leaks, throttle linkage binding, weak spark under load, or fuel venting problems—so a carb kit replacement can waste money without addressing the true root cause.
Another major pitfall is part replacement strategy. If you replace a carb without verifying tank vent and fuel freshness, you may just move the contamination forward and re-clog new passages. The checklist approach encourages keeping old parts when diagnosing—save the removed components and record what you found so you can compare and avoid “multiple-change” repairs that erase diagnostic evidence.
Maintenance misconceptions also waste time. Using incorrect fuel/oil ratios (for 2-strokes), failing storage procedures, and ignoring proper stabilizer/vent management can lead to repeat failures. Tool pitfalls are real too: misreading compression gauge results, forgetting throttle/choke position consistency during tests, or not returning adjustment screws to a known baseline can make “successful changes” unrepeatable.
Deeper insight is the “misdiagnosis loop.” That loop looks like: you see one symptom, replace a part in the subsystem you first suspect, and then interpret the partial improvement as proof your assumption was right. But sometimes the improvement is temporary (like a spark plug clearing fouling) while the real issue remains (like stale fuel or an air leak). The checklist breaks this loop by defining pass/fail criteria and requiring verification again under the original failure conditions.
If you want a structured way to plan the next step when evidence is mixed, you can compare approaches based on symptom category. That’s covered in the next section, where you decide whether you should isolate subsystem first, do quick symptom-first checks, or run a seasonal maintenance sweep based on the evidence quality.
Comparisons & alternatives: choose the right troubleshooting path when evidence points multiple ways
When troubleshooting evidence points multiple directions, the right path is the one that isolates the subsystem with the highest likelihood and lowest risk first. A Small Engine Mechanic checklist can help you choose between systematic isolation, quick symptom-first checks, or maintenance sweeps depending on your tools, time, and the safety boundary of your engine type.
Systematic isolation is best when you can safely test and record. It follows the core sequence: fuel readiness, spark verification, intake/air leaks, and then compression. Symptom-first quick checks can be helpful when time is short—like checking for a flooded plug, obvious air filter blockage, or disconnected ignition lead—however the checklist should ensure you still transition into subsystem verification rather than stopping at “it seems better.” A seasonal maintenance sweep is best when the engine history indicates storage and contamination issues; it prioritizes vent clearing, fresh fuel strategy, filter inspection, and basic intake sealing checks.
Professional escalation should be realistic and evidence-based. If you have clean fuel verified, spark verified under the right conditions, compression reading that doesn’t suggest severe mechanical failure, and the engine still fails consistently, that’s when complex diagnosis (timing sensor checks, internal valve train verification, carb internal flow tests with specialty equipment) may require a professional. Your checklist log becomes the “handoff brief” so the shop doesn’t repeat tests and waste labor.
Alternatives should map to symptom categories rather than brand preference. If the engine won’t start after storage, fuel-first is often best. If it cranks but won’t fire, ignition-first (with safe spark verification) is best. If it runs rough across throttle positions, intake and mixture control checks (air filter, air leaks, carb cleanliness) should come next. For some engines, a mismatch in choke or primer technique can create symptoms that look like fuel failure, so always verify technique and state before you interpret results.
Deeper insight: engine type changes the best path. Two-stroke vs. four-stroke basics differ, and diaphragm-vs-float carb behavior changes what “fuel delivery” means. With diaphragm systems, vacuum integrity matters more; with float carbs, needle/seat and float level become central. Your checklist should therefore adjust the order slightly based on engine design while preserving the overall evidence-first logic.
For DIYers who are also dealing with equipment that sees track or sport loads, your troubleshooting path may incorporate operational testing. When you “match track setup to symptoms,” you can confirm whether a problem appears only under higher load or vibration—an important clue when the checklist indicates multiple plausible subsystems.
Advanced edge cases: intermittent faults, storage issues, and “runs only with choke”
Advanced edge cases are where checklists save the most time: intermittent faults hide until conditions match, storage issues create delayed failures, and “runs only with choke” signals mixture imbalance. A Small Engine Mechanic checklist should include reproduction steps and verification under both cold and warm states so you don’t misdiagnose a symptom that changes with temperature.
Intermittent no-start problems often relate to heat-soak electrical faults, connector corrosion, or weak ignition performance under compression load. To handle this, your checklist should instruct you to reproduce the exact failure condition: start cold, run to a defined heat state, then attempt a warm restart using the same choke/throttle settings. If the engine starts when cold but fails warm, immediately suspect marginal electrical connections, weak ignition components, or fuel delivery issues that worsen with heat and viscosity changes.

Storage-related failures go beyond “stale fuel.” Varnish can clog small passages gradually, stuck floats can prevent bowl refilling, and tank vent blockage can create pressure/withdrawal problems that show up after the engine sits. A checklist should include vent inspection and a fuel freshness check, plus an assessment of plug condition after failed starts (wet plugs suggest fuel arrival, which changes what you should test next). If you have repeated no-start after storage despite cleaning, the checklists should lead you to verify the fuel system holistically rather than focusing only on carb jets.
The “runs only with choke” clue deserves structured interpretation. Often it indicates a lean condition where additional choke enrichment temporarily helps—air leaks, partial fuel delivery restriction, or carb calibration problems can do this. But it can also indicate a flooded cylinder scenario where choke changes intake behavior enough to alter starting behavior. The checklist should therefore instruct you to check whether the plug is wet after a choke-assisted start and whether the engine dies quickly once choke is opened.
Edge cases also include vibration and mounting issues that mimic mechanical problems. Loose engine mounts can misalign linkages and create inconsistent throttle behavior or fuel line strain. Conceptually, clogged mufflers or exhaust restrictions can change load behavior and cause “won’t run right” symptoms that look like fuel problems, because backpressure affects combustion stability. Your checklist should include a quick inspection of mounts, line routing, and any visible exhaust restriction signs before deep disassembly.
Common objection: “I tested everything—why does it still fail?” The checklist answer is to re-verify under the exact conditions of failure. Many systems behave differently during cold start, after a short run, or after long heat soak. Your checklist should include “test again exactly” rules so you don’t accept results taken under conditions that weren’t the same as the original failure.
When edge-case troubleshooting escalates, your documented reproduction steps support faster professional diagnosis. This again ties back to checklist before calling a pro, especially when intermittent faults need controlled observation.
Small Engine Mechanic checklist template: record results like a diagnostic technician
A Small Engine Mechanic checklist template is a one-page worksheet that records symptoms, starting conditions, safety steps, subsystem test results, and the exact next action. The goal is to create evidence you can trust and reuse—so you don’t repeat tests or buy parts blindly.
Capture the basics that determine test meaning: symptom category (no crank, cranks no start, runs rough, surges), model/type of engine, and whether behavior differs between cold and warm. Record choke and throttle position at the time you attempted starting. Log fuel details including freshness, storage history, and any fuel odor/color observations. For electric start engines, record battery condition and whether cranking speed is normal; slow cranking changes how you interpret fuel and spark tests.
Then structure your evidence log by subsystem. For fuel, record verification outcomes like whether fuel flows when primed, whether a tank vent is open, and whether the plug shows wetness consistent with fuel delivery. For spark, record plug condition and whether spark appeared consistently using your chosen test method. For mechanical integrity, record compression readings, test conditions (throttle position, engine warm/cold), and number of cranks. If you adjust anything (idle screw, choke linkage), record what you changed and the baseline you started from.
Pass/fail rules make the template actionable. Example criteria: “spark test success” might mean consistent spark at cranking speed with correct grounding and plug condition, not a one-time flash. Fuel verification pass/fail could include “fuel delivery observed to carb inlet under the same priming conditions,” rather than a vague “smells like gas.” Compression pass/fail should be interpreted relative to your engine’s baseline and the consistency of test conditions, not treated as a single universal truth.
Use a worksheet flow: pre-check → subsystem checks → evidence log → next action. This reduces repeat store trips because your log preserves measurements and your memory of what worked or didn’t. It also helps when escalation is needed: a shop can use your recorded pass/fail results to focus on advanced diagnosis instead of repeating basic checks—supporting reduce downtime with proper testing.
Deeper insight: documentation prevents misdiagnosis loops. If you record each subsystem result before changing parts, you can detect patterns like “fuel wet plugs consistently but spark test changes after cleaning” or “compression reading only low when battery is weak.” That evidence is what turns DIY troubleshooting into real engineering logic. If you later choose a service path, your notes help determine the best way forward based on the evidence quality.
Top 10 questions about Small Engine Mechanic checklist for DIY troubleshooting tips
What is the fastest Small Engine Mechanic method for a no-start?
Follow the sequence: safety check and confirm whether it cranks, then verify fuel delivery clues (plug wetness and fresh fuel/vent factors), and only after that check ignition with a proper spark test. If it won’t crank, do not proceed to ignition testing—check starter/rope binding and battery/safety switches first. If it cranks but the plug is dry, prioritize fuel delivery verification before further ignition work.
How do I know if my small engine issue is fuel or ignition?
Use plug condition and start behavior patterns: a consistently wet plug suggests fuel is reaching the cylinder (or you are flooding it), while a consistently dry plug suggests fuel delivery failure. If a spark test shows consistent spark but the engine won’t fire, revisit fuel cleanliness, carb flooding, and intake leaks. If there’s no spark, check kill switch grounding and wiring before replacing ignition components.
Why does my small engine only run with the choke on?
Running only with choke usually points to a lean condition—common causes include intake air leaks, partial fuel delivery restriction, or carb mixture calibration issues. Confirm by checking air filter condition, intake sealing surfaces, and tank vent behavior, then inspect the plug after choke-only operation. If the plug becomes very wet after choke use, consider flooding and carb float/needle issues.
What should I check first on a small engine that won’t crank?
Start with safety and then verify cranking capability: check battery voltage and connections for electric start, and check for rope binding, safety switch activation, or seized components. Inspect the obvious “no-crank” causes before you touch ignition or carb parts. If you hear normal starter engagement but no movement, stop and investigate mechanical binding.
Can stale fuel cause a small engine to start then die quickly?
Yes. Stale fuel can flow initially but varnish can clog jets or passages as soon as the engine runs, causing it to start briefly and then die. Confirm by checking fuel freshness, tank vent function, and whether the carb bowls/needle valve are contaminated. In many cases, restarting attempts worsen flooding, so re-test with controlled choke/priming technique.
How do I test spark correctly on a small engine without damaging anything?
Use a safe spark test procedure: secure the spark plug correctly, ensure proper grounding, and crank at normal speed. Avoid repeated cranking with a wet plug; dry it or wait to avoid misleading results from flooding. Use an inline spark tester if you have one, and interpret “no spark” only after verifying kill switch grounding and wiring continuity.
What compression reading is good enough for DIY small engine diagnosis?
There isn’t one universal number for all small engines, so DIY diagnosis focuses on consistency and test conditions. Use the same throttle/choke settings recommended for that engine type and record how many cranks you used. If your reading is drastically low compared to expected performance for that engine, mechanical integrity issues become more likely.
Should I clean the carb first or replace parts when troubleshooting small engines?
Clean first when evidence suggests varnish or contamination (storage history, after-fuel odor changes, or clogging signs). If you find repeated surging after cleaning and you have evidence of float/needle wear or persistent fuel contamination, replacement may be safer than repeated cleanings. The checklist should guide you by recording whether the fuel system verification and intake leak checks were done before carb work.
How do I troubleshoot surging on small engines at different throttle positions?
Treat idle surging differently from mid/high throttle behavior: idle instability often implicates idle circuit issues or intake leaks, while mid/high surging can implicate main jet/air bleed passages or fuel delivery under sustained demand. Check air filter and intake sealing first, then verify fuel freshness/vent function. If surging changes when you open choke, use that as a mixture clue rather than assuming a single component is wrong.
What are the most common DIY mistakes that waste time on small engine repairs?
Common mistakes include replacing parts without verifying subsystem evidence, changing multiple variables at once, and skipping baseline measurements. Another common error is flooding the cylinder during repeated attempts, which confuses spark testing results and makes it harder to interpret plug condition. Keep old parts when diagnosing and document test outcomes so you do not enter a misdiagnosis loop.
Do I need special tools to follow a Small Engine Mechanic checklist?
You can do a useful first pass with basic tools: a screwdriver/socket set, an inspection light, and a safe spark test method. A compression gauge and an inline spark tester improve confidence, but you should not use tool limitations as an excuse to skip evidence recording. When tool access is limited or safety risks rise, use the checklist log to inform escalation decisions.
Conclusion: turn your troubleshooting into evidence-based decisions
The core of a Small Engine Mechanic checklist is systematic order, evidence-based decisions, and safety-first boundaries—so you diagnose the correct subsystem without random parts swapping. Start by recording symptoms and starting conditions, then move step-by-step through fuel, spark, air/intake, and mechanical integrity only when the checklist evidence justifies it.
Documentation is the multiplier. Record what you tested, what you measured, and what changed, then only change one variable at a time. This reduces the common misdiagnosis loop where each partial improvement convinces you the prior assumption was correct, even though the root cause remains elsewhere.
Finally, know when to stop and escalate. If your checklist log shows conflicting evidence, unsafe access requirements, or advanced diagnostics beyond your tools (especially for sealed or high-risk systems), use your results to brief a professional—this is the best way to “checklist before calling a pro.” Print the template, run your first subsystem isolation pass, and only then decide whether cleaning, adjustment, or parts replacement is truly supported by the evidence.
If you’re troubleshooting a small engine at home, having a Small Engine Mechanic mindset helps you stay organized and safe. Start by checking the basics first, then use a fast reliable diagnostic sequence to narrow down what’s most likely before you start swapping parts.
As you work, keep notes on what changed, what improved, and what made no difference—those details guide your next steps like a Small Engine Mechanic would. Follow a methodical approach and use the fast reliable diagnostic sequence again after each adjustment so you don’t miss a simple cause.
Updated May 2026