
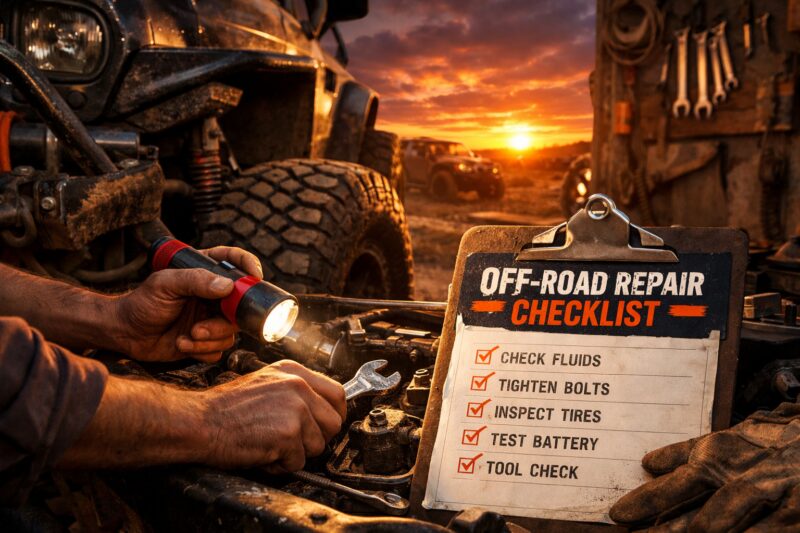
Off-Road Vehicle Repair success depends on running a structured, safety-first checklist that gets you from intake to verified fix without guesswork. This commercial guide gives you a step-by-step Off-Road Vehicle Repair checklist designed to speed diagnosis, reduce rework, and keep turnaround promises realistic across common off-road platforms.
For shops and mobile technicians, faster job success is not just about speed—it directly affects fewer comebacks, clearer estimates, smoother scheduling, and better customer trust when trail-season demand spikes. When you standardize intake, apply a decision-path diagnostic workflow, and verify repairs in staged ways, you reduce “part-swapping” and you catch hidden damage confounders that commonly create repeat failures.
This checklist is scoped to common off-road platforms (ATVs, UTVs, dirt bikes, off-road trucks, and SUVs with off-road modifications). It covers intake → diagnosis → repair execution → QA verification → customer handoff, with special attention to modified-vehicle branching rules, compatibility checks, and off-road-specific risks like mud/water intrusion, breather routing, and driveline harmonics.
Turn Every Off-Road Repair Ticket into a Clear Plan
To speed commercial turnaround, start by building a complete job plan before tools come out—because most “slow repairs” are really incomplete problem definitions. A strong intake for Off-Road Vehicle Repair sets targets for time-to-diagnose, parts accuracy, and reduced rework by clarifying how and when the symptom appears.
Begin with the vehicle context that changes fault likelihood: model/year, engine type, drivetrain configuration, and especially how the vehicle is used (rock crawling vs desert running vs mud/wet forest). Ask about recent mods (lift kits, tire size changes, ECU tunes, skid plate installs, snorkels, intake/exhaust changes) and any prior failures that were “temporary fixes.” These details prevent misdiagnosis, because off-road modifications often shift sensor behavior, driveline speed relationships, and airflow patterns.
Next, capture symptoms precisely in operational terms. Record sounds as “what it does,” not just “a noise”: throttle position, surface type, speed range, and whether it happens in 2WD/4WD/locked modes. Include odor cues (fuel smell vs electrical/ozone vs burning oil), temperature context (cold vs hot), and environmental conditions (rain, recent water crossing, salty sand, winter freeze). In practice, this helps your diagnostic decision path avoid expensive teardown on problems that are actually intermittent electrical contamination or vacuum/boost leakage.
Commercially, define “success” in measurable language and set expectations for scheduling. For example: idle returns reliably within X seconds after a restart, no drivetrain shudder under a defined load, and hot-start consistency on repeated cycles. Then check access realities that determine how fast you can work—lift/fork availability, bench time, specialty adapters, scan tool capabilities, and whether you have time for safe test conditions. Many shops lose days by promising turnaround without confirming that the right tools and test route authorization are ready for the specific fault category.
Finally, apply mod-to-risk mapping. Lift kits and larger tires can alter speed sensor correlation and driveline imbalance characteristics; ECU tuning can change diagnostic logic and stored fault meaning; skid plate and vent routing changes can increase mud ingestion or alter breather flow paths. A short “mod-to-risk” note in the work order becomes a powerful branching input later when you decide what to test first—and what to avoid.
Even if you plan to reference broader customer-facing guidance, ensure your team uses a consistent question set. Consider starting with a standard intake script using resources like What to Ask, then refine the script for the modified-vehicle realities you see locally and seasonally.
Pre-Inspection Safety & Documentation: Prevent Rework Before Wrenches Turn
Before diagnosis accelerates, you must lock down safety and baseline documentation—because early mistakes can create new damage and inflate turnaround. A pre-inspection checklist reduces rework by ensuring test conditions are valid, hazards are controlled, and evidence is captured before parts are disturbed.
Start with immediate safety triage. Isolate the battery when you’re working near starters/alternators/wiring; verify fuel caps and opening procedures for systems with high vapor pressure; and use correct PPE when you may encounter coolant, brake fluid, or oil contamination. If you’ll lift or hoist, follow hoist safety habits suited to off-road vehicles that may have skid plates, altered lift points, or non-standard underbody components. Also be alert to brake line awareness around lifted suspensions—routes may be tighter, and a “looks safe” hose can still be at risk during flex tests.
Then establish baseline condition documentation. Take photos of underbody areas (corrosion hotspots, impact marks, oil/dust patterns, and leak witness points), document cable routing, and capture tire wear patterns (cupping, feathering, uneven tread) that can explain driveline vibration or traction-related faults. For vehicles with water/mud exposure, photograph connector locations and vent/breather components before you disconnect anything—mishandling can wipe evidence and remove clues.
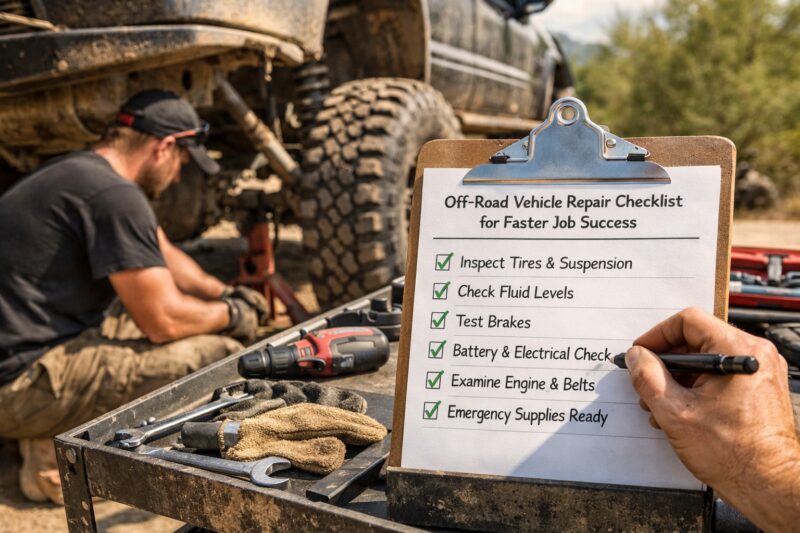
Confirm diagnostic preconditions for reliable results. Determine whether faults are cold-only or hot-only, whether driveline is in a specific engagement mode, and whether fluid levels and fluid condition are verified using the correct specification and method. Many comeback jobs begin when technicians test “as received” without verifying fluid type, oil level accuracy, or the system state (for example, whether the ECU has completed an expected readiness cycle after a tune or battery disconnect).
Include legal/compliance workflow basics. For off-road platforms that may be street-registered or semi-street (common in U.S. markets), ensure test ride authorization and liability language are covered before you run dynamic checks. If the customer expects off-trail verification, coordinate what’s safe and permitted—because “real trail testing” can be a risk multiplier without authorization.
Deeper than obvious: handle hidden damage confounders. A recent impact can bend control arms or alter alignment geometry, and water ingestion can temporarily skew misfire/vapor lock behavior and electrical connector condition. If the original complaint “vibrates” but the vehicle also has bent linkage or a shifted skid-plate strike point, symptom-based diagnosis can be invalid until you reconcile the physical baseline.
Diagnostic Workflow That Speeds Off-Road Vehicle Repair (Decision Path + Criteria)
A fast diagnostic workflow uses a structured decision path with gating rules—so you test in the order that avoids expensive teardown. The goal is to confirm the most likely root cause quickly, then verify with criteria rather than replacing parts based on codes alone.
Implement a symptom classification → quick checks → targeted tests → confirmatory measurements → service action sequence. For example, start by categorizing symptoms into groups: hard start, misfire, reduced power, charging/voltage anomaly, shifting/driveline shudder, braking fade or pull, and overheating. This classification matters because off-road faults commonly overlap—mud/water intrusion can trigger misfire behavior, charging instability, and sensor dropouts that set misleading codes.
Use diagnostic time-saving gating. Before deep teardown, verify high-yield basics: battery health, visible connector condition, fuse/relay integrity, and obvious vacuum/boost routing issues—especially on vehicles modified with intakes, intercooler piping, or relocated breather hoses. For charging-related complaints, do a quick sweep of grounds and connector security before you pull components. For misfire and reduced power, confirm fuel quality and check for air leaks that are common after off-road impacts or intake modifications.
Define pass/fail thresholds that your team follows consistently. Instead of “seems low,” document what is acceptable: compression/leak-down expectations relative to engine condition, resistance ranges for sensors where applicable, voltage drop criteria on known circuits, and free-play tolerances for driveline components. This is how you turn diagnosis into repeatable engineering rather than technician interpretation. It also improves commercial estimates, because you can forecast labor once your team knows which failure category is confirmed.
Apply confirm-before-replace rules. For common off-road failure modes, verify before replacement: charging faults require under-load voltage/ground confirmation; misfire symptoms after mud/water exposure need connector inspection and ignition/fuel-air checks; driveline imbalance complaints should include alignment and rotation checks rather than assuming “a bad mount.” For vacuum/boost leak suspects, confirm with pressure testing or smoke where safe and authorized.
Deeper than obvious: branching rules for modified vehicles. A lift and tire size change can affect speed sensor correlation and shift logic; ECU reflash may alter fault thresholds and trigger codes that don’t match stock diagnostic assumptions. In these cases, mechanical validation becomes even more important—validate physical constraints first (air leaks, sensor wiring integrity, driveline angles), then interpret codes with the modification context in mind.
If you’re building consistency across your shop, it helps to align diagnostic workflow with your service positioning and customer communication. You can also reinforce service quality by referencing content like Choose the right mechanic when training staff on what “good diagnosis” looks like from the customer’s perspective.
Parts, Fluids, and Compatibility Checks for Faster Job Turnaround
Parts and fluid compatibility checks prevent delays that appear as “mystery time,” like wrong seal kits, mismatched bearings, or incorrect fluid specifications. A commercial Off-Road Vehicle Repair workflow should treat compatibility verification as part of diagnosis—not paperwork afterward.
Start with a pre-order compatibility checklist. Confirm OEM vs aftermarket fitment, correct torque specs, and thread standards; verify bearing numbers, seal dimensions, and gasket material requirements. Off-road vehicles often use swapped wheels, hubs, or bearings that differ from stock components, and a single part mismatch can create days of rework or require rebooking the job queue.
Verify serviceable fluids using the correct specs and grades. Oil viscosity and coolant type matter for off-road duty because extended idling, higher load, and frequent temperature cycling can expose marginal lubrication or wrong coolant chemistry. Brake fluid grade and ABS compatibility also matter—some aftermarket systems or brake mods respond poorly to incorrect fluid types. Differentials and transfer cases may require specific additives or service intervals; confirm what the manufacturer (or authoritative service literature) specifies for that application.
Map inspections to parts requirements early. When you confirm a likely component category—like seals, gaskets, harness repairs, or bearing replacements—estimate quantities based on what you will likely disturb. For example, opening a drivetrain case typically requires new sealing surfaces, correct fasteners, and alignment hardware considerations. This reduces “stop-and-wait” cycles where you finish labor only to discover you’re missing one critical fastener, O-ring, or vent routing component.
To reduce downtime, prioritize same-day compatible items and define acceptable substitutions with documented rationale. Commercial discipline means you decide in advance what can be substituted (for instance, certain fasteners or seal brands with equivalent specs) and what cannot (OEM-calibrated sensors, alignment-critical hardware, and specific ECU-integrated components). When substitutions are necessary due to lead times, document why and how compatibility was verified.
Deeper than obvious: account for off-road-specific compatibility traps. Sealed vs open bearings can drastically change performance in wet conditions; vent routing for mud ingestion can affect pressure buildup and seal life; and mismatched tire/gear ratios can cause symptom changes that look like “a drivetrain fault,” when the underlying mismatch is driving abnormal shift logic or vibration patterns. This is why compatibility checks should include the vehicle’s modification profile, not only the part number.
For teams that need official spec baselines, use authoritative manufacturer documentation as your source of truth. For example, general diagnostic discipline aligns with guidance from NHTSA on vehicle safety and inspection expectations, while scan tool and electrical testing practices often align with manufacturer service documentation and training materials. When you’re building your internal checklist, base the fluid and procedure rules on manufacturer manuals rather than generic advice.
Repair Execution Checklist: Step-by-Step Quality Controls During the Job
A repair execution checklist prevents the most common causes of comebacks: incorrect torque, missed steps, and poor reassembly practices. Speed comes from disciplined workmanship controls so you do not have to reopen the job later.
Use a critical path repair checklist grouped by systems: engine/mechanical, electrical/charging/ECU, drivetrain, and brakes/suspension/steering. The critical path concept means you focus first on steps that can invalidate later stages—like verifying mating surfaces for seals, correcting harness damage, and ensuring driveline alignment procedures are followed. When you track work in this order, you reduce time lost to “re-check later,” especially on stacked symptoms common to off-road vehicles.
Track torque, alignment, and procedure adherence. Mark fasteners where appropriate, replace one-time-use hardware (cotter pins, certain stretch bolts, and seal-specific components), and follow factory torque sequences. Off-road shocks and skid plate components often invite incorrect assumptions like “it’ll be fine—tighten by feel.” It rarely is. Instead, log torque settings and document alignment targets if the job affects toe/camber/caster or driveline angles.
Prevent cross-contamination and warranty issues. Cleanliness matters for seals and gaskets: protect bearing surfaces, keep dirt out of oil passages, and ensure gasket mating surfaces are clean and undamaged. Protect connectors and harness routing with correct shielding, loom, and clips—off-road vibration and abrasion from skid plates or moving suspension parts can degrade wires long after the repair is completed.
Add mid-job QA checkpoints. Before closing panels, do leak checks, confirm electrical continuity where relevant, and run pre-reassembly checks like spin tests for driveline components. Then after reassembly, do functional checks in the correct sequence—starting with static verification, then controlled operational cycles. This staged QC reduces “unknowns” at the end of the day when scheduling pressure is highest.
Deeper than obvious: off-road reassembly pitfalls often involve breathers, vents, and routing. A mud/water vehicle may have modified breathers that require careful routing to avoid direct exposure; a harness may need protection from contact with skid plate edges or tire spray paths. If your checklist includes these details, you prevent failures that appear as “it worked in the bay but not after one ride.”
When you want standardized team behaviors, use targeted resources that reinforce system categories. For example, you can build from an ATV Repair Checklist style workflow using ATV Repair Checklist and then adapt it for UTVs, dirt bikes, or modified trucks/small SUVs in your inventory.
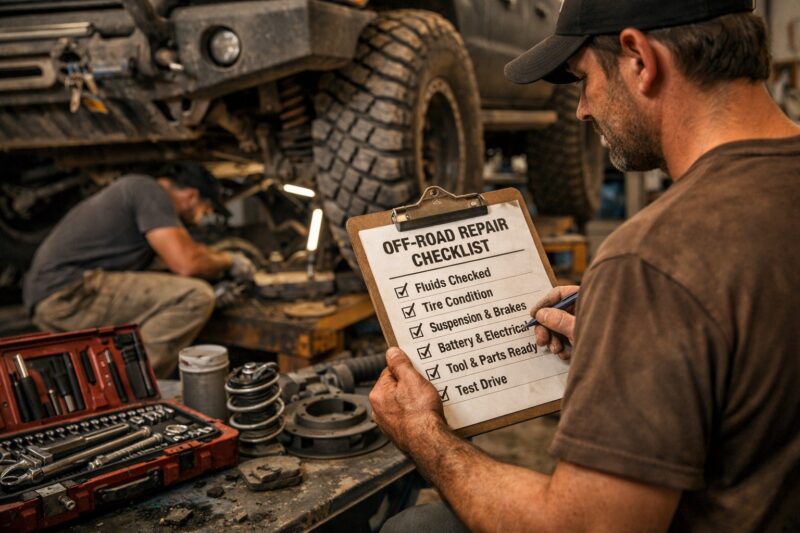
Test, QA, and Verification: Proving the Repair Works Off-Road
Verification is what turns a repair into a commercial win—because it proves the fix works under the conditions that caused the failure. Use staged testing (static → controlled functional → load/realistic cycles) to catch issues before handoff.
Define verification stages up front. Static tests confirm the system responds correctly without load (idle quality, signal stability, basic fluid leak absence). Controlled functional tests validate operation under safe, repeatable conditions—like short drive cycles on similar surface, engagement checks for 4WD/locking modes, and brake feel checks. Load tests confirm that symptoms don’t return when the system is stressed, such as charging output under RPM/load, cooling performance under sustained throttle, and driveline smoothness at speed.
Only when safe and authorized, consider environment simulation tied to off-road realities. Mud and water exposure can be a key differentiator for certain faults, but you must treat it as a controlled verification step, not an uncontrolled “trail test.” If authorization is limited, document what you used as the safest proxy (for example, connector inspection after controlled splashing, or breather flow verification). This protects both safety and the validity of your findings.
Include measurable verification for common off-road concerns. For brakes: check pedal feel consistency and pressure stability, and watch for fluid seep around fittings. For charging: verify output under higher RPM and observe voltage stability under accessory load. For shifting/driveline smoothness: record what “good” feels like and how it differs from the complaint—shudder reduction, elimination of gear-specific vibration, and smooth engagement/torque transfer.
Use leak verification logic and consistent observation windows. Seep vs drip can matter; configure observation time based on seal type and expected leak behavior. For intermittent faults, create a re-test plan: repeat diagnostics after heat-soak, mimic the vibration or throttle pattern that triggered the fault, and rerun targeted checks with documented results.
Deeper than obvious: detect symptom mismatch. Sometimes the original fault disappears but a new failure mode appears—like a new noise after alignment, or stable idle but returning misfire under load. Your QA process should explicitly check for these “secondary signals” because they often indicate the real root cause wasn’t fully corrected or another system was impacted during reassembly.
To support commercial workflow transparency, keep the QA log organized so a service manager can schedule subsequent work confidently. When you’re comparing verification expectations across vehicle types, consider building out a Dirt Bike Repair checklist approach using Dirt Bike Repair checklist, then scale for your broader UTV/ATV/truck platforms.
Common Mistakes & Misconceptions That Cause Comebacks in Off-Road Vehicle Repair
Most comebacks happen when repairs follow the wrong mental model—like “codes or symptoms automatically mean the replaced part is correct.” To prevent repeat failures, your checklist must force confirm-before-replace thinking and account for modified-vehicle behavior and off-road contamination.
A common mistake is the replace-without-confirm pattern: swapping components based on codes alone while ignoring mechanical constraints and fluid condition. For example, an off-road vehicle that idles poorly after water exposure may show misfire codes, but the true root cause could be connector corrosion, ignition coil insulation breakdown, or air leaks in modified intake plumbing. If you replace only what the code “suggests,” you risk rework and uncertain diagnosis cycles.
Another frequent issue is skipping modified-vehicle assumptions. Lifts, larger tires, ECU tunes, and altered driveline geometry can change sensor behavior, triggering faults that don’t map neatly to stock diagnosis flow charts. Without re-baselining what “normal” means for that specific configuration, you can chase the wrong direction and miss the mechanical driver like misalignment drift after an impact.
Water and mud effects are underestimated. Even if the engine starts, intermittent electrical faults may recur after vibration and moisture cycles. Grounds and connector housings can corrode internally, breathers can clog or route wrong, and sealing surfaces can hold contamination that breaks down later. Your checklist must include documentation and inspection steps before disconnection, because once you wipe evidence, intermittent patterns become difficult to prove.
Intermittent vs root-cause confusion also causes comebacks. A symptom like hard start may be “easy to reproduce” but not the underlying cause—fuel delivery pressure, air leaks, and charging instability can produce similar start symptoms. Your decision path should explicitly require confirmatory checks before replacement.
Deeper than obvious: re-learning misconceptions after repair. Some ECUs require manufacturer procedure for adaptation or readiness, and some repairs trigger new learning behaviors that temporarily change drivability. If you skip manufacturer steps, the vehicle may appear “fixed” initially but drift back into a complaint pattern after a heat cycle or after specific drive conditions.
To reinforce discipline, train your team to write down what changed and why each test supports the next action. This is the same mindset that helps shops deliver faster, clearer client updates when you explain your reasoning without overpromising.
Service Options & Comparisons: What to Offer Clients for Off-Road Jobs (and When)
The fastest commercial outcome comes from choosing the right service model for the job’s risk and tooling needs. Compare in-shop, mobile, hybrid diagnose-then-bring-in, and teardown-in-batches so you can optimize turnaround without gambling on diagnosis.
Start by comparing realistic approaches. In-shop diagnosis/repair optimizes tool access (benches, scan tools with capabilities, alignment tools, and parts inventory). Mobile service optimizes customer convenience but can be limited by shop-grade test equipment and safe load testing options. A hybrid approach—remote diagnose then bring in for parts replacement—can be ideal for vehicles with clear high-level clues but requiring bench verification or specialized calibration.
Teardown-in-batches scheduling can reduce calendar fragmentation. For shops handling seasonal spikes, you may bundle similar fault categories so you can share bench time and keep parts handling efficient. The tradeoff is risk: batching only works if your intake and decision path are strong enough to avoid tearing into the wrong category.
Choose based on complexity and risk. Safety-critical systems (brakes, steering control, major driveline failures) should prioritize shop verification and correct test procedures. Specialty calibration or ECU-related work might require in-shop procedures, documentation control, and controlled verification steps. For parts availability constraints, estimate lead times early and apply compatibility checks to avoid ordering the wrong kit.
Estimation criteria matter commercially. Decide what information you require before giving a firm turnaround versus a range. For example, you may offer a tighter estimate when the intake documents include mod profile, baseline photos, and symptom reproduction in a consistent condition. You may require a teardown or at least deeper inspection before firming labor when hidden damage confounders are possible.
Deeper than obvious: off-road “verification expectations” must match authorization. A controlled test route can be far more reliable than attempting “trail verification” when the shop lacks safe access or customer approval. Your checklist should explicitly ask: what measurable outcome validates the repair, and where can you validate it safely?
When communicating options, keep the tone practical and measurable. If you want to position your shop’s diagnostic approach, content frameworks like Choose the right mechanic can help customers understand why the process reduces comebacks.
Advanced Considerations & Edge Cases: Handling the Hard Off-Road Failures
Hard Off-Road Vehicle Repair cases need escalation rules and documentation discipline, not just a longer checklist. When multiple systems interact or the vehicle’s modifications break stock diagnostic assumptions, you must branch into specialist-level verification paths.
Complex root causes include drivetrain harmonics, alignment drift after impacts, intermittent electrical under load, and heat-related faults. For drivetrain harmonics, vibration patterns may change with RPM bands or throttle transitions; for alignment drift, “vibration” may be a byproduct of bent geometry or tire wear rather than a single component. Heat-related faults require staged testing after heat-soak, not just immediate bay checks.

Multiple-fault interactions are common on off-road vehicles. Cooling issues can contribute to ignition instability; charging weakness can cause sensor dropouts; and mud-induced contamination can lead to both misfire behavior and fuel system anomalies. Your diagnostic workflow should explicitly consider these interactions by confirming shared root causes: stable voltage supply first, then signal integrity, then mechanical constraints like air leaks and alignment geometry.
Escalation rules should be part of your checklist. When basic tests are inconclusive, request OEM diagnostics/support or shift to waveform testing for ignition and sensor patterns where appropriate. If transmission/ECU systems are involved, involve specialists or acquire manufacturer-level tooling procedures. Commercially, escalation protects customers from repeated “half-correct” repairs and protects shop time by preventing endless teardown loops.
Documentation protects turnaround and quality. For edge cases, keep photos of findings, record test logs (inputs, outputs, and thresholds), and document all parts used with compatibility notes. Capture customer sign-off when you change scope due to newly discovered damage, especially after impacts, water ingestion, or salvage components. This is critical for off-road rigs where service history may be incomplete or wiring harness modifications are non-standard.
Deeper than obvious: edge cases like salvage/modded rigs and non-standard wiring harnesses. Custom wiring can create ground offsets, sensor bypass loops, or connector issues that look like component failure. Missing service history increases the need to verify baseline wear (cables, seals, mounts, and fluid condition). Your checklist should stay consistent—while the branching logic changes based on what you find.
To keep the process consistent across vehicle categories, reference targeted workflow templates and adapt the branching rules accordingly. The same discipline behind an ATV Repair Checklist style flow can be applied to these edge cases, but the diagnostic gates and verification stages must reflect the failure category you’re handling.
Local/Regional Anchoring for Off-Road Repair Workflow (U.S. Industry Reality)
In the U.S., off-road repair turnaround is heavily shaped by seasonal demand, weather exposure, and regional usage patterns. Anchor your Off-Road Vehicle Repair workflow to those realities so scheduling stays accurate and your checklist prioritizes the failures you’ll see most.
Consider seasonal demand waves that affect shops and mobile techs: spring and summer trail-season surges, autumn maintenance rushes, and winter freeze-related failures like brittle hoses and cold-start fuel issues. Weather-driven mud and water influx increases contamination-related failures—especially charging, grounds, connectors, and breathers. This means your intake and pre-inspection documentation should explicitly ask about recent water crossings, and your diagnostic gating should include electrical inspection early when wet conditions are involved.
Regional usage patterns also change what breaks first. Desert heat environments stress cooling systems and expand thermal-related behavior; wet forests increase water ingestion and connector contamination; and winter freeze increases corrosion and brittleness. Your checklist can stay universal in structure, but the emphasis in “what to test first” should shift based on regional patterns you’ve observed—without inventing guarantees or timelines you cannot meet.
Inventory and scheduling strategies should reflect predictable downtime patterns. For example, you may pre-position common seals, gaskets, and fasteners for popular local platforms and keep an emergency substitution policy ready with documented compatibility checks. Build estimate buffers for parts lead times and shipping variability, and communicate these buffers explicitly when you expect order items. Commercially, clarity beats optimism because it protects your reputation and reduces customer frustration when trails are open but logistics are not.
Deeper than obvious: promise setting should include authorization realities for verification. In some regions, safe test routes may be limited during certain weather, or customers may not authorize off-trail verification due to legal or risk concerns. Your checklist should provide alternative verification methods (bench simulation, controlled surface testing, measurable static checks) so you can still confirm repairs without relying on trail access.
Finally, ground your internal planning with documentation habits that make repairs scalable across technicians. The checklist becomes more valuable as your team grows, because it creates consistent decision-path diagnosis rather than relying on individual memory.
Frequently Asked Questions About Off-Road Vehicle Repair Checklist for Faster Job Success
What is an off-road vehicle repair checklist used for in a shop?
An off-road vehicle repair checklist structures intake, diagnosis, repair execution, QA verification, and handoff into a repeatable workflow. It’s used to speed turnaround by forcing confirm-before-replace testing and documenting evidence before teardown. In commercial environments, that structure also reduces comebacks because the repair is verified with measurable criteria, not only symptom disappearance.
How do you speed up diagnosis without skipping critical tests?
You speed diagnosis by using a decision path with diagnostic gating: test the highest-yield items first (battery/grounds, connectors, fuses, fluid condition, and obvious air/vacuum routing) before expensive teardown. Then apply pass/fail thresholds so team members don’t “interpret” results differently. Finally, use confirm-before-replace rules so parts are installed only after confirmatory measurements match the expected range.
Which off-road issues should be verified before returning a vehicle to a customer?
Verify the systems that are most likely to fail under off-road conditions: charging output under RPM/load, leak integrity before closing panels, driveline smoothness during engagement and at defined speeds, and brake feel/pressure stability. Also verify intermittent behavior with heat-soak or repeat cycles when the original fault was temperature- or vibration-dependent. If the symptom changed form (symptom mismatch), re-check the related system even if the original code or complaint seems gone.
How often should fluids be inspected in off-road vehicle repair?
Inspect fluids at intake as baseline condition, and again whenever you open a system or confirm a likely failure category. In off-road usage, watch for contamination signals like discoloration, burnt odor, metal debris, or incorrect viscosity. If the diagnostic gating depends on fluid correctness (oil level, coolant type, brake fluid grade), verify it before proceeding to component-level replacement.
What should be included in an estimate for off-road vehicle repair?
An estimate should include the known scope based on confirmed diagnostics, plus allowances for variability driven by modifications and possible hidden damage. It should state whether parts compatibility verification is required, what fluid/spec checks will occur, and what QA verification steps will be performed before handoff. If turnaround depends on tool access or authorized test conditions, mention those constraints so the estimate stays realistic.
Can codes be misleading for Off-Road Vehicle Repair on modified vehicles?
Yes. ECU tuning, lift/speed sensor changes, and tire/gear ratio differences can alter fault logic and trigger codes that don’t precisely map to stock service procedures. Even when codes are present, you still need mechanical checks—like confirming air leaks, connector integrity, and alignment/driveline constraints—before replacing parts.
How do you handle intermittent faults during off-road vehicle repair jobs?
Handle intermittent faults by planning repeat verification runs that mimic the conditions that trigger the failure, such as heat-soak cycles, vibration mimic patterns, or load-based tests. Record each run’s results with the same thresholds so you can compare outcomes rather than guessing. If the failure doesn’t reproduce, document what was tested and what conditions were controlled to prevent future “it was fine before” disputes.
What’s the best workflow for electrics and charging problems?
Use a systematic electrical workflow: inspect connectors and grounds first, then test battery condition, then verify voltage drop and charging output under load and at higher RPM. Because mud/water exposure is common, prioritize connector and ground integrity before component replacement. Under-load verification is critical—charging that looks good at idle may fail when accessories or drivetrain loads increase.
How do you prevent comebacks after suspension or driveline repairs?
Prevent comebacks by following torque and alignment procedures exactly, verifying driveline angles where applicable, and protecting harness and vent routing from abrasion during reassembly. Use mid-job and post-reassembly QA checkpoints like leak checks, electrical continuity checks, and controlled functional tests that match the complaint conditions. If a new noise appears after alignment, treat it as symptom mismatch and re-check the related system immediately.
Do you need a test ride to validate off-road vehicle repair?
Often, yes, but it depends on authorization and the fault type. A test ride helps validate brakes feel, driveline smoothness, shifting behavior, and charging stability under load. If a safe test route isn’t authorized, you can still validate with static checks and controlled functional cycles, but document the limitations and the measurable outcomes you achieved.
How do you document findings to protect turnaround time and quality?
Document findings with a structured log: intake photos, pre-inspection evidence, test measurements with thresholds, parts used and compatibility notes, and QA verification results. Add customer sign-off when scope changes due to hidden damage discovered during repair. This documentation reduces back-and-forth, speeds approvals, and makes future diagnostics faster if an edge-case issue appears later.
Conclusion
To win commercial Off-Road Vehicle Repair jobs faster, run a checklist that is structured, compatibility-driven, and verification-heavy. The three themes to take from this guide are: (1) structured intake and decision-path diagnosis, (2) compatibility checks plus workmanship controls during repair execution, and (3) staged verification that reflects real off-road conditions.
When you standardize these steps, you reduce comebacks, improve parts accuracy, and produce clearer estimates that support smoother scheduling. Customers experience faster handoffs because the shop is not repeatedly reopening cases to chase preventable root causes like connector contamination, incorrect specs, missed torque/alignment steps, or breather/vent routing errors.
Adopt this checklist as a repeatable template and tailor it to your highest-volume off-road categories and your tool reality (in-shop vs mobile). Your next step should be to convert the process into a shop-ready version with checkboxes, test thresholds, and a parts-compatibility quick reference so every technician follows the same critical path—every time.
Updated May 2026