
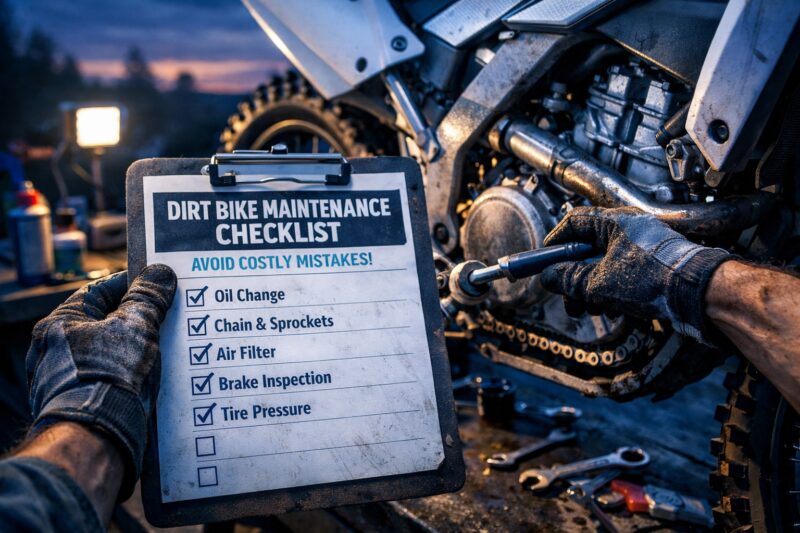
Dirt Bike Maintenance is the difference between enjoying every ride and getting stranded by avoidable failures—this checklist helps you catch the common problems early and decide when to stop riding and service. If you follow a clear cadence (before, during, after rides), you’ll prevent the “small” issues—like air leaks, chain stretch, brake fade, and oil/coolant problems—from compounding into expensive repairs.
Dirt bikes are high-wear machines because they combine heat, vibration, dust, and water in ways street bikes rarely see. An air filter that isn’t seated correctly can quickly turn into a low-power or hard-start issue. A chain that’s slightly too loose can wear sprockets and swingarm components faster than you’d expect. Brake fade can start as minor lever feel changes long before you realize the pads are glazing or the rotor is warping.
This guide gives you a practical Dirt Bike Maintenance checklist you can use on any bike: a cadence you can stick to, inspection points for each system, “what good looks like,” and decision rules for when to stop riding. It also includes caveats based on your conditions (humidity, dust, mud, salt air), and on your bike type (2-stroke vs 4-stroke, carb vs EFI, motocross vs enduro/dual-sport), because those details change what wear patterns look like and how fast problems appear.
How do you build a Dirt Bike Maintenance schedule that matches how you ride?
A Dirt Bike Maintenance schedule works best when it’s driven by how your bike is used (hours ridden and conditions), not just the calendar. Use a simple decision path to set base intervals, then tighten them when dust, mud, or short-ride “condensation cycles” increase wear.
Time-based schedules alone often fail because wear is not linear. Two riders can ride the same number of hours and get completely different results: one rides in smooth dirt with gentle throttle modulation; the other does repeated hard accelerations, rock strikes, and prolonged braking. Chain and sprocket wear is especially throttle- and traction-dependent—aggressive starts increase load cycles, and muddy grit accelerates abrasive wear even if “the ride felt short.”
To build your schedule, start with your “default interval” based on ride hours (or engine hours if you track them). Then apply condition multipliers: heavy dust (high particulate exposure), wet/muddy terrain (increased corrosion and filter loading), and cold starts (fuel dilution on some setups, plus condensation). Finally, align the checklist with your routine: a rider who practices motocross-style laps needs different clutch and drivetrain attention than an enduro rider who spends hours managing traction.
Practical application: create three tiers so you’re not overwhelmed. A “minimum viable maintenance” pass happens every ride: pre-ride safety checks, chain slack/lube check, brake feel check, and a quick filter/airbox visual. A “full checklist” happens weekly or every 2–4 rides: deeper drivetrain inspection, rotor/pad measurements, air intake seal checks, oil level inspection (and oil service decisions), and fastener checks by feel and torque where recommended. A “seasonal” tier after wet seasons, storage, or long downtime should add corrosion prevention steps, thorough inspection of bearings, and verifying that cooling and fuel systems are functioning correctly.
Tradeoffs: if you only do minimum checks, you may miss the early warning signs of component mismatch—like a stretched chain with sprocket hooking or a brake system that’s starting to pull due to caliper slider drag. If you only do full checklists every time, you may lose consistency. The most reliable approach is to follow the cadence rules and add service “stop points” when symptoms show up. For a related practical workflow, consider building your plan around your own “Pre-ride repair checklist” habits and using “Quick dirt bike repair fixes” for rapid triage.
Real-world scenario: suppose you ride twice on Saturday. Ride A is 40 minutes of slow trail cruising in dry conditions; Ride B is four 10-minute sessions of repeated starts, heavy braking, and dusty berms. Chain wear, brake heat cycling, and filter loading differ dramatically—so your maintenance decisions should be based on conditions and workload, not time alone. Choosing the right service window is also a reliability strategy; it reduces the probability that you pay for the same failure twice due to missed root causes, which is exactly the kind of outcome you want to avoid when you’re planning “Choosing reliable dirt bike service” for any repairs you don’t do yourself.
How often should you inspect and service your dirt bike before, during, and after rides?
Inspect before every ride, add during-ride quick checks if you notice changing behavior, and complete an after-ride inspection that focuses on cleaning, lubrication, and fluid cues. Use ride conditions to adjust frequency: dust and mud tighten intervals; short rides may increase oil-related attention.
A strong inspection cadence acts like a safety net. Before-ride inspection prevents the most common “I made it 5 miles and failed” situations: tire damage, major chain slack issues, a throttle that doesn’t return smoothly, a brake lever with abnormal travel, and an air intake seal that let dust into the engine. During-ride checks matter because symptoms can appear mid-session—like brake fade that improves with cooldown but returns as heat builds, or a chain that starts to sound different as it warms.
After-ride inspection is where you catch what you couldn’t see while moving. Look for oil/coolant residue at hose connections, inspect chain condition after grit exposure (instead of guessing later), and verify that the filter is not visibly packed with dust or distorted. Then clean and lubricate using controlled methods so you remove abrasive grit without forcing water into bearings or damaging air-filter media.
How it works in practice: you’ll make most decisions using “signs of change.” If lever feel changes, pedal travel increases, or braking starts to pull, that’s not a “ride it a bit longer” signal—it’s a service trigger. If chain noise grows quickly over a ride day or you see sprocket teeth looking hooked, the issue is often misalignment or insufficient lubrication cadence, which can cascade into more expensive drivetrain wear. This is also why your schedule should include decision rules: when a symptom indicates “ride not advised,” you stop and repair rather than doing partial fixes.
To tailor frequency, follow a decision path. If you ride mostly dry and smooth trails, a weekly full checklist and after-ride minimum checks can work for many riders. If you ride muddy/silty environments, increase after-ride cleaning attention and inspect brake hardware more often because mud holds moisture near calipers and rotors. If you ride short sessions repeatedly, pay attention to oil condition because condensation and fuel blow-by can accumulate differently than in longer rides.

Edge case: motocross practice sessions often involve repeated peak-load acceleration and braking. That increases heat cycling and can accelerate brake fluid aging, chain stretch, and clutch wear patterns. Enduro/dual-sport riding may emphasize steadier throttle and traction management, so you may notice clutch engagement changes and chain wear with fewer extreme peaks but longer run times under dust exposure.
When you need help deciding service intervals or you’re troubleshooting symptoms, you can use “Fast repairs dirt bike mechanic” as a framework for choosing a shop that aligns with your checklists rather than replacing parts blindly. The key is to ensure your inspection results are consistent and documented so the shop can confirm root cause.
What should you check in a pre-ride Dirt Bike Maintenance inspection to avoid breakdowns?
Your pre-ride Dirt Bike Maintenance inspection should focus on the high-impact basics that strand riders: tires, brakes, drivetrain condition, throttle return, chain slack, and air intake integrity. If any safety system doesn’t feel right, stop riding and service before you go further.
Pre-ride checks matter because many expensive failures start as subtle deviations you can see early. A chain that is too tight heats faster, wears sprockets, and increases the risk of premature bearing or alignment stress. A brake system that has slight pull or abnormal lever travel can indicate contamination, warped rotors, slider drag, or fluid issues. Air intake problems—like a poorly seated air filter or loose clamps—can lead to poor performance and rapid internal wear from dust ingestion.
Start with tires and wheel condition. For tubed tires, inspect for punctures, valve stem integrity, and proper bead seating. For tubeless setups, check sealing behavior and look for slow leaks or damaged tire sidewalls. Verify spokes and rim condition visually and by running your eyes over the wheel for obvious dents or wobble; if you feel vibration before you inspect, don’t ignore wheel trueness.
Next inspect drivetrain and controls. Check chain slack within the manual’s range, confirm smooth chain movement without binding, and verify you can see enough lubrication on the rollers (not just a shiny surface). Test throttle return: twist and release, then verify it snaps back crisply without hanging. Inspect clutch lever feel and engagement consistency—if lever movement feels notchy or engagement changes suddenly, that can point to cable/hydraulic issues or early clutch problems.
Brakes need more than “it stops.” Check pad thickness and condition, inspect for uneven wear, and ensure rotor surfaces aren’t deeply grooved or excessively blued. Look for rotor rub and abnormal lever travel. Inspect caliper and hose areas for leaks, and verify the lever feels consistent under light compression—sponginess or sudden travel increases are service indicators.
Then check air intake and crankcase breathing components. Inspect air filter condition and seating, airbox seals, and intake tract clamps. For many bikes, the crankcase breather hose or vent routing can accumulate oil residue; confirm it’s properly routed and not blocked. A filter that looks “mostly fine” can still be compromised if it was oiled incorrectly or wasn’t dried after cleaning.
Safety-to-service rule: if you observe brake pull, sudden throttle sticking, coolant loss, or abnormal noises that correlate with load, ride not advised. Abnormal noises might be drivetrain wear, bearing issues, or internal mechanical problems. Cooling loss can lead to immediate damage on liquid-cooled bikes, so treat it as a stop condition rather than a “monitor it later” situation.
Tailoring by setup: motocross gearing and riding style can create different chain and bearing load patterns because motocross often uses higher sustained RPM and repeated starts. Enduro/dual-sport riding may stress the clutch differently due to slower traction management and longer engine braking events. If you’re running different sprocket sizes, chain slack and wear rates shift—so align your inspection priorities to your gear ratio and ride workload.
For riders who want a structured approach that matches shop expectations, use “Pre-ride repair checklist” as your organizing anchor: record what you see, not just what you felt, and keep the results consistent across rides so you can spot trends early.
How do you clean and lubricate after a ride without causing premature wear?
Clean grit carefully, then lubricate only what needs it—chain and key moving points—using the smallest effective amount. The goal of post-ride Dirt Bike Maintenance is to remove abrasive contaminants while avoiding water intrusion into bearings, seals, and air intake systems.
Cleaning matters because dirt and sand act like grinding paste when mixed with oil residue. However, over-aggressive cleaning can create the very failures you’re trying to prevent: high-pressure water can drive into wheel bearings, swingarm pivots, and fork seals. It can also dislodge air-filter sealing surfaces or contaminate braking surfaces if you rinse aggressively around calipers and rotors.
Evidence-based cleaning approach: start dry. If possible, use low-effort methods like brushing off loose dust before introducing water or cleaner. Focus on the chain area, swingarm, footpegs, and linkage points where grit accumulates. When you do use water, keep pressure gentle and avoid directing spray into seals and bearings. Wipe and rinse only the areas that need it, then dry fully.
Lubrication targets should be precise. Clean and lube the chain at a cadence that matches your conditions; dusty rides need more frequent attention because abrasive particles cling to oil film. Pivot points and the throttle cable/bendix-style parts may need periodic lubrication depending on your setup, but don’t assume “more is better.” A light film on moving interfaces is enough—excess lube becomes fling and collects dust.
Practical application: after cleaning, dry bearings and rotor areas. Then re-lubricate and allow lubrication to set for a few minutes before you ride again. This reduces the chance of immediately throwing off excess lube onto the rear tire, swingarm, or chain guide surfaces. After mud rides, inspect for moisture trapped under boots or around fasteners, because corrosion can begin quickly at exposed metal surfaces.
What not to lubricate and what not to rinse: avoid lubricating brake rotors, pads, or caliper hardware surfaces where friction is required. Don’t rinse air filters with harsh solvents that attack media or oils. Also avoid soaking plastic airbox components or O-rings with aggressive chemicals; compatibility matters.
Deeper insight on chemical compatibility: certain degreasers can damage plastics, weaken certain rubber compounds, and strip air-filter oils designed to improve capture of dust. O-rings and seals can swell or degrade when exposed to incompatible solvents. Use cleaners specifically intended for bike components, and follow product instructions for contact time and dilution. If you’re unsure, test on a small area or choose a safer, bike-rated cleaner.
Real-world scenario: you pressure-wash after a wet ride. The bike starts fine, brakes feel okay at first, then you notice fading or pulsing later in the day. That pattern can occur when water has entered rotor or caliper areas and not dried properly, or when contaminants alter friction surfaces. This is why your cleaning sequence should be: remove grit, clean selectively, avoid high pressure at bearings, then thoroughly dry and only then lubricate.
If cleaning and lubrication is becoming inconsistent or you’re trying to fix a persistent symptom, a hybrid approach can help: do your own pre/post routines while using “Quick dirt bike repair fixes” for targeted troubleshooting and part replacement rather than guessing.
How do oil, air filter, and fuel systems reduce reliability problems in Dirt Bike Maintenance?
Oil, the air filter, and the fuel system are the reliability backbone of Dirt Bike Maintenance because they protect internal components from heat, dust ingestion, and fuel starvation or contamination. Follow the manual’s procedures for oil level and service, maintain filter seating and oiling, and check for fuel flow and leaks before long rides.
Why it matters: engines can fail quickly when dust enters through an improperly serviced air filter or intake leak. Oil issues can cause accelerated wear of cam journals, bearings, and pistons, while incorrect or contaminated fuel can lead to hard starting, misfires, or lean conditions. These systems are linked: a dusty air filter increases engine load and heat; poor fueling can cause extra combustion stress; overheating can damage seals and crank components.
How oil service works: you’re not just replacing oil on a schedule—you’re ensuring correct viscosity and contamination control. Check oil level using the manual’s method (upright vs bike-on-stand, warm vs cold, engine off vs running). Many riders underfill or overfill due to incorrect level procedure, both of which can cause poor lubrication behavior. Signs you need earlier service include dark oil with gritty residue, abnormal smell, visible metal particles, or frequent short rides that increase condensation and fuel dilution.
Air filter maintenance mechanics: inspect filter for tears, deformation, and clogged pores. Clean according to the filter type and media instructions; then dry completely. If your filter requires re-oiling, apply the correct air-filter oil in the correct manner—typically evenly distributed and not dripping—then verify the filter seals properly to the airbox. A filter that looks clean but isn’t seated or has compromised sealing surfaces can still allow dust ingestion.
Fuel system checks relevant to costly failures include fuel quality and tank venting behavior. Watch for overflow behavior, vent blockages, and fuel line kinks. For carbureted bikes, check for clogged jets symptoms like hard starting after sitting or persistent richness/lean misbehavior. For EFI bikes, basic leak checks and ensuring proper sensor/airbox seal integrity are often more important than guesswork.
Cooling and lubrication considerations for liquid-cooled bikes include coolant level and condition, plus radiator cap and hose integrity. A failing radiator cap can cause boil-over or inconsistent coolant behavior. Air pockets after service can create localized overheating. If you notice repeated temperature issues or coolant loss without obvious leaks, escalate to inspection rather than continuing to ride.
Deeper insight: maintenance myths. Extending oil intervals without considering dust load and ride type can lead to sludge buildup and bearing wear. Short rides can increase condensation and fuel dilution, especially if the engine never reaches full operating temperature. Dusty conditions may also require more frequent air filter cleaning even if the calendar hasn’t reached the usual interval.
Real-world scenario: after a dusty weekend, a rider cleans the filter quickly but doesn’t fully dry it and reseats it without checking the seals. The next ride shows poor throttle response and increased engine noise or overheating. Meanwhile, the “oil change every season” plan missed the reality that dust exposure and short warm-up cycles increase contamination rate. This is where following a real ride-conditioned cadence beats generic time rules.

When you need support with oil/EFI/carb troubleshooting, selecting the right service matters. Look for “Choosing reliable dirt bike service” practices: documentation, symptom-based diagnostics, and alignment with your maintenance records.
What should you inspect in brakes, clutch, and drivetrain during Dirt Bike Maintenance?
Inspect brakes, clutch, and drivetrain by feel and measurement: pad thickness, rotor condition, lever travel, chain slack and alignment, and consistent engagement. Correct setup prevents the expensive chain-and-sprocket cascade and reduces brake fade risks off-road.
Why it matters: a dirt bike’s drivetrain and braking systems experience repeated shock loads. If brakes are slightly contaminated or misaligned, performance degrades rapidly in dusty or wet conditions. If the chain is too tight, worn, or misaligned, sprockets wear faster and the added stress can increase wear on swingarm components and bearings.
Brake setup checks beyond “it works.” Look at pad wear pattern: uneven wear can indicate caliper slider drag or rotor runout. Inspect rotor surfaces for warping signs (uneven thickness feel, excessive grooves, or visible distortion). Verify caliper slider freedom by checking for consistent lever pressure response and confirming there are no fluid leaks at the master cylinder and banjo fittings. Pay attention to brake lever travel: sudden changes can indicate air in the line or fluid contamination.
For clutch and drivetrain, check lever or hydraulic feel. Cable/hydraulic issues can present as inconsistent engagement, delayed bite, or slipping. Confirm free play and engagement consistency based on the manual. Chain alignment and sprocket wear are critical: inspect sprocket teeth for hooked or sharply worn patterns. Check the chain for stretch indicators; note that an adjustment that “fixes” slack can mask deeper stretch or worn links that will fail sooner.
Bearings and suspension-adjacent wear: wheel alignment and swingarm play can increase driveline stress. Verify axle nut tightness and check wheel movement by feel (without forcing components). If you feel grinding in wheel spin or see excessive play at pivots, escalate before the issue damages related parts.
Tradeoffs and limitations: a perfect “spec” adjustment can still fail if the chain is worn, sprockets are mismatched, or wheel alignment is off. That’s why the checklist must include both setup and condition. Riders often adjust chain slack repeatedly while ignoring uneven sprocket wear; that mistake increases cost because sprockets and potentially the chain guide or adjusters may be damaged during the “adjustment-only” phase.
Deeper insight on cost-saving logic: misalignment and poor chain condition accelerate sprocket replacement, and severe chain failure can damage cases, swingarms, or radiators depending on how components fail. Early detection is cheaper than emergency replacement. Use your inspection points to decide when you should stop riding and service.
Internal linking awareness: if you’re building a routine or deciding which shop to use for drivetrain diagnostics, referencing a structured approach like a “Pre-ride repair checklist” and matching it to shop work can reduce repeat labor. If you’re dealing with recurring brake feel problems or need targeted part replacement, “Fast repairs dirt bike mechanic” can be the right path—but only if you’ve clearly documented what you observed during Dirt Bike Maintenance.
What advanced Dirt Bike Maintenance topics prevent hidden failures most guides miss?
Advanced Dirt Bike Maintenance focuses on hidden failure causes: correct torque discipline, fastener habits, seal and bearing causes, and diagnostic logic for recurring symptoms. When you treat “good enough” maintenance as a system, you prevent failures that appear random but have consistent root causes.
Why it matters: many breakdowns don’t come from the obvious “wear item” alone—they come from how wear items are installed, aligned, and maintained. Under-torqued axles, inconsistent sprocket torque, or skipped re-torque after major rides can allow components to loosen gradually. Over-torquing can warp rotors or stress fasteners, leading to delayed failures that aren’t noticed until the next session.
Seal and bearing failure causes often include water ingress, contaminated lubrication, and incorrect cleaning methods. Bearings don’t fail instantly; they degrade as grit mixes with grease and water displaces lubricant. That degradation accelerates after pressure washing or after mud rides without thorough drying.
Torque spec discipline means using the owner’s manual and tightening sequence guidance. Many riders “feel” fasteners are tight enough, but dirt bikes vibrate. The correct approach is consistent torque for critical fasteners like axle nuts, caliper mounting bolts, and sprocket-related hardware. After repairs or major rides that involve heavy load and wash cycles, consider re-checking fasteners as recommended by your manual.
Electrical/charging diagnostics are another guide gap. Starting problems can be battery voltage, a weak stator/charging system, or a starter relay issue, not just “bad fuel.” If your bike has a repeat starting issue after storage, check battery health and charging output before assuming carb/EFI faults. This prevents the trap of chasing unrelated causes.
Wheel true checks also get missed. Vibration causes can originate from wheel imbalance, bent rotors, or tire damage. If you feel vibration, don’t only balance; inspect rotors, wheel condition, and bearings. The “what most guides get wrong” pattern is assuming vibration is always tire-related and skipping the rotor and axle checks.
Edge-case troubleshooting decision trees: if you have persistent hard starting and a rich smell, air leaks, clogged jets, or weak battery voltage can all contribute depending on bike type. For EFI bikes, a rich smell might still be fueling/airbox seal issues or a sensor fault; for carb bikes, it can be jet or float-related. Vibration that returns after chain adjustments could indicate chain alignment or sprocket wear rather than a single “loose bolt.” Repeat chain wear patterns often point to alignment issues, worn swingarm bushings, or improper chain cleaning/lube.
Seasonal transitions: focus on maintenance actions after wet seasons or prolonged storage. Dry components, protect against corrosion, verify coolant condition for liquid-cooled bikes, and confirm fuel freshness or proper storage procedures. Then complete a thorough inspection before the first long ride of the new season, because “first ride” failures often stem from stored grime, condensation, and neglected seals.
If you’re considering outside help, choose the approach thoughtfully. A shop that uses your inspection evidence and follows your maintenance logic can save money; otherwise you may get “part swapping.” That’s why “Choosing reliable dirt bike service” should be about process alignment, not just speed.
What common mistakes and misconceptions quietly ruin Dirt Bike Maintenance?
The most costly Dirt Bike Maintenance mistakes are skipping the air filter/cleaning basics, ignoring brake and drivetrain warning signs, and using the wrong products or torque habits. These errors often “look fine” at first, then fail once heat, dust loading, or water exposure reaches a threshold.
Costly pitfalls start with parts protection. Ignoring filter condition is one of the fastest routes to engine wear because dust bypasses protection immediately. Over-tightening axle or chain can create friction, heat, and accelerated bearing wear, while using incorrect grease or chain lube can either wash off too fast or attract grit permanently. Skipping torque specs is a major contributor to hidden looseness and uneven wear—especially after events with heavy vibration and wash cycles.
Cleaning mistakes are equally damaging. Pressure-washing bearings and seals can move water where it shouldn’t go. Using harsh solvents on plastics and O-rings can cause softening or cracking. Contaminating brake rotors or pads during cleaning can create squeal, reduced stopping power, and unsafe braking feel. Even “minor” contamination can matter because braking systems are friction-dependent.
Sign blindness is the biggest human failure mode. Riders may continue to ride with warped rotors, weak brake feel, or stretched chains because performance still “mostly works.” But those symptoms are indicators of deeper issues—rotor warping can progress, chain stretch can damage sprockets, and worn bearings can escalate into catastrophic failure. The safe rule is to treat changes in behavior as information, not background noise.
Why failures appear random: temperature swings, water ingress, and dust exposure can temporarily mask a problem. For example, a sticky caliper slider may work after the bike cools, then drag when hot. An air leak might only show itself under certain throttle transitions. Many riders misdiagnose these patterns because they don’t log what happened and when.
Mitigation strategies: keep a basic maintenance log with ride conditions and symptoms—dust level, wetness, ride duration, and what felt different. Establish minimum stop points: “stop riding” triggers for brake pull, coolant loss, sudden throttle sticking, and abnormal noises under load. Then use your checklist as a decision tool rather than a routine you complete even when symptoms point to escalation.
Tradeoffs: if you stop too early, you might do unnecessary repairs; if you ignore symptoms, you pay for downstream damage. The best mitigation is consistency: same inspection points every time and a clear escalation logic. This is also why hybrid DIY-and-shop plans work well—your records make shop diagnostics faster and reduce paying twice.
For additional process ideas and help aligning repairs with what you can do yourself, you can reference “Quick dirt bike repair fixes” when symptoms first appear instead of waiting for a full breakdown.
How do DIY checklist, shop service, and hybrid plans compare for Dirt Bike Maintenance?
DIY checklist maintenance is best for routine inspections and predictable wear items; shop service is best for diagnostics, specialized work, and repairs that require measurements. A hybrid plan—DIY inspections plus targeted shop work—often gives the best reliability-per-dollar when you track symptoms and results.
DIY is powerful when you can reliably follow the manual and you have the right tools. Chain setup, filter service, basic brake pad inspections, and fluid level checks are commonly DIY-friendly. The risk is skipping steps or using incorrect products—like the wrong oil, poor air-filter oiling practices, or incorrect cleaning methods—that can create hidden issues. If you can’t measure correctly (for example, pad thickness with appropriate tools or chain wear beyond slack adjustment), you may be “working around” a problem instead of fixing it.

Shop service is valuable because technicians often diagnose patterns across many bikes. But the tradeoff is cost and potential mismatch between the shop’s workflow and your maintenance goals. A shop might replace parts without verifying root cause if you only describe symptoms rather than providing a maintenance history. That’s why documentation matters: record what you checked, what you observed, and under what conditions the symptoms occur.
Hybrid plans combine the strengths. You handle pre-ride and after-ride checklists consistently, so you catch problems early. Then you use the shop for targeted repairs—like bleeding brakes, verifying cooling system integrity, diagnosing EFI or carb issues, or addressing bearing-related noise. This approach reduces labor duplication because the shop starts with your evidence instead of starting from scratch.
Tradeoffs and “what most guides get wrong”: many guides imply DIY is always cheaper and easier. In reality, speed depends on your tools, comfort level, and access to the manual. Also, step order matters: cleaning before inspecting can remove clues. For example, washing the bike thoroughly can hide oil leaks or make it hard to identify where coolant is escaping. A better approach is to inspect first, then clean selectively.
Practical decision criteria: if your budget is tight but you can invest time, DIY inspections plus buying consumables (pads, filters, chain lube) can be cost-effective. If you lack tools or you have an advanced symptom (persistent hard starting, charging issues, repeat chain wear), prioritize shop diagnostics. If you’re considering service planning, align it with “Choosing reliable dirt bike service” by asking for the specific checks you’ve already made and the additional tests they’ll perform.
Internal linking awareness: if you need a starting point for what a shop should handle, use a structured “Pre-ride repair checklist” workflow as the evidence you bring. For quick symptom triage before committing to a bigger job, “Fast repairs dirt bike mechanic” can reduce downtime—but only if the fix addresses the root cause rather than masking it.
How does Dirt Bike Maintenance change in real riding conditions like dust, mud, and cold weather?
Dirt Bike Maintenance changes in priority and cadence depending on conditions: dusty rides require more frequent air filter attention, muddy/wet rides require corrosion and drying focus, and cold weather increases starting and condensation considerations. Adjust your checklist based on what your environment accelerates.
Dry dusty rides: dust is abrasive and persistent. Your higher-priority checks are air intake integrity, air filter condition, and chain lubrication cadence. Filter service should happen earlier than calendar intervals if you notice reduced throttle response, unusual engine noises, or rapid filter clogging. Keep your cleaning approach dry-to-wet controlled: remove loose dust first, then clean selectively to avoid pushing grit into seals.
Wet and muddy rides: water and mud accelerate corrosion and can compromise sealing surfaces. You’ll typically tighten after-ride cleaning and drying: protect bearings and rotor areas from water intrusion, then dry thoroughly. Inspect brake performance closely because mud contamination can reduce friction consistency and change lever feel. Also check for coolant/oil residue after wet rides, since hoses, clamps, and seals can be stressed by impacts and thermal cycling.
Cold weather and mixed conditions: cold starts and short rides increase condensation risk in many engines. That can lead to oil dilution and reduced lubrication quality. Your oil service decisions should consider how often you ride short trips versus longer warm-ups. Also monitor starting behavior after storage and after repeated cold start attempts; repeated “short start cycles” can create different failure patterns than long sessions in warm conditions.
How it works on mixed-condition weekends: you might ride dry trails on Saturday and mud sections on Sunday. Prioritize the highest-risk system first based on the condition you encountered most recently. For example, if Sunday is wet/muddy, give more time to drying and brake checks afterward, and then adjust chain lube cadence based on how dirty the chain became. If you don’t have time for everything, do not skip the safety checks—brakes, throttle return, and basic leaks—because those are the most likely to become dangerous if ignored.
Common edge case: salt air or coastal riding adds corrosion risk beyond typical wet conditions. In that scenario, use corrosion prevention steps and consider more frequent inspections of fasteners and braking hardware. Also be mindful that brake performance can degrade as corrosion forms on rotor surfaces and caliper hardware.
Optional comparison table note: Condition → higher-priority checks → failure modes to watch. Dusty: air filter seating and chain lube → dust ingestion, rapid chain/sprocket wear. Muddy/wet: drying, brake feel, corrosion → slider drag, bearing contamination, rotor/pad performance changes. Cold: starting behavior, oil condition → condensation/oil dilution, hard starting, sluggish clutch feel.
Real-world scenario: you ride two evenings after work in varying humidity. The bike seems fine, but the air filter gets darker faster than expected and chain noise increases. Your schedule should adapt by cleaning and re-lubing chain more frequently and checking air intake seals. Then, if you’re unsure about your approach, consult “Choosing reliable dirt bike service” to align service intervals with your specific environment.
Frequently Asked Questions About Dirt Bike Maintenance
How often should I do Dirt Bike Maintenance if I ride only on weekends?
Use ride hours and conditions, not just the calendar. If your weekend rides are short trail sessions in dry dust, you may need more frequent air filter checks and more chain attention than you expect. Keep oil checks consistent and follow the manual’s oil interval guidance, then advance service if you notice dark, gritty oil or unusual smells.
What are the first signs my chain needs replacing, not just adjustment?
If chain slack stays out of spec quickly after adjustment, that’s a common early sign of stretch beyond adjustment range. Look for sprocket hooking (teeth that look worn in a curve) and chain that binds or has visibly stiff spots when rotated by hand. Continuing to ride after those signs often accelerates sprocket replacement and can cause drivetrain misalignment.
How do I know my air filter was cleaned correctly after Dirt Bike Maintenance?
A correctly cleaned and serviced filter should be free of residue, fully dried if your process requires drying, and seated so the sealing surfaces contact the airbox evenly. You should not see gaps at the edges or signs the intake clamp is pulling the filter out of alignment. If performance drops or the bike gets hard to start after filter service, re-check seating and for intake leaks.
Can I over-lube my chain and cause problems during rides?
Yes. Over-lubing can fling excess oil off the chain during motion, coating the rear tire and collecting dust and grit, which increases abrasive wear. A good target is a light, even film on the rollers—if it’s dripping or spraying, you likely added too much.
What should I check if my dirt bike starts poorly after storage?
Start with fuel freshness and basic leaks: stale fuel, clogged lines, or venting problems can cause hard starting. Next check battery condition and charging basics if your bike uses electric start, because weak voltage can mimic fuel-related issues. Then verify air intake sealing and air filter condition, since intake leaks or a mis-seated filter can prevent correct mixture.
How do torque specs affect reliability in Dirt Bike Maintenance?
Torque specs affect reliability by preventing slow loosening from vibration and avoiding component stress from over-tightening. Axles, caliper mounts, and sprocket-related fasteners are common trouble points when torque is inconsistent. Under-torqued parts can lead to misalignment and accelerated wear that becomes expensive later.
Should I replace brake pads as soon as they’re low or wait for specific wear patterns?
Replace pads when thickness is near the service limit or when you see uneven wear patterns that suggest caliper slider issues. Waiting until performance feels bad is riskier because rotor condition and caliper function can degrade along with pad material. If you notice rotor grooving, lever pulsing, or strong brake pull, inspect rotors and caliper hardware rather than only replacing pads.
What’s the safest way to clean my bike without damaging seals during Dirt Bike Maintenance?
Avoid high-pressure water directly on bearings, fork seals, swingarm pivot areas, and air intake seals. Use gentle washing on external surfaces, keep water flow away from openings, and dry thoroughly afterward. If you must use water near sensitive areas, rely on controlled, low-pressure rinsing and focus on drying to prevent corrosion.
Is it better to service oil by miles or by engine hours?
Engine hours are usually better because they reflect actual workload and time under heat. Miles can be misleading if you do slow technical riding versus fast open sections. If you can’t track hours, use ride conditions to adjust calendar intervals and service earlier in dusty or short-ride scenarios.
Long-tail: How can I prevent dirt bike overheating with basic maintenance?
Check coolant level and hose condition on liquid-cooled bikes, and keep radiator airflow clear by avoiding blocked fins and damaged hoses. Confirm oil is at the correct level and in good condition because degraded oil can worsen heat handling. Watch early symptoms like rising temp trends, fan behavior (if equipped), and unusual coolant loss, and escalate before damage occurs.
Long-tail: What’s the best Dirt Bike Maintenance checklist for dusty, rocky trail riding?
Prioritize a pre-ride check for air filter seating and clamps, chain slack and lubrication condition, and brake feel consistency before you enter rocky sections. After the ride, clean loose grit without blasting seals, re-check chain lube, and inspect for rotor wear patterns and unusual drivetrain noise. In dusty/rocky terrain, service earlier than generic intervals if the air filter is loading quickly or the chain sound changes mid-day.
Conclusion
Dirt Bike Maintenance becomes predictable when you follow a cadence-based system: inspect before rides to prevent stranding, clean and lubricate after rides to prevent premature wear, and schedule deeper checkpoints weekly and seasonally. The core idea is simple: catch changes early using consistent inspection points, then use decision rules to determine when to stop riding and service.
The highest ROI checks are the ones that protect your engine and control systems: air filter integrity, oil level and service decisions, chain/drivetrain setup, and brakes that feel consistent. These checks prevent costly downstream damage because they reduce the chance that dust ingestion, heat buildup, or drivetrain misalignment turns a minor issue into a major failure.
Build a personal ride-condition log so your schedule matches reality. Note conditions like dust density, mud exposure, humidity, and whether rides are short warm-up cycles or longer sessions. Then align your plan with your owner’s manual for torque specs and official service intervals, and when you need help, bring your observations so any “Choosing reliable dirt bike service” support can target root causes instead of guessing.
Updated May 2026