
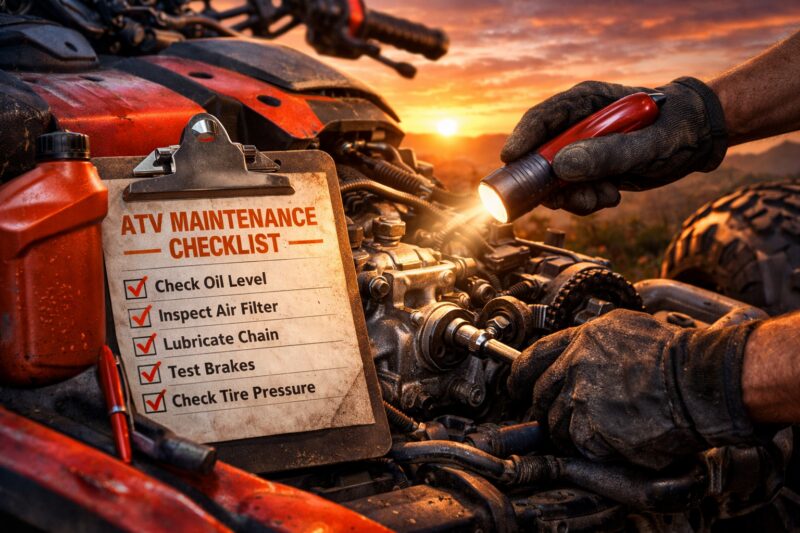
An ATV that’s serviced on schedule is far less likely to fail when you’re in the middle of a trail, job site, or long haul. This is what ATV Maintenance Checklist to Prevent Costly Breakdowns is designed to do: provide a repeatable system that catches common failure modes early—before they turn into stuck rides, overheated engines, warped brakes, or expensive drivetrain repairs. In practice, ATV Maintenance means following a cadence of checks (pre-ride, after-ride, monthly/seasonal, and annual) tied to how parts actually wear out and how damage accumulates. This article gives you a DIY-friendly framework you can apply to recreational trail use, utility/work riding, and seasonal storage—while acknowledging that your exact model (and manual) may require different intervals, fluid types, or procedures. You’ll learn what to measure, how to interpret symptoms like vibration or hard starting, and when to stop and escalate to the ATV service manual or a qualified technician.
How does an ATV Maintenance checklist prevent costly breakdowns?
An ATV Maintenance checklist prevents costly breakdowns by turning “mystery failures” into predictable outcomes you catch during the early wear and deterioration stages. Instead of reacting after the ATV quits, you inspect the components most likely to fail—then you correct the underlying cause (contamination, misadjustment, worn friction, low lubrication, or water intrusion) before it compounds.
This works because most expensive breakdowns are not single-part failures—they’re cascades. For example, a dirty air filter increases intake restriction, which raises engine load and heat. Heat accelerates oil breakdown and can contribute to harder starting or intermittent running. Likewise, worn brake components produce more heat, which can warp rotors and increase fluid contamination risk. A checklist is effective when it maps to failure modes: wear (thin pads, stretched cables), deterioration (degraded rubber boots, aged fluids), and hidden damage (water-splashed electrical connectors, hairline cracks near fasteners).
To apply this reliably, use a cadence system and keep the checks realistic for your life. Recreational trail riders often benefit from pre-ride and after-ride routines plus a monthly inspection during active seasons. Utility/work riders—who log higher run times and carry loads—typically need shorter intervals for air intake, lubrication points, and cooling/engine-bay cleanliness. Seasonal storage users should add pre-storage and post-storage verification steps so “old” issues don’t become “new” failures when you restart. Always treat your owner’s manual and service intervals as the final word on fluids, torque specs, and adjustment procedures.
The tradeoff is that checklists can’t replace model-specific instructions. Some ATVs use different drivetrain layouts (shaft drive vs chain vs belt), different brake systems, or unique cooling/airbox designs. Also, some problems require instrumentation (cooling system pressure testing, charging system diagnostics, or compression testing). A good checklist therefore includes escalation rules: if you find leaking fluids, structural damage signs, brake function abnormalities, or charging anomalies, stop and consult the manual or a professional—this is where “book ATV service checks” becomes the safer path.
Build a maintenance cadence system that actually prevents breakdowns
A maintenance cadence system prevents breakdowns by checking parts at the right time in the way they fail—so wear doesn’t stack up unnoticed. Think of it as matching inspection frequency to how quickly your ATV accumulates damage from dust, water, vibration, heat, and load.
Start with a practical cadence: pre-ride checks (quick safety and early-warning inspection), after-ride care (cleaning, lubrication, moisture management), monthly or seasonal intervals (fluids, filters, drivetrain/brake measurement), and annual inspections (deeper inspection, replacement of consumables nearing end-of-life). Pre-ride catches sudden issues—low tire pressure, a loose fastener, a sticking brake, abnormal noises—before you ride. After-ride addresses what causes hidden deterioration: grit in seals, sand-packed drivetrain components, contaminated air filtration, and corrosion-prone moisture. Monthly/seasonal maintenance addresses measurable wear and performance drift. Annual service catches degradation that’s hard to notice mid-season.

To tie cadence to failure modes, use decision criteria that increase frequency. High dust riding means you shorten filter inspection windows and pay attention to intake tract integrity. Deep water crossings require more frequent electrical connector and airbox/vent inspections after every event, not “sometime later.” Long storage means you prioritize fuel system stability, battery health, and seal protection checks before first start. Heavy loads or towing increase drivetrain and brake heat cycles, so you measure chain/belt tension, inspect brake wear, and verify cooling cleanliness more often than a light recreational schedule.
Use two paths so you don’t skip essentials. A “minimum viable checklist” covers the basics that prevent most trail and work failures: tires and brakes function, air filter/air intake inspection, visible leaks, throttle and controls free play, basic drivetrain/brake measurements, and electrical condition. An “expanded checklist” includes fluid condition checks, deeper drivetrain/bearing checks, connector inspection, and cooling/vent verification. Common symptom tracking helps you choose what to do next: vibration that increases with speed can indicate balance/wear in drivetrain components; hard starting plus a smell can suggest fuel/air/ignition issues; brake fade or a hot rotor smell indicates brake system heat or contamination. If you want a structured next step for tasks outside your comfort zone, “Reduce downtime with fixes” by aligning your DIY cadence with professional inspections when repeated symptoms show up.
Pre-ride checks: the 10-minute routine that catches issues early
Pre-ride ATV Maintenance should take about 10 minutes because it’s your best chance to catch problems that turn into trail or job-site breakdowns. The goal is simple: confirm the ATV is safe, responsive, and free of warning signs before you put load or speed on it.
Begin with tires and wheels: check tread condition, look for sidewall cracks, and verify pressure against the manual (or recommended range for your model). Low or uneven pressure can cause handling instability, faster wear, and overheating. Next, confirm lights, switches, and electrical basics—particularly for utility/work riders who depend on visibility. Then test throttle response and engine cut-off behavior at low risk: ensure smooth throttle movement and that controls return correctly.
Brake feel and controls free play matter because many failures appear as “performance drift” before they become total failure. Check lever travel consistency and look for signs of leaks around brake lines/calipers (where applicable). Inspect cables and boots for cracks or fraying. Listen for unusual noises while moving the ATV slightly in a safe area—rattles, grinding, or clunks can indicate drivetrain issues, worn bearings, or loose fasteners.
Go beyond “looks okay” with specific inspections. Look for cracks and looseness around common stress points: control mounts, footrests, skid plates, and wheel hubs. Examine the engine area for fresh leaks or residue that suggests seepage. Check exhaust color and odor patterns: an overly sooty smell can hint at mixture or combustion issues, while a fuel smell can indicate leaks or overflow. For drivetrain quick checks, verify chain/sprocket wear and slack range on chain-driven models, and check for abnormal binding when rotating wheels—smooth movement is a sign of health, while roughness can indicate bearing or shaft contamination. Logging findings is the secret weapon: keep short notes like “vibration increases after 30 minutes” or “hard start only when warm” so you can correlate symptoms to conditions before they escalate into an expensive repair.
After-ride care: cleaning, lubrication, and protecting against wear
After-ride care prevents breakdowns by removing contaminants that cause accelerated wear and by managing moisture before it reaches seals, bearings, and electrical connections. Cleaning is not just cosmetic—it’s part of ATV Maintenance that preserves clearances and helps heat escape properly.
Clean correctly by removing mud and sand without forcing debris into vulnerable areas. Use gentle methods around vents, around the air intake path, and near connectors. High-pressure blasting can drive grit into seals or under boots where it then becomes abrasive, increasing bearing and shaft wear. Avoid aggressive degreasers on plastics, boots, and wiring insulation; some chemicals can degrade materials and compromise water resistance.
After cleaning, focus on lubrication responsibilities and boundaries. Many ATVs have specific greasing points and oiling needs, often listed in the manual. Generally, you lubricate where friction and metal-on-metal contact exist, and you keep areas that must stay dry—like certain brake components and mating surfaces—free from contamination. Timing matters: you typically lubricate after the ATV is clean and dry so you don’t trap abrasive particles in the grease. If you lubricate during active riding, you can also help distribute lubricant, but you must still manage cleanup afterward.
Moisture management is critical after water crossings. Dry the airbox intake area and check for water in places that should stay dry. Pay attention to vents and drain points, and protect electrical connectors from repeated mud pack. A common mistake is “it dries later” thinking—corrosion can start immediately and worsen with each ride. Also, re-check adjustments after lubrication: if you lubricate a control cable, verify free play and smooth return. If you find water intrusion, persistent starting issues, or recurring electrical glitches, that’s where professional support like “Faster safer ATV repairs” can reduce the risk of misdiagnosing the root cause.
Engine and fuel system checks to prevent hard starts and running failures
Engine and fuel system checks prevent hard starts and running failures by ensuring clean airflow, correct lubrication, stable fuel delivery, and consistent ignition. These are the systems most likely to produce symptoms you can’t “ride through.”
Start with engine basics that affect combustion and longevity. Check oil level and condition using the proper procedure for your model; low oil can starve components and overheat the engine. Verify you’re using the correct oil type and viscosity as specified, because mismatch can alter lubrication behavior under heat. Inspect the air filter and intake tract for damage, missing elements, or obvious dirt bypass. Even if the ATV runs, a clogged air filter can increase load and heat, which then affects oil degradation and performance.
Next, inspect the fuel system. Look for fuel leaks around lines, fittings, clamps, the fuel cap area, and any visible residue that suggests seepage. Verify the fuel cap vent behavior if applicable and inspect fuel lines for cracks or stiffness. Fuel contamination is another hidden cause: water in fuel or sediment can cause intermittent starting and stalling. Also, if the ATV sits for long periods, fuel can degrade—leading to hard starts that later “improve” briefly but reappear after temperature changes.
For spark/ignition, evaluate plug condition and inspect for loose or dirty connections. Fouling signs (like heavy deposits) can indicate oil consumption issues, mixture problems, or air filter neglect. Plug gap should match specifications, and wiring/boot integrity matters because vibration can create intermittent contact. The deeper insight is handling “it runs fine now” scenarios: intermittent spark or fuel delivery issues often show up after heat soak or during load changes, so you should monitor patterns. If you notice repeat stalling, strong fuel smell, or overheating history, treat that as escalation criteria. At that point, consult your service manual and consider “Book ATV service checks” to avoid guessing beyond your skill and tools.
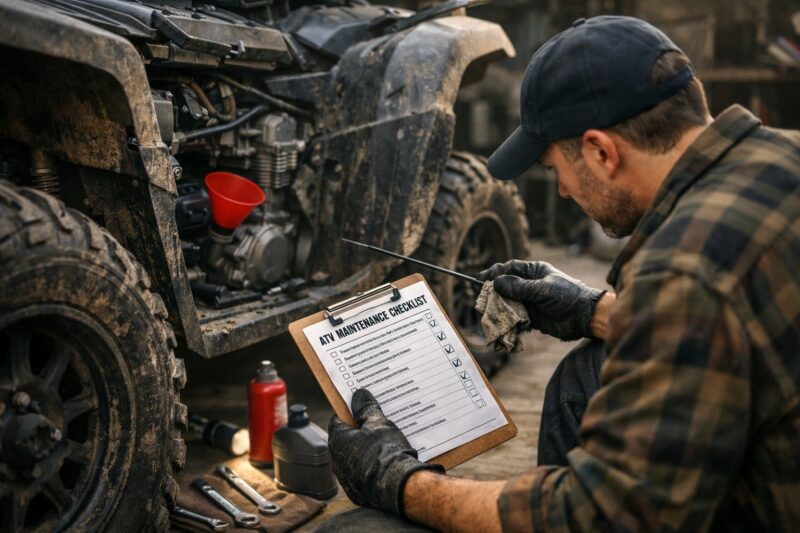
Drivetrain, brakes, and suspension: preventing control loss and expensive damage
Drivetrain, brakes, and suspension checks prevent control loss and expensive damage by maintaining correct alignment, friction performance, and predictable handling under load. These systems fail most expensively when heat, wear, and misadjustment accumulate together.
For drivetrain maintenance, start with what you can measure. On chain-driven ATVs, check chain condition and tension and inspect sprocket teeth for uneven wear. On belt-driven models (where applicable), inspect belt condition and alignment guidance in your manual. For axle/shaft cleanliness where relevant, look for buildup that can hide early corrosion or interfere with moving surfaces. The “how it works” part: improper tension or worn sprockets increases vibration and shock loads, which then accelerates bearing wear and can contribute to overheating in the drivetrain and cooling system due to inefficient power transfer.
Brakes maintenance is about friction stability and fluid integrity. Inspect pad/lining thickness and rotor condition, and confirm lever feel consistency—sponginess, drift, or sudden changes can indicate fluid contamination, air in the system, or a failing component. If your ATV uses brake fluid, check level and appearance where accessible, and look for leaks around hoses and calipers. A deeper insight is failure-mode mapping: neglected brakes run hotter, which degrades seals and can contaminate brake surfaces, leading to more fade and then longer stopping distances. That increases the chance of further mechanical stress from abrupt braking or impacts.
Suspension and steering checks protect handling and reduce secondary damage. Inspect play in bearings and joints, check boot integrity, and look for shock leaks. Uneven rebound or a harsh ride can indicate worn shock components or internal issues. Common mistake: focusing only on “can I stop?” and ignoring “how does it feel?” Consistency is key—brakes and steering should respond the same way every time. Use red-flag thresholds: visible leaks, grinding brake noises, severe free play, or a shock that bottoms quickly are “do not ride if…” signals. If you need a structured resource for multi-system inspection, reference an “Off-road repair shop checklist” to guide what gets checked during a thorough inspection.
Electrical and charging maintenance to stop dead-battery surprises
Electrical and charging ATV Maintenance prevents dead-battery surprises by ensuring power delivery stays reliable and corrosion doesn’t create intermittent stalling, weak starts, or no-crank events. Most electrical failures are not “sudden”—they’re the result of heat, vibration, moisture, and loose connections.
Begin with battery condition and terminals. Inspect for corrosion at the terminals and ensure connections are secure and clean. Check grounds and wiring routing so vibration doesn’t loosen them over time. Look for damaged insulation, frayed wires, and connector areas that show signs of mud intrusion. Verify fuses and relay areas visually; a simple blown fuse can mimic a much more complex symptom, such as a stalling problem after a bump.
Then examine the charging system. A safe approach is visual inspection first: verify belt/drive integrity if applicable, check for obvious wiring damage, and inspect the stator/alternator area as your manual permits. For voltage/load testing, follow manual guidance and use appropriate tooling. Since charging issues can be intermittent, you must confirm performance across the conditions that trigger the symptom—cold start versus after running, idle versus under load. Weather and terrain matter: wet riding accelerates corrosion; mud can wick into connectors unless they’re properly sealed.
The deeper insight is that electrical problems often masquerade as other system issues. Heat and vibration can loosen grounds, causing “random” stalling or weak starts that resemble fuel delivery problems. A common mistake is replacing parts without re-checking the basics like grounds, connector seating, and corrosion. Set safety boundaries: if you’re unsure about diagnostic steps beyond basic inspection, avoid probing circuits blindly. When symptoms persist, schedule an inspection—structured troubleshooting is where a technician can help “Reduce downtime with fixes” by verifying wiring, charging output, and ignition system interactions rather than chasing one guessed cause.
Common misconceptions and maintenance pitfalls that lead to breakdowns
The biggest maintenance breakdowns usually come from misunderstandings, skipped inspections, and shortcut cleaning or adjustment habits—not from “bad luck.” Fix the misconceptions and you’ll prevent many failures that look random until you examine the maintenance history.
Misconception: “If it starts, it’s fine.” An ATV can start with a degraded component and still fail later under load. For example, a weak fuel delivery path might still start cold but stall when warmed or when throttle demand rises. Another example is a small air leak in the intake path that won’t always prevent starting but can increase misfire and heat damage.
Pitfall: skipping the air filter or cleaning it incorrectly. Dust ingestion is a cumulative wear accelerator. Improvised cleaning that spreads dust or damages the filter media can lead to ongoing bypass, especially in fine powder conditions common in many trail regions. Pitfall: incorrect lubrication or over-lubrication. Using the wrong product or applying too much can attract dirt, foul components, damage seals/boots, or contaminate surfaces where friction stability matters. Pitfall: ignoring fasteners/tightness. Vibration loosens components over time; looseness can lead to misalignment, abnormal vibration, and secondary wear.
What most guides get wrong is treating maintenance intervals as universal. “One-size-fits-all” advice often ignores model-specific service schedules and different operating environments. Even with a good cadence, your exact intervals and torque specs depend on your ATV and how you ride. A practical solution is to follow your service manual specs for fluids, filters, and adjustments, then apply the checklist logic (inspect, measure, record, escalate) consistently. When you’re uncertain whether the right part or interval matches your model, rely on your manual and consider professional oversight—this is one reason many owners use an “Off-road repair shop checklist” during seasonal transitions.
Choices and alternatives: fluids, filters, and service approaches that fit different riders
Choosing the right fluids, filters, and service approach helps your ATV Maintenance prevent breakdowns by matching parts to your environment and risk tolerance. The best plan is not always the most “frequent,” but it is the most consistent and specific to your model and riding conditions.
Start by comparing maintenance approach categories. A strict DIY routine uses your manual for interval targets and performs the checks with measurement tools when needed. This is best for riders who can reliably inspect air intake, check fluid condition, and verify adjustments. A mixed DIY + scheduled professional service approach works well for utility riders who need uptime and for owners who want an expert review before peak season. Seasonal storage-only focus can reduce work when you ride rarely, but it must include post-storage readiness checks—especially for fuel stability, battery health, and air filter condition after long downtime.
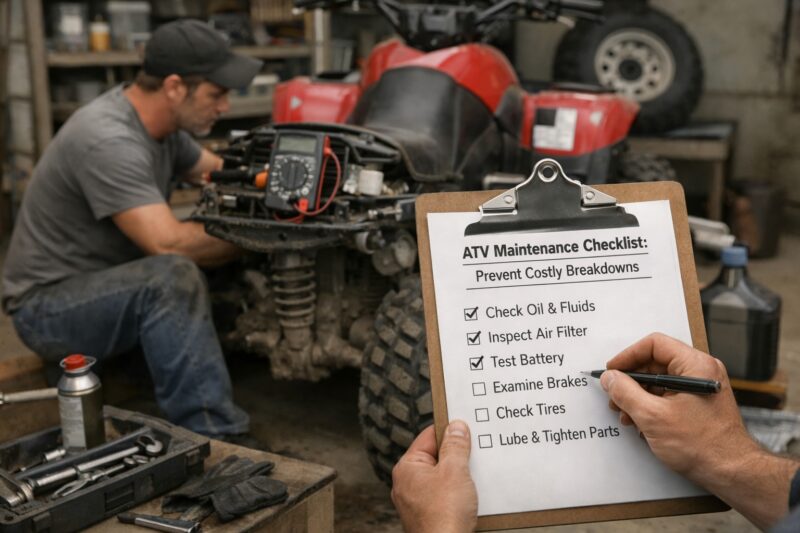
For consumable choices, decide based on terrain, warranty constraints, and how your machine fails under your conditions. OEM parts may reduce risk for fit and material compatibility, while equivalent parts can be acceptable if they meet specifications. For air filters, replacement versus cleaning depends on filter type and condition; dust-saturated filters often can’t be restored without losing effective filtration. For brake pads, “refreshing” can mean cleaning external contaminants, but it should not replace proper inspection and measurement—thin or heat-damaged pads should be replaced based on measurable criteria.
Tradeoffs readers often miss: “long intervals” fail first in dusty/high-load use because wear accelerates faster than the schedule assumes. Also, low-quality parts can change failure patterns—some cheaper components wear unevenly or degrade under heat cycles. To stay safe, always follow manufacturer specs for fluid grades and filter selection. If you want to align choices with practical breakdown prevention rather than guesswork, use a two-stage plan: DIY handleable inspections plus professional review for high-risk items. This planning mindset is what helps “Faster safer ATV repairs” when unexpected symptoms appear.
Advanced considerations for higher-risk conditions and edge cases
ATV Maintenance must change in higher-risk conditions because water, dust, heavy load, and frequent high-RPM operation increase the rate of hidden damage. Edge cases require tighter inspection and clearer escalation rules to prevent failures after the “worst day” becomes a breakdown.
For deep-water crossings, the priorities shift to moisture intrusion prevention and immediate post-event checks. You should dry and inspect air intake areas, confirm the air filter condition, and check electrical connectors for contamination or water ingress. For muddy and dusty environments, the checklist cadence should emphasize intake filtration, drivetrain contamination, and cooling airflow paths. Frequent high-RPM riding increases thermal stress, so you should monitor engine symptoms and pay close attention to oil condition and cooling system cleanliness according to the manual.
Heavy hauling or towing increases brake heat and drivetrain load. This means you should inspect brakes and friction components more frequently, check drivetrain tension/alignment, and verify there are no signs of overheating smells or fading. Diagnostics-informed maintenance helps you decide which checklist section to re-run. If you keep seeing repeated stalling, prioritize fuel delivery checks, air intake restriction, and electrical grounds/charging basics. If you see recurring hot-start failures, focus on heat-related fuel vapor issues and ignition consistency—without exceeding your diagnostic comfort level.
Seasonal transitions are another edge case. Before storage, stabilize fuel as recommended, top off fluids per the manual where applicable, clean thoroughly to remove abrasive grit, protect exposed components, and ensure the battery is stored/maintained correctly. After storage, perform a systematic restart verification: confirm throttle response, check for leaks, verify air filter seating, and test brakes at low risk before full riding. For “hidden damage” prevention after impacts or near-misses, inspect throttle/controls travel for sticking, check air intake for deformation, verify drivetrain alignment, and look for bearing wear indicators like abnormal play or rough rotation. If you see leaks that persist, structural cracks, brake performance anomalies, or charging behavior that doesn’t match normal expectations, stop riding and arrange a professional assessment. For many owners, an “Off-road repair shop checklist” is the safety net that ensures no edge-case item is missed.
Frequently Asked Questions About ATV Maintenance
How often should I do ATV Maintenance to avoid breakdowns?
Do pre-ride checks every time you ride, and do after-ride cleaning and moisture management each session. For monthly or seasonal intervals, follow your owner’s manual service schedule, then increase frequency if you ride in dust, run heavy loads, or cross water often. A practical rule is to tighten intake and drivetrain checks whenever your operating conditions are more severe than “normal trail.” If you’re unsure, “Book ATV service checks” before peak season can help set the right interval baseline for your model.
What are the most important checks before riding an ATV?
Prioritize brakes, tires/pressure, throttle response, visible leaks, and basic electrical readiness like switches and lights (if applicable). Then check for unusual noises and confirm controls free play isn’t abnormal. These steps prevent many trail breakdowns because they catch safety-critical and early-warning faults before load increases. If your ATV feels different than usual, re-check your drivetrain and brake feel before continuing.
Can I follow one ATV Maintenance checklist for every model?
You can use a universal framework (pre-ride, after-ride, monthly/seasonal, annual), but the exact items, fluid types, and measurement specs vary by model. The owner’s manual defines critical details like lubrication points, oil grades, brake service requirements, and adjustment limits. Treat your manual as the source of truth, then adapt the checklist cadence to your environment. For model-specific service gaps, “Faster safer ATV repairs” is especially helpful when you’re between manual updates.
How do I tell whether my ATV oil is overdue or contaminated?
Overdue oil is typically addressed by tracking service intervals in your own notes, since color alone can be misleading. Contamination signs include a burned smell, metallic particles, milky appearance (possible water intrusion), or dramatic viscosity changes. If the oil level is low or the oil looks unusually dirty soon after a change, stop and investigate the source before continuing. In suspicious cases, schedule “Book ATV service checks” to confirm whether the issue is oil quality, air/fuel behavior, or cooling-related overheating.
Is it bad to use high-pressure water for cleaning an ATV?
It can be risky because high-pressure water can force debris into seals, bearings, boots, and connector housings. That can turn into accelerated wear and intermittent electrical failures. Use gentler cleaning methods and keep water away from sensitive intake paths and electrical components. If you ride in wet or dusty conditions, careful cleaning directly supports breakdown prevention during your next ride.
When should I replace an ATV air filter instead of cleaning it?
Replace the air filter when it’s damaged, cannot be restored to a clean condition, or is heavily loaded with dust such that airflow is clearly restricted. If you see oil saturation on elements where oiling isn’t appropriate (depending on filter type), replacement is usually safer than repeated cleaning. Your manual will describe whether your filter is serviceable and the correct cleaning/oiling procedure. When in doubt, err on replacement to prevent intake wear and heat-related failures.
What causes hard starting even after routine ATV Maintenance?
Hard starting after maintenance can come from fuel delivery issues, ignition problems, or heat-related factors that show up under load. Even if the ATV starts, weak charging/ground issues or intermittent spark can still cause delayed starts. Also, incorrect oil or air filter seating can affect starting behavior indirectly through engine temperature and combustion stability. If the symptom repeats, re-run fuel/air/ignition basics and consider professional help if troubleshooting goes beyond simple inspection.
How should I maintain my ATV battery and charging system?
Keep the terminals clean, ensure grounds are tight, and inspect wiring for damaged insulation or corrosion after wet rides. If your ATV shows weak starts, check charging output using the manual’s recommended test procedure and tools. Don’t rely solely on “it runs now,” because charging problems can be intermittent and worsen with temperature. If you need diagnostics support, an “Off-road repair shop checklist” can help guide what gets tested in order.
What’s the difference between ATV Maintenance for trail riding vs work/utility riding?
Trail riding typically involves shorter run times, lighter loads, and fewer hours of continuous operation, so cadence can be less aggressive during calmer seasons. Work/utility riding often includes heavier loads, longer run time, and frequent starts/stops, which increases wear on drivetrain, brakes, and cooling/air intake. If you use the ATV for hauling or site work, inspect friction components and intake systems more often and keep cleaning discipline higher. Higher use also increases the value of scheduled professional inspections.
Long-tail: How do I prevent drivetrain wear on my ATV?
Inspect chain/belt condition and alignment routinely, maintain correct slack/tension per the manual, and keep contaminants from packing into drivetrain areas. Lubrication should follow the specified product type and amount, since under-lubrication and over-lubrication both increase wear risks. In dusty or muddy conditions, cleaning after rides is as important as lubrication. When vibration increases or you notice abnormal binding, stop and check alignment and bearing health before riding further.
Long-tail: What should I do after water crossings to avoid failures?
Dry and inspect the air intake and air filter area, then inspect electrical connectors for contamination. Check for leaks and re-test basic control and brake response at low risk before normal speed riding. Common failures after water crossings come from lingering moisture in intake and electrical areas. If you experience stalling or weak starts after a crossing, prioritize fuel delivery checks and electrical grounds before assuming engine issues.
Conclusion: turn ATV Maintenance into a breakdown-prevention system
ATV Maintenance prevents costly breakdowns when you treat it as a system: a cadence (pre-ride, after-ride, monthly/seasonal, annual), targeted checks tied to specific failure modes, and clear escalation rules when symptoms repeat. The outcome is fewer “surprise” trail failures, lower repair costs, and safer rides because you’re correcting the early causes—contamination, misadjustment, wear, moisture intrusion—rather than waiting for total failure.
If you want a practical next step, create a personalized schedule that uses your owner’s manual service intervals as the baseline, then tightens the cadence for your riding conditions. Track findings with short notes so repeated symptoms become patterns you can manage. Most breakdowns are predictable once you measure what matters: oil condition, filter status, brake feel, drivetrain wear measurements, and electrical cleanliness.
Finally, use professional support strategically. DIY is ideal for routine inspections and many after-ride tasks, but some diagnostics and high-risk repairs exceed comfort or tooling—especially charging performance, structural damage assessment, and repeated hard-start/stalling patterns. When you’re unsure, align your plan with “Book ATV service checks” so your maintenance effort produces fewer breakdowns and less downtime.
Updated May 2026