

A Dirt Bike Tune Up that’s done right makes your throttle feel crisper, reduces stalls and misfires, and keeps power delivery smooth instead of “hit or miss.” In this 2026 checklist-style guide, you’ll learn a decision-based workflow for getting faster, smoother rides by checking the real foundations of performance first: safety, airflow, ignition health, fuel delivery, and basic drivetrain feel. Because commercial intent is about results you can plan to achieve, the guide also helps you choose parts/tools and decide when it’s smarter to hire a shop.
We’ll cover two common situations: periodic tune-ups (new season, after every few hours, or at the first sign of performance drift) and post-incident resets (after winter storage, a hard ride, or a fall that may have loosened something). You’ll get measurable “good” targets to aim for, plus clear stop-and-hand-off triggers when symptoms point to root causes that can’t be fixed by turning screws—like air leaks, damaged sensors, cracked manifolds, or mechanical limits.
How to use this article: read in order, log measurements and symptoms (idle quality, hesitation type, hard-start behavior), then compare your notes against OEM expectations. Finally, tailor the checklist to your engine type—2-stroke vs 4-stroke changes what “correct” looks like for plug readings, air filter oiling, and carb/EFI adjustment practices.
What should a Dirt Bike Tune Up include to feel faster and smoother?
A Dirt Bike Tune Up should produce measurable ride-feel improvements: more consistent idle, smoother throttle response, easier starting, and fewer bogs or hesitations under load. Done right, it stabilizes heat management and reduces the “random” feeling that often comes from small ignition, fuel, air, or drivetrain issues.
“Faster and smoother” doesn’t mean the bike suddenly becomes a different machine—it means it behaves predictably across throttle openings. A practical tune-up focuses on ignition + fuel delivery + air intake + consumables + basic settings (where applicable). For example, when spark is weak or fuel delivery is restricted, the rider often interprets it as “engine roughness,” when the real issue is misfire or mixture instability.
Timing matters because tune-up work interacts with conditions. A seasonal tune-up addresses typical drift: filter oiling quality, fuel contamination risk, spark plug aging, carb gunk from long storage, and minor cable or airbox changes after transport. Hours-based intervals are also useful—especially for riders who do repeated dusty/sandy days where airflow restriction and jet fouling appear sooner.
However, it’s critical to distinguish tune-up from diagnosis. If symptoms are caused by non-adjustable factors—like an air leak at the intake tract, a cracked manifold, damaged ECU sensor wiring, or a wiring ground fault—turning mixture screws will not produce a stable fix. This is where an evidence-first approach matters for commercial decisions like buying a tune-up kit versus paying for labor: you want the smallest set of parts that eliminates the root cause.
Practical application: start with the action list at the end of the tune flow in your own notes. Finish DIY only if the bike meets consistency criteria (starts cleanly, idles without surging, pulls smoothly without hesitation at common throttle transitions). If you hit a hard stop trigger—severe backfiring, obvious mechanical damage, or repeated refusal to start cleanly—hand off to a shop using your symptom log to speed root-cause testing.
Tradeoffs and limitations: a tune-up cannot fix everything. If valve clearance/service intervals are overdue on a 4-stroke, or if compression is low due to internal wear, you may get short-lived improvement but not long-term reliability. If you want more reliability planning, review a broader dirt bike maintenance checklist so tune-up work doesn’t happen in isolation.
Pre-ride inspection checklist: what to check before you touch tune settings
Before you adjust ignition, carb/EFI, or mixture settings, do a pre-ride inspection that confirms the bike is mechanically safe and that the “symptom” exists consistently. This prevents wasting money on parts while the true cause is something simpler—like a clogged filter, intake leak, or binding throttle.
Start with safety and performance-affecting basics. Check tire condition and pressure, inspect chain slack and condition, and confirm brake feel is normal. Then verify fastener tightness in the usual hotspots (airbox clamps, exhaust/muffler mounting points, skid plate fasteners, and cable adjusters). Even small changes can alter intake sealing or cable routing, and that can change how the engine responds to throttle.
Next, perform controls/feel diagnostics. Twist the throttle and feel for smooth movement—no sticking points or abrupt jerk. Verify idle cable free play and lever return behavior. Then replicate the symptom methodically: if the bike hesitates on takeoff, note whether it happens immediately on clutch release, mid-lean transition, or only after a heat soak.
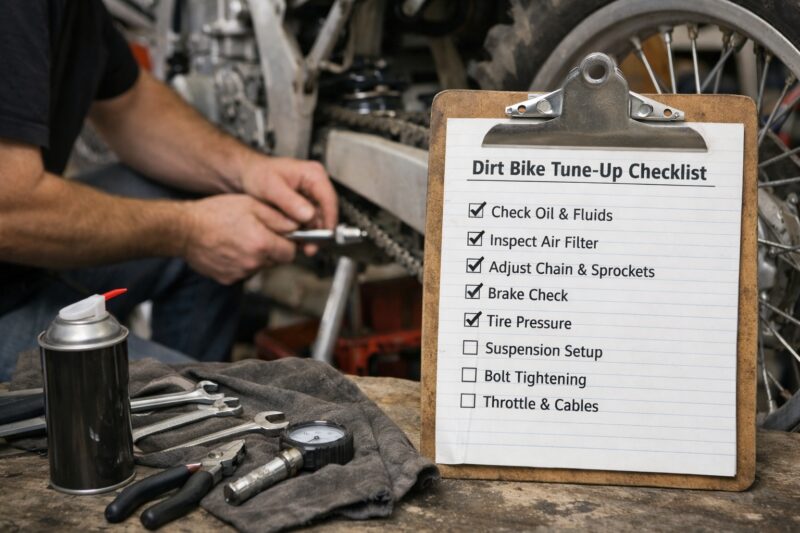
Airflow foundation comes next. Remove and reseat the air filter, confirm there are no tears or damaged seals, and ensure the filter is seated correctly in the airbox. If your intake tract is visibly collapsed, obstructed, or loosely clamped, mixture and airflow will be unstable and any “tuning” becomes guesswork.
Deeper insight: suspension and controls can mimic engine problems. A warped cable routing path, a partially seized throttle housing, or a snagged linkage can produce throttle jerk that feels exactly like bogging or misfire. Common mistake: many riders chase jetting while the throttle is actually binding or returning late, especially after a crash.
Stop point: if the bike won’t start cleanly, has severe backfiring, shows obvious mechanical damage, or you detect fuel leaks you can’t resolve, pause tune adjustments and move to diagnosis. For structured reliability planning, it’s also useful to align your work with an engine service checklist reliability mindset—log observations and measurements so you know what changed.
Spark, ignition, and timing checks for stronger throttle response
Spark health is one of the fastest ways to restore stronger throttle response, smoother pull, and easier starting. A Dirt Bike Tune Up that ignores ignition can still feel rough because misfires under load often feel like “fuel” problems.
Begin with the spark plug as your evidence anchor. Inspect the plug for electrode wear, heavy soot, blistering, fuel fouling, or oil contamination patterns. Replace the plug when it’s worn out, cracked, or clearly mismatched in appearance compared with what your model expects under similar riding conditions. If your engine uses a specific plug type or heat range, follow OEM guidance rather than assuming “any plug works.” Verify the gap where applicable, using the correct method for your plug design and your engine’s expectations.
Then check ignition components that commonly fail without obvious warning. Inspect the plug cap/boot for cracks, ensure the spark lead is intact and not chafed, and check coil-related wiring for damage. Verify grounding points are clean and tight—loose grounds create intermittent spark under vibration and heat, often leading to surging at steady throttle and misfire under load.
Timing verification matters for models where timing marks/rotor alignment are serviceable. If your service manual specifies checking timing marks, confirm alignment without “drifting” settings. Tradeoff: replacing ignition parts randomly is an expensive way to learn what’s wrong; weak spark can be caused by grounding or pickup issues, not just the coil or plug.
Practical application: if your bike surges only at a certain throttle opening, test for misfire behavior by checking plug condition after a short controlled ride. If the plug repeatedly shows abnormal soot or a different pattern than expected, focus on ignition/fuel delivery consistency rather than immediately changing carb/EFI jets.
Common mistake most guides get wrong: “gap everything” without verifying plug type and heat range. Also, if you feel hesitation right after throttle blips, misfire is more likely than intake restriction alone. If you’re considering service support, use choosing reliable dirt bike mechanics criteria so you get documented checks rather than guess-and-replace.
Fuel delivery and carburetor/EFI tuning steps (to eliminate bog and hesitation)
To eliminate bog and hesitation, your Dirt Bike Tune Up needs a fuel delivery approach that matches your fuel system: carbureted models follow mixture/jets and float/slide behavior, while EFI models require intake integrity checks and safe sensor/connector verification. The goal is stable fueling across throttle transitions, not just one “happy” RPM.
First, identify carb vs EFI, because the checklist branches differ. For carburetors, focus on float level/needle seating (where applicable), jet condition (especially pilot/slow circuit), and throttle slide movement without binding. Ensure the throttle slide opens smoothly and that the air/fuel path isn’t restricted by residue or debris.
For EFI, prioritize checks you can safely do: confirm the intake tract isn’t compromised, check airbox sealing, and inspect connectors/wiring for looseness or damage that could affect sensor signals. Real-world scenario: after a fall, a connector can be slightly pulled and create intermittent lean or rich fueling that looks like “tuning drift.” Also verify updates/mappings align with your model year and any legitimate kit requirements.
What to tune depends on operating conditions. Altitude and temperature can shift mixture needs, and fuel quality changes how carb/EFI responds. In practical terms, “baseline” settings that feel perfect at sea level in summer may hesitate in cold mornings or high-elevation riding where air density changes.
Deeper nuance: many “tuning failures” are actually fuel restriction or air leaks. A restricted fuel line filter, kinked vacuum lines (on some systems), clogged venting, or intake leaks can create lean conditions that mimic bad jetting. The tradeoff is that changing jets without fixing airflow integrity can lead to chasing the wrong symptom.
Evidence-based application: if bog happens on takeoff, inspect the slow circuit/pilot transition first (carb) or verify intake sealing and sensor/connector health (EFI), then retest with your symptom log. If you want a broader reliability workflow for what to document, align with a repair shop fix checklist style note-taking approach so your next steps remain evidence-led.
Air filter, intake tract, and exhaust health for consistent performance
Air filter and intake tract health often determine whether your tune-up results feel consistent or disappear after a short ride. If airflow is restricted or leaking, your mixture goes unstable and throttle response suffers—even when ignition and jets are perfect.
For air filter service, clean properly (using the correct method for your filter type), dry thoroughly, and re-oil only to the level your filter specifies. On 2-strokes, over-oiling can restrict airflow and cause “rich bog,” which riders sometimes misdiagnose as “needs more fuel” or “needs different jetting.” Practical check: after cleaning, confirm the filter seals properly in the airbox and isn’t deformed or torn.
Inspect the intake tract for clamps tightness, rubber boot cracks, and any signs of loose fittings. Check crankcase breather hoses and routing—misrouted or pinched hoses can alter pressure/venting in ways that affect mixture stability. For deeper insight, confirm there is no obstruction in the intake path and that the intake boot is fully seated at both ends.
Exhaust health affects performance through gas flow and seal integrity. Check manifold/header gasket condition for leaks, since an exhaust leak at the joint can create hot spots and change scavenging behavior, especially on 2-strokes. Silencer packing issues can also change backpressure characteristics; if packing is degraded, heat management and power delivery can change noticeably.
Link to symptoms: lean surging under steady throttle can point to an air leak or restricted airflow, while heavy smoke and odor changes can suggest fueling/oiling imbalance. Edge case: after an “air filter service day,” some riders forget to confirm the filter seated correctly; the result is a seal gap that creates an immediate lean condition and a rough running complaint.
Common mistake: focusing only on jetting/excessive carb screw changes while the real cause is intake sealing. If you’re building a parts shopping list for consumables, treat this section as the product category decision basis—filter type, clamps, and sealing materials matter as much as the tuning screw settings.
Chain, drivetrain, and clutch adjustments that improve ride smoothness
Chain, drivetrain, and clutch setup can make your engine feel smoother by reducing jerk, drag, and inconsistent engagement. Even with a perfect fuel/ignition tune, a misadjusted drivetrain can cause takeoff feel that riders interpret as “rough running.”
Start with the chain checklist that directly affects power delivery feel. Measure chain slack using the specified method for your bike (don’t guess with a casual eyeball). Inspect chain condition for tight spots or visible wear. Check sprocket wear (including uneven hooking) and confirm alignment so the chain runs straight without excessive friction.
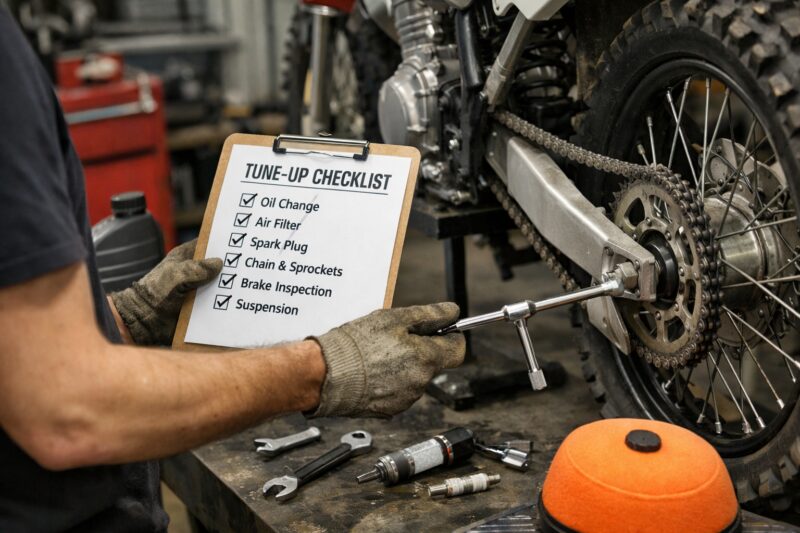
Lubrication is part of “smoothness.” Use the correct lubricant and avoid contamination during cleaning—sling/wash residue or improper lube can increase drag and distort throttle response. Practical application: if the bike feels like it surges then lurches at clutch release, verify chain drag and clutch lever feel before touching mixture settings.
Clutch basics matter because slipping or drag can mimic fueling problems. Verify lever free play so the clutch can fully disengage and re-engage. Observe engagement behavior: if engagement is inconsistent or the bike creeps, you may have cable slack issues or clutch adjustment needs. Tradeoff: if you try to “tune around” clutch drag by changing fueling, you may worsen drivability because you’re masking a mechanical issue with mixture changes.
Wear item criteria: replace when chain stretch exceeds service limits, when sprockets show shark-fin wear, or when hub/bearing play (where applicable) creates movement that changes effective driveline feel. Real-world scenario: after a crash or wash, a slightly bent linkage or cable misroute can create jerky takeoff and backfire risk during clutch transitions.
Common mistake most guides get wrong: tightening the chain too much to eliminate perceived “slack” without checking alignment and wear, then creating binding drag. If you want additional reliability structure, keep your drivetrain checks aligned with dirt bike maintenance checklist habits so tuning doesn’t become the only troubleshooting lever.
Exhaust heat management and cooling-related tune factors (advanced)
Cooling and exhaust heat management can change how a tune behaves over time, especially after heat soak. A Dirt Bike Tune Up that “feels perfect cold” but falls apart after repeated laps may need cooling and airflow checks before you touch mixture adjustments again.
Start with fundamentals relevant to your machine. If it’s water-cooled, verify coolant level and condition, inspect for leaks, and ensure the radiator isn’t blocked by mud or debris. Confirm fan/thermostat behavior matches expected operation where applicable. Even on air-cooled bikes, airflow restrictions around the engine fins or shrouds can impact temperature and combustion behavior.
How overheating changes tuning: higher temperatures can increase detonation risk, reduce power, and cause riders to interpret it as “rich/lean drift” or “carb needs adjustment.” Some engines also become more sensitive to fueling quality when hot, so mixture that was acceptable at the beginning of a ride can produce poor throttle response later.
Smoke and odor clues help you decide what to do next. Coolant contamination signs (where applicable) can show unusual smoke patterns distinct from normal fuel/oil residue. Edge case: riders sometimes keep turning carb air screws while the true issue is a blocked radiator screen or restricted airflow, leading to a runaway cycle of incorrect “fixes.”
Practical application: do a short controlled ride, then check for overheating indicators and track when the symptom appears. If the problem correlates with heat soak, stop chasing tuning knobs and investigate cooling or airflow restriction first. For structured service handoff and documentation habits, a shop workflow aligned with engine service checklist reliability principles can prevent repeated tune changes when the root cause is heat management.
Common Dirt Bike Tune Up mistakes and misconceptions (and how to avoid wasting money)
The most expensive Dirt Bike Tune Up mistakes come from guessing—replacing parts or adjusting settings without confirming the real cause. If your bike’s symptoms are caused by a non-adjustable fault, you’ll waste both time and consumables while the ride quality stays inconsistent.
One common misconception is that you should replace or “gap everything” as a default. That approach ignores the fact that the correct plug type, air filter oiling amount, and baseline settings depend on your engine type and operating context. Another mistake is servicing the wrong component first: for example, chasing jetting while the air filter is compromised, intake seals are leaking, or the throttle cable is binding.
Ignoring consumable age is another money-waster. If your fuel is old, your plug is near the end of its life, or your air filter was cleaned improperly (or over-oiled), tuning adjustments won’t compensate for clogged or inconsistent airflow and fuel delivery. In 2026 riding conditions, where dust and humidity patterns vary widely, “set it and forget it” is often false—especially after long storage or a season change.
2-stroke vs 4-stroke differences matter for what “correct” looks like. Plug color and smoke patterns can differ, and carb behavior isn’t identical to EFI mapping. Tradeoff: some riders tune by plug appearance alone without validating whether the plug reading is influenced by throttle position, heat range, or riding style.
Most guides get this wrong: they present a tune-up as a guarantee of performance. The truth is that some bikes require valve service intervals (4-strokes) or have mechanical limitations that tuning cannot fix. If the engine has low compression or damaged internal parts, you can achieve some smoother running but not the full performance you want.
Commercial tip: avoid repeated “parts trials.” Instead, evidence-led checks first—especially ignition and intake sealing—before buying multiple kit components. If you’re weighing service options, use choosing reliable dirt bike mechanics criteria so you’re paying for root-cause testing rather than repeated adjustments.
Service vs DIY Dirt Bike Tune Up: choose the right option based on your bike and budget
Choosing between a DIY Dirt Bike Tune Up and a professional service depends on what you can measure, the complexity of your fuel system, and how risky the symptom pattern is. DIY is best for inspection, basic consumable service, and safe checks; professional service is best for deep EFI diagnostics, compression-related concerns, or persistent drivability faults.
DIY-friendly tasks usually include pre-ride inspections, air filter cleaning and correct re-oiling, spark plug replacement (with correct heat range and gap practice), and verification of basic cable/clamp integrity. You can also do many intake tract checks and drivetrain measurements with basic tools. Practical application: if you’re trying to restore smooth throttle response, start DIY by confirming ignition and airflow basics and logging results after each change.
Professional needs often appear when symptoms point to sensors, complex mapping, or possible mechanical damage. EFI drivability issues can require scan tools, and intermittent faults can be hard to replicate without instrumentation. If hard starting includes electrical concerns or if the bike won’t start cleanly after basic checks, a shop becomes the fastest route to prevent repeated parts swapping.
Commercial considerations include parts pricing, tool requirements, and time cost. The biggest risk with DIY is incorrect adjustment—like wrong baseline settings on a carb or incomplete intake sealing after filter service. What “good service” looks like: the shop uses OEM specs, records measurements, explains what they tested, and confirms the fix with a test ride at real throttle transitions.
Deeper nuance: when you shop, ask for what they test and how they confirm. Use a “repair shop fix checklist” mindset: request before/after symptom notes and ask whether they looked for root causes like air leaks and electrical grounding rather than only adjusting jets.
Internal linking awareness: for broader reliability habits and how to plan recurring tasks around tune-ups, consider a dedicated reference to the repair shop fix checklist approach after you decide whether DIY or service fits your budget.
Tune-up alternatives and upgrade paths (without losing ride comfort)
Alternatives to a basic tune-up include targeted upgrades paired with a baseline service, but the key is sequencing so you don’t create new variables. If you want smoother ride comfort without losing reliability, prioritize reliability first, then address the one or two changes that directly affect your desired feel.

Realistic categories include: baseline tune-up only; tune-up plus consumables kit; tune-up plus targeted jetting/airbox/exhaust inspection; and tune-up plus controls or suspension-only adjustments where they affect perceived smoothness. For many riders, drivability improvements come more from consistent airflow and airflow sealing than from performance bolt-ons alone.
Tradeoffs: too many simultaneous changes—filter + jetting + exhaust + gearing—make it hard to know what solved the issue. If you start with upgrades without stabilizing baseline tune conditions, you may get short-term improvement but spend weeks re-adjusting because the ride feel is inconsistent across throttle transitions.
Practical evaluation method: start with reliability basics (air filter sealing, plug and spark health, fuel restriction checks), then make only one change at a time. If your goal is smoother power delivery, also verify drivetrain/clutch feel so mechanical engagement isn’t misread as fuel tuning issues.
Deeper insight: upgrades are not a shortcut around diagnosis. A common edge case is riders swapping exhaust parts while ignoring intake leaks; the bike may “run” but never feels smooth because mixture stability is still broken. When you’re ready to plan purchases, build your consumables first and then evaluate whether performance-focused parts will complicate tuning.
Local buying and service considerations: what to look for in 2026
Product availability and emissions or fuel expectations can vary by region, so your 2026 Dirt Bike Tune Up parts list should be built around confirmed model-year compatibility and locally common fuel types. This reduces the chance you buy the right-looking parts that don’t match your exact system or operating conditions.
In the United States, riders often face altitude differences, seasonal temperature swings, and fuel quality variation across states. When buying OEM-spec parts, focus on matching your engine family and model year, and confirm air filter oil recommendations with local riding conditions—dusty areas can make filters and sealing more critical, while wet environments can change how quickly residue builds. A practical step is to verify that the parts you buy match your bike’s intended environment, not just the SKU on a website.
For service providers, use a “prove it” buying and commissioning checklist. Ask for OEM equivalence documentation (where applicable), confirm return policies for parts that don’t fit or that fail inspection, and request that they explain what they tested. If you choose service, ensure they provide a measurement-based approach rather than “generic settings” that don’t account for altitude and season.
Deeper nuance: altitude and weather commonly require retesting. A tune that feels great in late summer may hesitate after a cold snap or after moving to higher elevation riding, even if the original setup was correct. That’s why evidence logging matters: your future self needs before/after symptoms and conditions, not memory.
If you’re mapping out whether to buy a tune-up kit vs parts individually, use a structured plan like an engine service checklist reliability approach to keep your shopping decision tied to actual checks and measurements.
Service vs DIY tune-up: choose the right option based on your bike and budget
Pick DIY when the symptom aligns with inspection and consumables, and pick service when the fault likely involves diagnostics you cannot safely validate at home. The comparison below helps you choose based on risk, tools, and how quickly you need results.
| Option | Typical time | Common cost drivers | Best for | Main risk |
|---|---|---|---|---|
| DIY baseline tune-up | 2–6 hours | Plug/filter/fluids, basic tools | Air/ignition basics, filter service, reset after storage | Incorrect settings or missed air leak |
| DIY + consumables kit | 3–8 hours | Kit pricing + replacements | Season start reliability improvements | Buying parts without identifying the root cause |
| Shop service | Same week (varies) | Labor + diagnostic fees + parts | EFI issues, persistent surging, hard starting after basics | Paying for adjustments without root-cause verification |
Practical tradeoff: if your bike hesitates only after heat soak, a shop that checks cooling airflow and intake sealing can be more cost-effective than repeated jet or screw changes. Before you authorize work, ask questions using the choosing reliable dirt bike mechanics criteria so the shop aligns with an evidence-led workflow.
Frequently Asked Questions About Dirt Bike Tune Up for Faster, Smoother Rides
How often should I do a Dirt Bike Tune Up in 2026?
Most riders benefit from tune-up checks at the start of each riding season and whenever they hit major exposure events like long dusty rides or wet-season mud. If you ride frequently, track hours and do consumables service (air filter and spark plug inspection) based on how quickly they degrade rather than a fixed calendar. If symptoms appear—hard starting, surging, hesitation, or idle instability—treat that as an earlier tune-up trigger and log what changed.
What are the first checks to do before a Dirt Bike Tune Up starts?
Start with safety and consistency: verify tire and brake feel, confirm chain condition and slack, and ensure all fasteners around the airbox and intake are tight. Then replicate the symptom in a controlled way (for example, when it bogs on takeoff) so you know the issue is real and repeatable. Finally, check for basic airflow integrity by reseating the air filter and confirming the intake tract isn’t leaking or obstructed.
Can I tune a carbureted dirt bike without changing jets?
Sometimes you can improve ride quality by adjusting mixture or idle-related settings, especially if the issue is mild and the jets are still clean and the filter/intake are sealed. If the carb is clogged, the needle/float behavior is off, or symptoms persist through throttle transitions, jet cleaning or jet replacement is often required. Use evidence: compare plug condition after controlled testing rather than relying on feel alone.
What spark plug type is best for a Dirt Bike Tune Up?
The best plug type is the one specified by your OEM manual for your model and riding conditions, including correct heat range. During a tune-up, inspect for electrode wear, carbon fouling, and signs of oil contamination, then verify gap where applicable. Using the wrong heat range can contribute to fouling or overheating behavior that looks like fueling problems.
Why does my bike bog on takeoff after a tune-up?
Bog on takeoff often points to fuel delivery issues in the pilot/slow circuit, a float/needle problem, or an intake sealing mistake after air filter service. Another common cause is drivetrain feel—clutch engagement, excessive chain drag, or binding throttle cable can mimic bogging. If the symptom appears immediately after a tune-up, prioritize what you touched most recently: filter seating, clamps, plug cap connection, and any cable adjustments.
What’s the difference between tune-up and diagnosis for dirt bike surging?
A tune-up focuses on adjustable maintenance items like plugs, filters, ignition health, and baseline settings where applicable. Diagnosis looks for non-adjustable root causes such as intake air leaks, damaged sensors or wiring (EFI), cracked manifolds, or mechanical limitations. If surging continues after correct baseline work, you likely need diagnostic testing rather than more “tuning.”
How do altitude and temperature affect a Dirt Bike Tune Up setup?
Higher altitude and colder temperatures change air density, which can shift mixture needs and make a previously good setup feel too lean or too rich. Warmer weather can also affect fuel volatility and how quickly symptoms appear after heat soak. If you ride across elevation or seasons, retesting and small adjustments may be necessary—especially after a season change in 2026.
Should I replace consumables every Dirt Bike Tune Up?
Not always—replace by condition, but inspect frequently. A typical approach is to replace spark plugs and air filters when inspection shows wear, clogging, tearing, or oiling contamination beyond what normal cleaning fixes. Also check fuel quality and related wear items like lines or oil condition, since stale fuel and degraded components can cause repeat symptoms.
What does a professional Dirt Bike Tune Up checklist include?
A professional checklist typically includes measurement-based inspections (air filter sealing, plug and ignition condition, fuel system health), before/after symptom documentation, and a test ride to confirm improvement across throttle transitions. Shops should verify the fix rather than stopping at adjustments only. If you want reliability-forward service, ask them to follow an engine service checklist reliability style approach with documented tests.
Long-term: how can I keep tune-up results from fading quickly?
Use clean, correctly oiled filters; keep fuel fresh and use proper storage practices; and avoid repeatedly operating with a clogged air filter in dusty conditions. Also re-check basics after any crash, major wash, or long transport—intake clamps and cable routing can shift. If results fade, compare symptoms and conditions to your log and avoid immediately repeating the same adjustments.
Is a Dirt Bike Tune Up enough to fix hard starting?
Sometimes, but not always—hard starting usually begins with spark and fuel/air basics, especially plug health and air filter/intake sealing. If those checks don’t resolve it, you may need deeper diagnosis for fuel pump/pressure problems, compression issues, or electrical faults. In cases where the bike shows repeated hard-start behavior after basic checks, schedule diagnosis rather than continuing to adjust mixture.
For additional planning, you can also compare what you’re doing at home against a structured dirt bike maintenance checklist and consider vendor help if diagnosis becomes repetitive.
Updated May 2026