
An ATV Tune Up checklist helps owners and shops improve starting reliability, ride safety, and reduce breakdown risk by using inspections and measurements—not guesswork. An ATV Tune Up is the decision-focused process of verifying the items that most often fail first (brakes, tires, lights, filters, ignition, fuel delivery, drivetrain wear) and escalating to diagnostics when symptoms point beyond basic service. This guide is for ATV owners scheduling maintenance, buyers choosing a qualified shop, and riders preparing for seasonal riding. It also sets clear expectations: you’ll know what to inspect, what to replace versus clean, what to measure, and when to stop and involve a technician.
Because ATV models, operating conditions, and local fuel or weather differ, intervals and “acceptable” numbers must be adapted. Treat this checklist as a standards-based framework you can customize. If you need a service provider, use the same categories to compare quotes and to request evidence-based results—so you’re confident you’re paying for the right work and avoiding repeat issues. For quick planning, a practical starting point is reviewing your maintenance history and using prevent costly breakdowns checklist standards before you schedule.
ATV Tune Up checklist overview: reliability + safety outcomes you can measure
An ATV Tune Up checklist turns maintenance into measurable outcomes: easier starts, predictable braking, stable idle and acceleration, and fewer overheating or vibration complaints. Instead of “tune it and hope,” a quality service validates safety-critical systems first and confirms engine and drivetrain performance second.
Why this matters is simple: many breakdowns feel like an “engine problem” when the root cause is elsewhere. For example, a contaminated brake system or dragging caliper can raise operating temperatures and create vibration that riders interpret as ignition or carb issues. Likewise, a worn clutch or CVT belt can cause inconsistent acceleration that looks like fuel delivery problems. When the checklist is built around outcomes, you avoid symptom-chasing.
How it works: you separate items by risk and by evidence. Safety-critical checkpoints (brakes, tires, lights, and basic electrical integrity) get verified first, because failures there can injure you immediately. Performance and durability items (air filtration, spark plug condition, fuel system health, drivetrain engagement, lubrication, and cooling airflow) are measured next, because they drive how long components last and how stable the ATV feels under load.
For practical application, use “what good looks like” criteria in two ways. First, ask what was measured: free-play at key linkages, brake lever feel, tire tread and sidewall condition, spark plug condition (and whether fouling indicates a deeper issue), and fluid levels/condition. Second, ask for before-and-after evidence when parts are replaced versus cleaned. A reliable service expectations report approach also helps you judge whether a shop documents work like an inspection, not a sales pitch.
Tradeoffs and limitations exist. Some problems mimic tune-up symptoms (like hard starts, hesitation, or poor idle) while actually requiring diagnostics, such as low compression, sensor faults, charging instability, or clogged intake restrictions. A checklist should include “escalation triggers,” so you don’t keep replacing parts while the core fault remains unchanged.
Real-world scenario: a rider reports “it runs rough after starting” in dusty trails. A checklist would confirm air filter restriction, spark plug fouling, idle quality, and intake leaks before touching ignition timing or mixture. If it still fails, the next escalation might be compression testing, valve train inspection, or checking for electrical noise that causes intermittent misfire.
For deeper planning, you can align this checklist with faster safer repairs checklist standards for shop workflow and safety documentation before the technician begins.
Pre-tune inspection and setup: how to start without missing hidden problems
A pre-tune inspection and setup step prevents missed “hidden” faults and reduces the chance of misdiagnosis before any adjustments happen. It also creates a safe, consistent baseline for measuring change after service.
Why it matters: a tune-up can only be as good as the condition you start with. If a technician jumps straight into carb cleaning or spark plug changes without confirming why the ATV is acting up, the service may treat normal wear as a tuning error. Conversely, doing a quick safety and baseline inspection reduces the risk of road-testing with compromised brakes, tires, or lights.
How it works begins before any tools come out. Start by capturing the rider’s complaint in chronological detail: when the issue happens (cold start, after warm-up, under load, only after rain/mud), what was recently changed (fuel type, tires, exhaust, handlebar position affecting throttle cables), and what maintenance was last performed (oil change, air filter cleaning, belt or chain inspection). This is where owners can use quick checks before booking to gather the right details instead of arriving with only a vague symptom.
Practical application includes baseline inspection logic. Check engine conditions cold versus warm (because some misfires and overheating symptoms only appear after heat soak). Listen for drivetrain noises during engagement, watch for smoke color patterns (oil burning, fuel enrichment, or coolant signs), and note vibration frequency at idle versus acceleration. Record whether idle stability changes when switching on lights or accessories, since electrical draw can reveal charging or ground issues.
Safety setup steps should be part of any commercial workflow: use a stable work stand, wear appropriate PPE, immobilize the ATV securely for inspection and cable adjustments, and handle batteries carefully. Avoid disconnecting and reconnecting electrical components without a plan, because improper practices can create intermittent faults that are harder to reproduce.
Environmental considerations affect interpretation. Dust and mud can clog filters and intake passages quickly, while altitude changes can shift mixture behavior (especially on carbureted models). Storage-related corrosion patterns—especially on grounds and connectors—can create erratic starting and intermittent misfire that looks like an ignition wear problem.
Deeper insight: differentiate “tune-up needed” from “diagnostic needed” early. For instance, hard starting can stem from low compression (mechanical), fuel delivery restriction (flow), ignition energy weakness (electrical), or ECU-related sensor faults (computer-controlled systems). If the symptom persists despite basic checks in a consistent pattern, escalation avoids wasting money on repeated adjustments.

Common mistake: treating all rough idle as a carb/mixture issue. What most guides get wrong is skipping compression and checking for air leaks or sensor errors first, especially on models where idle quality depends on sensor inputs and ECU compensation.
For additional evidence-based framing, you can compare how shop documentation and communication improves outcomes via ATV repair shop selection guidance principles and expectations.
Engine tune-up essentials: ignition, fuel delivery, and airflow checks that prevent failures
An engine tune-up essentials checklist focuses on verifying the three systems that must work together—ignition, fuel delivery, and airflow—so your ATV starts reliably and runs smoothly under load. When these items are inspected with criteria, you reduce repeat problems and prevent unsafe “band-aid” adjustments.
Why it matters: ignition weakness, fuel restriction, or intake restriction can all produce similar symptoms—hesitation, surging idle, hard starting, and misfire. If you only “tune” the symptom without verifying the underlying cause, you may get a brief improvement that collapses under temperature or riding time.
How it works in a commercial checklist: spark and ignition checks are first-pass verification steps, followed by fuel system health, then airflow integrity. For spark plugs, inspect condition (fouling, deposits, electrode wear), confirm correct gap where applicable, and ensure you’re not ignoring deeper mechanical issues. Where appropriate, the shop may verify spark quality using safe diagnostic methods appropriate to the model (without relying solely on “it sparks” as proof it is strong under load).
Fuel delivery essentials include checking the fuel filter condition, inspecting fuel lines for cracks or seepage, and confirming vacuum integrity on models that use vacuum-operated components. Carburetor cleaning is not just “spray and reinstall”—a good standard ensures the throttle plate and jets are serviced appropriately for the reported symptoms, while accounting for fuel formulation and operating conditions. For EFI systems, the checklist should pivot from “mixture knob” assumptions toward sensor/ECU-related checks when idle or throttle behavior remains abnormal after basic service.
Airflow checks are equally critical. Inspect and clean or replace the air filter based on dust loading, verify the intake tract for leaks or obstructions, and confirm the airbox sealing surfaces are intact. A restricted air filter can cause rich running, poor acceleration, and plug fouling that makes riders think the ignition is failing.
Practical performance verification should be included. The ATV should have stable idle quality, predictable throttle response, and correct heat behavior (no abnormal pinging, excessive hesitation, or persistent stumble). If you observe symptoms only under load, the checklist should capture that—because load reveals fuel/ignition stability issues that free-rev tests can hide.
Deeper insight: don’t tune around a mechanical problem. Low compression, valve issues, or coolant/overheating signs can render ignition and fuel adjustments ineffective. What most guides get wrong is telling readers to adjust mixture when the real issue is a failing compression seal, worn valve train components, or airflow bypass leakage that keeps the mixture wrong.
Real-world scenario: a rider changes plugs repeatedly after each ride season, but the same fouling pattern returns. A proper checklist would correlate plug condition with air filter restriction, fuel delivery restriction, and compression health before prescribing more parts.
Drivetrain and drivetrain-adjacent safety checks: clutch, belts/chains, and shifting feel
A drivetrain and drivetrain-adjacent safety checklist confirms the ATV’s power delivery is stable and predictable, not slipping, jerking, or failing under load. That directly supports safe takeoff, controlled acceleration, and fewer “mystery” breakdowns.
Why it matters: CVT clutches, belts, and chains operate in harsh conditions. When they wear, the symptoms can imitate engine tune-up problems—like surging RPM, poor acceleration, and “fuel/ignition” complaints. If brakes are dragging or drivetrain engagement is inconsistent, overheating and vibration can make the ATV feel like the engine needs adjustment even when it doesn’t.
How it works starts with inspection. For CVT-style ATVs, check engagement quality (how smoothly it transitions from stop to movement), belt condition, roller wear patterns, and alignment. Look for uneven belt glazing or cracks, measure wear where the model specifies thresholds, and inspect for debris in the variator area that can cause inconsistent pulley behavior.
For chain-driven models, inspect chain wear and stretch, sprocket teeth wear patterns, lubrication condition, and alignment. Linkage and shift feel (where applicable) should be smooth and not inconsistent between cold and warm operation.
Adjustment/inspection checkpoints should include free-play at relevant linkages, cable condition, and smoothness under load. A commercial service should also include test evidence: what the rider should feel during takeoff, whether RPM stays stable without abnormal squeal, and whether acceleration is smooth rather than “rev then grab.”
Tradeoffs by transmission type are real. Some ATVs require more specific procedures for CVT setup or clutch adjustments, and using the wrong process can worsen wear. A reputable shop will explain what applies to your transmission category and why certain parts are cleaned or replaced based on measured condition rather than a flat recommendation.
Deeper insight: failure-mode guidance is crucial. A slipping clutch or worn belt can be misdiagnosed as a carb adjustment problem because it creates hesitation and RPM fluctuations that resemble fuel starvation. What most guides get wrong is focusing only on engine idle quality without verifying drivetrain engagement characteristics.
Real-world scenario: an ATV that “spins up but doesn’t pull” after air filter servicing. The checklist should verify filter sealing and airflow first, but also confirm belt wear, variator cleanliness, and clutch engagement health. Fixing a restricted intake alone may not resolve slipping drivetrain symptoms—and vice versa.
Brake, tire, and lighting verification as part of an ATV Tune Up service standard
Brake, tire, and lighting verification is the non-negotiable safety portion of any ATV Tune Up standard. A quality service confirms you can stop reliably, handle traction predictably, and be seen by others before it moves to engine and performance work.
Why it matters: the commercial value of an ATV Tune Up is protecting riders and reducing liability. Even if the ATV runs well, worn pads, contaminated rotors, damaged tires, or faulty lights can create dangerous situations that no engine tune can compensate for.
How it works in a service workflow: safety-critical items are inspected and verified first. For brakes, check pad or shoe thickness (and wear indicators where available), inspect rotor or drum condition for scoring or uneven wear, and verify caliper or actuator condition where serviceable. Confirm fluid levels and whether the system appears clean and uncontaminated on applicable models. Lever or pedal feel should be consistent and firm—not spongy or uneven.
Tires require visual and measurement-based checks. Inspect tread depth, sidewall cracking, puncture damage, and any issues that suggest improper bead seating. Verify pressure to manufacturer targets and explain why extremes can harm handling stability. Too low can increase sidewall flex and heat; too high can reduce traction and amplify impact harshness.
Lighting and electrical safety include verifying headlight, taillight, and brake light operation, checking switch function, and doing basic wiring inspection for corrosion, loose connectors, or moisture ingress. This is especially important on U.S. trails where mud and water exposure are common. Inconsistent electrical behavior can also mimic engine misfire symptoms, so the tune-up should acknowledge that interaction.
Deeper insight: contaminated pads or rotors may “feel fine” initially but fail quickly under braking load. Confirm cleanliness and look for signs of oil or grease contamination. What most guides get wrong is skipping brake inspection because the main symptom sounds “engine-related.” That’s how repeat failures happen—because one subsystem remains unsafe even after the tune-up.
Real-world scenario: a rider reports vibration and poor control in wet conditions. A checklist would verify tire condition and pressure first, then inspect brake rotors for contamination and uneven wear. Fixing only the engine tune might still leave the ATV unstable and unsafe.
For owners comparing service providers, it helps to align your expectations with faster safer repairs checklist categories so the shop can show evidence of safety verification.
Fluids, lubrication, and cooling system checks that protect long-term performance
Fluids, lubrication, and cooling system checks keep an ATV stable over time by preventing overheating, protecting bearings and gears, and reducing internal wear. This is a key part of an ATV Tune Up because heat and friction accelerate component failure.
Why it matters: many “engine” failures are actually fluid and cooling issues. Low oil, degraded oil viscosity, contamination, or incorrect gearcase fluid can create internal drag and wear that later looks like ignition or fuel problems due to changed performance under load. Cooling airflow restrictions can also cause detonation-like symptoms or overheating that makes the rider blame the carb or spark.
How it works: verify oil condition and level using manufacturer criteria, then check whether the oil was changed at the correct interval. For ATVs with gearcase or differential fluid, inspect condition where applicable and confirm service history. Verify brake fluid level and condition on models that use hydraulic braking, and ensure the system appears leak-free.
Lubrication targets should include drive components where service intervals exist, throttle and brake cable condition, and pivot points that require lubrication. Equally important is what not to lubricate: some areas should be left clean or have specific approved lubricants to avoid attracting dust or swelling rubber components.
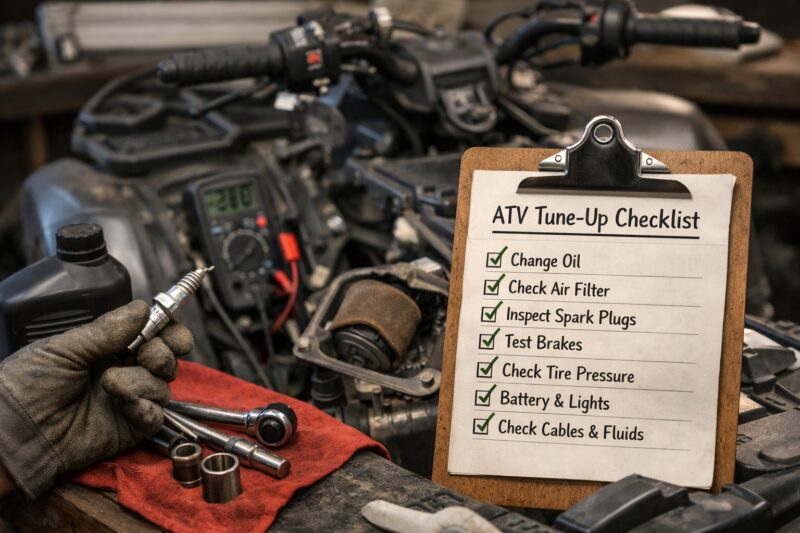
Cooling and overheating checks include coolant level and condition on liquid-cooled models, hose integrity, radiator condition, and signs of blocked airflow such as debris-packed fins. If the ATV has oil-cooler systems, inspect for blockage. For air-cooled models, confirm that fins and shrouds aren’t obstructed and that airflow pathways aren’t damaged.
Serviceable versus replace decision rules should be part of the checklist. If oil appears unusually “milky,” persistent contamination can indicate coolant intrusion—escalate beyond routine changes. If a fluid is beyond its service life, drain-and-fill or flush procedures should follow the model’s guidance and not be improvised.
Deeper insight: wrong fluid type or quantity can create recurring symptoms that look like “needs another tune-up.” For example, incorrect oil viscosity or additive incompatibility can change how the engine behaves under load and during warm-up. What most guides get wrong is advising generic fluid choices without model compatibility, then blaming ignition when the real issue is lubrication performance.
Real-world scenario: an owner switches to an aftermarket oil without confirming its rating. Idle improves briefly, then acceleration becomes inconsistent. A proper checklist would verify oil rating, level, and contamination indicators before adjusting any engine settings.
Electrical and starting system triage: battery, charging, grounds, and sensor smoke tests
An electrical and starting system triage checklist reduces repeat “hard start” and intermittent running problems by confirming the battery, charging health, grounds, and wiring integrity. This is critical for both safety and reliable starting—especially in humid or wet U.S. riding conditions.
Why it matters: modern ATVs rely on stable electrical power for ignition control, fuel delivery (EFI), and sensor readings. A weak battery or poor ground can cause misfire that looks like mechanical wear. If you tune engine settings while voltage is unstable, the service may fail the moment you ride for real.
How it works at a practical level: start with the battery health baseline and visible inspections of cables and terminals. Look for corrosion, looseness, and damage to insulation. Confirm the battery voltage condition and observe how the starting system behaves during cranking—slow cranking is a clue that isn’t solved by spark plug changes alone.
Charging system verification should focus on stable output under load. Without overclaiming model-specific procedures, a quality shop confirms charging health by checking whether voltage remains within acceptable limits during operation and accessory loads. If the ATV’s lights or ECU behavior changes during riding, capture that evidence—because intermittent faults often correlate with voltage drops.
Wiring and connectors inspection includes checking harness chafe points, moisture ingress signs, and relay or fuse condition where relevant. On sensor-influenced models, a triage checklist should consider that erratic idle may come from sensor fault signals rather than tuning wear.
Deeper insight: intermittent faults are best handled with evidence. What most guides get wrong is replacing components based on a single symptom without capturing timing and pattern (only cold mornings vs after mud exposure vs after bumps). A strong commercial approach asks riders to note when the issue appears and whether any codes are stored.
Common mistake: assuming “it starts sometimes, so the battery and charging are fine.” Intermittent ground connections often pass in the garage and fail under vibration and wet conditions. Triaging electrical problems early reduces the chances of repeat breakdowns.
Real-world scenario: after riding in coastal humidity, an ATV won’t start until it dries. A checklist would inspect grounds, connector seals, and terminal corrosion before repeatedly adjusting engine settings.
For background on general automotive electrical safety and measurement considerations, you can reference U.S. Department of Energy guidance materials on safe electrical handling and battery best practices, and for battery care basics consult Interstate Batteries owner resources.
Advanced considerations (what most guides miss): when the checklist must become diagnostics
When symptoms repeat or persist after checklist-level checks, the ATV Tune Up must shift from adjustment into diagnostics. The goal is to identify root causes—compression, sensor faults, charging instability, fuel flow restrictions, or mechanical wear—so you stop cycling the same parts.
Why it matters: a checklist is designed to validate common wear and maintenance items. Diagnostics are needed when the problem behaves like a system failure rather than routine wear. For commercial customers, escalation also protects budget predictability by preventing “pay-and-try” cycles.
How to decide escalation triggers: persistent hard starting, major power loss, repeat breakdowns within a short interval, abnormal noises, stored fault codes (where applicable), or symptoms that clearly correlate with load/temperature. If the engine responds incorrectly to safe baseline adjustments, diagnostics should take over quickly—because over-adjusting can create unsafe RPM behavior or engine stress.
Edge cases include modified exhaust or airbox configurations, altitude changes that shift mixture behavior on carbureted models, and aftermarket electrical accessories interfering with charging. In these scenarios, the checklist still applies, but the “why” behind deviations becomes a diagnostic question.
Tune-up versus repair decision rules should be explicit. Replace immediately when safety items are out of spec (brake components, damaged tires, cracked belts beyond thresholds). Continue stepwise inspection for non-safety performance items only when evidence suggests you’re narrowing the cause. If the ATV repeatedly returns to the same fault pattern, continuing “tuning” is usually wasteful.
Documentation guidance builds commercial trust. A shop should record measurements and results: timestamps, pre/post inspection notes, replaced versus cleaned parts lists, and test-ride observations tied to rider complaints. This approach aligns with a reliable service expectations report style of communication that you can compare across providers.
Deeper insight: the risk of over-adjusting is real. What most guides get wrong is instructing mixture or idle changes without confirming that compression, airflow sealing, and sensor inputs are within expected bounds. If the baseline is wrong, adjustments can mask the problem and worsen wear.
Real-world scenario: a rider reports a recurring bog under acceleration only after rain. After basic filter and plug checks, the symptoms persist. Escalation could focus on moisture-related electrical faults, fuel delivery restriction, or throttle position sensor signal integrity.
Options and alternatives: what to look for when choosing a shop or a DIY ATV Tune Up approach
There are multiple valid paths to complete an ATV Tune Up: DIY owner checklists, independent shops, dealerships, and mobile technicians. The best choice depends on how much diagnostic capability you need and how strongly you value transparency of evidence and documentation.
Why it matters commercially: you’re not only buying parts and labor—you’re buying process quality. A shop that measures, documents, and test-drives responsibly is less likely to leave you with repeat issues. Likewise, a DIY approach can be effective when you follow a standards-based order and know when to escalate to diagnostics.
How it works as a comparison framework: evaluate service depth and proof. Ask for a measurable inspection report, specify whether the technician performed safety-critical checks first, and request clarity on “clean versus replace” decisions. Look for OEM versus equivalent parts policy, warranty/returns terms, and how they handle test rides and post-service verification.
Practical application: for DIY, use a checklist you can actually execute safely, with immobilization and correct PPE, and plan to stop if you encounter out-of-spec items. For professional service, request the shop’s “before/after” evidence: photos of air filter and brake condition, measurements for wear thresholds, and written results of basic engine verification (idle quality, throttle response, heat behavior) plus whether symptoms changed.
Tradeoffs exist. DIY typically offers cost predictability for parts, but can lack diagnostic tools for compression, electrical stability tests, or ECU sensor capture. Independent shops often provide strong balance of depth and value, while dealers may have brand-specific training and access to service information. Mobile technicians can be convenient, but confirm they can perform the safety-critical parts of the workflow reliably and can document results.
Deeper insight: avoid upsell traps without sacrificing safety. A good standard is to request measurements and evidence, not just recommendations. For example, if a shop claims you “need a carb tune,” ask what measurements show enrichment or restriction and whether they inspected airflow sealing, compression health, and electrical stability first. This is where aligning with quick checks before booking and checklist-based questions helps you stay grounded.
Real-world scenario: a shop offers “full tune-up” for a surging idle complaint. A quality alternative approach would ask whether the shop captured symptom timing, checked air intake leaks, verified sensor conditions (if applicable), and confirmed baseline adjustments were within spec before recommending replacements.
Optional comparison table can be useful here for readers deciding between approaches.
Common mistakes and misconceptions about ATV Tune Up (and how they create repeat failures)
Common mistakes in an ATV Tune Up include treating symptoms as causes, skipping safety-critical checks, and making adjustments without verifying the systems that drive the symptom. These errors are a major reason customers experience repeat breakdowns.
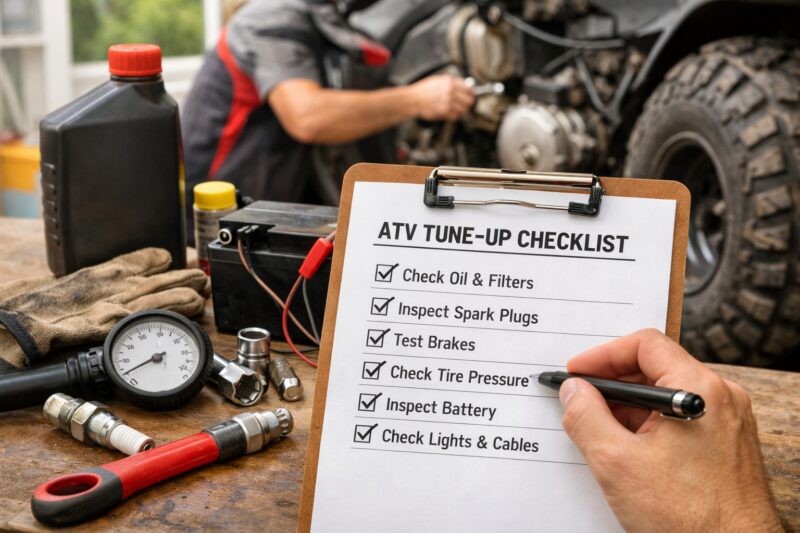
Why it matters: misunderstandings lead to wasted money and unsafe riding. When riders assume “if it runs, it’s tuned,” they may miss weak spark under load, dragging brakes, worn drivetrain components, or an intake leak that only appears in real-world use. The ATV might start in the garage and still fail during trail conditions.
How mistakes typically happen in practice: skipping air filter checks, using incorrect fuel or fluid types, and tightening fasteners without following torque specs. Over-tightening can distort mounting surfaces (especially on exhaust/intake), leading to vacuum or air leaks that create rich running, misfire, and poor idle. Using the wrong fluids can also change friction behavior and accelerate wear.
Adjustment errors are another category. Incorrect plug gap, wrong mixture settings assumptions, or idle stop interference can mimic more serious failures. If a shop adjusts idle speed before verifying throttle cable free play and linkage movement, it can cause inconsistent throttle response and unsafe behavior.
Maintenance interval pitfalls drive big failures. Waiting until a component fails (like belts or brake pads) forces expensive repairs and can contaminate other systems. Seasonal changes matter too—dust loading in U.S. summer trails can clog filters faster than many manuals assume, leading to repeated plug fouling or hesitation.
Deeper insight examples of “symptom chasing”: a rider replaces spark plugs repeatedly while the actual issue is grounded corrosion or compression leakage. What most guides get wrong is not requiring evidence-based decisions—no measurement of airflow restriction, no inspection of grounds, and no confirmation that the underlying system is within spec.
Commercially, this is why documenting findings matters. If a shop provides a reliable service expectations report style record—measurements, photos, and test results—you can verify whether they followed a checklist logic rather than guessing.
Real-world scenario: after “tune-up” work, an ATV still hesitates on takeoff. Investigation reveals belt wear and inconsistent engagement, not a carb adjustment issue. Fixing the drivetrain resolves the symptom and prevents the cycle from repeating.
Geography anchor: what changes for ATV Tune Up in the U.S. (seasonal dust, storage, and riding conditions)
ATV Tune Up requirements in the U.S. vary mainly due to dust, mud, winter storage habits, and humidity that affect filters, cooling airflow, and electrical connections. In practice, your checklist cadence and interpretation should shift by region and season.
Why it matters: U.S. riding often includes variable trail conditions—dry dust in the West and Midwest summer, mud and water exposure in wooded regions, and road-salt or coastal humidity near the coasts. These realities change how quickly air filters load, how often intake tracts need sealing checks, and how prone connectors are to corrosion and intermittent faults.
Seasonal preparation patterns are especially important. Post-winter storage checks should focus on fuel freshness or stabilization history, corrosion on grounds, battery conditioning, and inspection of fluids. Pre-summer heat checks should emphasize cooling airflow, fan or radiator/fin obstruction issues (where relevant), and ensuring oil and gearcase fluids match the riding season’s expectations.
Climate-driven nuance matters: high humidity or salt exposure can accelerate connector corrosion and ground failures, leading to intermittent starting and sensor-related erratic idle. Your checklist should ask the shop to inspect and clean grounds and connector seals if your location or riding environment suggests moisture or salt exposure.
Practical application: communicate location and usage explicitly. Tell the service provider your typical trail types, average ride duration, whether you ride in muddy water crossings, and whether you store the ATV outdoors. The better the inputs, the better the tailored checklist.
Deeper insight: regional fuel formulations can affect symptoms, especially on carbureted models. What most guides get wrong is advising a single mixture approach without evidence. Instead, request objective findings: measured plug condition, symptom timing, and verification of airflow and fuel delivery health.
Real-world scenario: in dusty trails, a rider sees recurring plug fouling within weeks. A properly adapted U.S. U.S.-aware checklist would inspect air filter loading rates and intake sealing after every dusty ride segment rather than waiting for a long seasonal interval.
To align seasonal planning with shop workflow, it can help to start with the safety-first logic in prevent costly breakdowns checklist standards.
Frequently Asked Questions About ATV Tune Up reliability and safety
How often should I schedule an ATV Tune Up for best reliability?
Schedule an ATV Tune Up based on riding intensity and season, not only a calendar date. Dusty or muddy riding typically demands more frequent inspections of air filtration, intake sealing, and brake condition, because contamination can rapidly mimic engine or ignition issues.
What should be checked first during an ATV Tune Up?
Brakes, tires, and lights should be verified first because they affect safety immediately. After those are confirmed, validate starting and idle quality while checking airflow, ignition condition, and basic fuel delivery health.
Can an ATV Tune Up fix hard starting or only “real repairs”?
It can fix hard starting when the cause is routine wear or service items like a fouled plug, clogged air filter, restricted fuel filter, or weak battery terminals. If hard starting persists despite those checks, escalation to compression testing or electrical diagnostics is often necessary.
Should I replace the spark plug every ATV Tune Up or just inspect it?
Inspect first and replace based on condition, interval, and fouling patterns rather than a fixed schedule. If the plug shows consistent oil or fuel fouling, the checklist should also investigate why the plug is failing instead of only swapping it.
What are the signs my air filter is causing poor performance?
Signs include degraded idle stability, hesitation under acceleration, and plug fouling that returns quickly after cleaning or replacement. Air filter restriction can also produce abnormal heat behavior because combustion efficiency changes when airflow is limited.
How do I know if my brakes need service during an ATV Tune Up?
Look for measurable pad or shoe wear, uneven rotor/drum scoring, and any contamination from oil or grease. Also confirm lever or pedal feel is firm and consistent; sponginess or uneven engagement indicates the system needs attention.
Is a CVT belt inspection part of an ATV Tune Up, and what should I look for?
Yes—CVT belt inspection is a core reliability item because belt wear can cause slipping, squeal, or inconsistent acceleration. Look for glazing, cracking, fraying, uneven wear patterns, and verify engagement quality with a safe test ride expectation.
What’s the difference between a basic ATV Tune Up and a full diagnostic service?
A basic tune-up validates common service items and confirms safe operation and stable basic running. A full diagnostic service is used when symptoms persist, fault codes appear, or the ATV shows major power loss, repeated breakdowns, or abnormal noises that indicate a deeper root cause.
How can I avoid getting upsold during an ATV Tune Up at a shop?
Request measurements and photos, and clarify “clean versus replace” for each item. Ask what evidence supports recommendations (wear indicators, test results, and symptom changes) instead of accepting vague claims.
How long does an ATV Tune Up usually take, and what affects turnaround time?
Time depends on inspection depth, parts availability, and whether test rides or additional diagnostic steps are required. Busy seasons, special-order parts, and escalation from tune-up to diagnostics can extend turnaround.
What should I tell the technician before they start an ATV Tune Up?
Describe when the problem happens (cold, warm, under load, after rain or dust), what changed recently (fuel, tires, mods), and what maintenance you’ve done. This symptom timeline helps the shop decide whether the issue is likely routine service or diagnostic-level fault finding.
Conclusion: how to use this ATV Tune Up checklist to reduce risk in 2026
A high-quality ATV Tune Up checklist is designed around outcomes you can verify: safety-critical checks first (brakes, tires, lights), then engine and drivetrain verification (idle, throttle response, engagement under load), and finally fluids, cooling, and electrical protection. When readers use evidence-based categories like these, they can judge whether a service provider is following standards rather than repeating trial adjustments.
To make this practical, request documentation and measurements that match the checklist sections. A shop should be able to explain what they inspected, what was cleaned versus replaced, what test ride or verification steps were performed, and why the results justify the work. This evidence-first approach reduces the chance of repeat failures and supports better communication between owners and technicians.
Your next step is to assemble your maintenance history and your top reliability/safety goals before scheduling service. If symptoms persist after checklist-level items, treat that as a trigger for diagnostics—not as a reason to keep repeating the same adjustments. For guidance on setting service standards and comparing providers fairly, use references like quick checks before booking and maintain an escalation-ready mindset with prevent costly breakdowns checklist principles.
If you want to choose a shop confidently, use a reliable service expectations report style of questioning and then request documentation aligned with faster safer repairs checklist workflow logic. That’s how you turn an ATV Tune Up into a safer, more reliable ride for the road and the trail.
External references that support checklist thinking and safe electrical and maintenance practices include U.S. Consumer Product Safety Commission guidance on safe product use and inspection, and OSHA resources on jobsite PPE and safe handling principles relevant to shop workflows.
Updated May 2026