
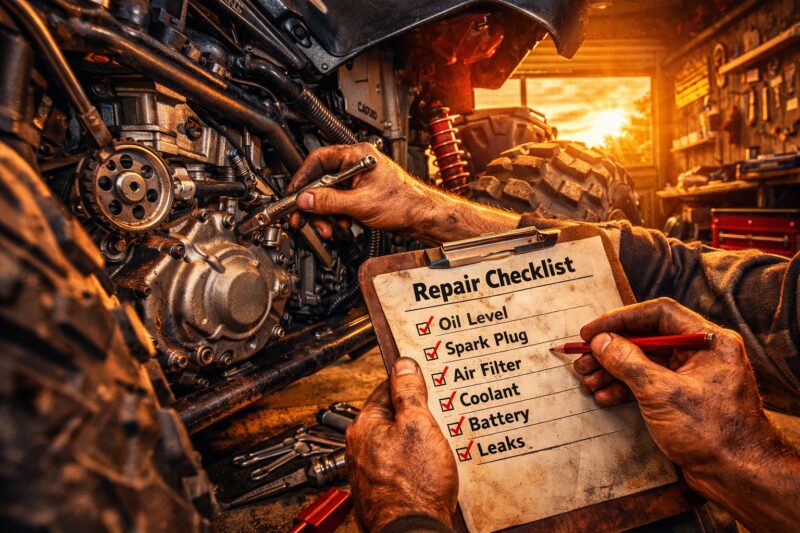
Before booking, an ATV engine repair checklist before booking service means you document symptoms, “what changed,” and basic external evidence so the shop can diagnose quickly and quote accurately. By the end, you’ll have a clearer problem description, a photo and notes package, and a test-driven scope that helps prevent repeat visits and surprise charges.
Specifically, this ATV Engine Repair checklist helps you prepare for a faster, more evidence-based intake. For a commercial repair appointment, that preparation matters because it changes the shop’s workflow: it improves triage, narrows the scope of testing, and reduces avoidable labor that comes from guesswork. When you arrive with a symptom timeline and the right photos, you’re more likely to receive a quote that reflects the true root cause rather than a generic parts-first approach.
This guide is not a DIY repair manual. It is a pre-booking triage and documentation guide designed to help you communicate efficiently with technicians—especially when you need a reliable estimate and clear next steps. The checklist applies to most 4-stroke and 2-stroke ATVs, but you should expect a few model-specific caveats (carbureted vs EFI, 2-stroke oil injection systems, and whether your machine uses accessible compression checks).
If you’re trying to pick a shop, use shop readiness as part of your decision: confirmation of their diagnostic process, willingness to provide written test plans, and communication norms. If you want a companion resource for selecting service providers, review choose the right ATV when matching your machine to the shop’s experience level and test equipment.
What does an ATV Engine Repair pre-check checklist include before a shop appointment?
An ATV Engine Repair pre-check checklist includes a symptom timeline, “what changed” details, and basic external evidence (photos and any available measurements) to help the technician diagnose faster and quote more accurately.
Why it matters commercially is simple: ATV repair is often billed by diagnostic time and labor cycles. If you wait until the appointment to explain what happened, the shop may need additional back-and-forth, extra test attempts, or wider troubleshooting that increases cost. Conversely, arriving prepared can reduce avoidable charges because technicians can follow a test order that matches your observations rather than starting from assumptions.
How it works in practice is that the shop uses your documentation as input to a structured workflow: intake (what you’re seeing), verification (what tests confirm), and decision (what repair path is justified). Your documentation should help them separate likely causes such as fuel delivery, ignition/spark, air restriction, compression/valvetrain, and charging/starting system weakness—without jumping straight to parts replacement. This is the same idea as ATV service pre-checks: a short, targeted set of preparation steps that prevents the “we’ll troubleshoot later” delay that costs time.
For practical application, create a one-page summary and bring it along with photos. Include when the problem occurs (cold start vs after a ride), whether it worsens, and any “what changed” triggers like new fuel, a spark plug replacement, carb cleaning, battery work, or belt/clutch adjustments. Tradeoffs exist: the checklist cannot confirm internal failure causes by itself, and it may not capture intermittent faults unless you provide pattern details (for example, only failing after heat soak). A real-world scenario is a machine that cranks strongly but dies immediately—good notes about “fires then stalls” versus “no start at all” can steer the shop toward fuel pressure/air leaks or ignition timing concerns before they waste time on unrelated parts.
One common mistake most guides get wrong is treating “pre-check” as permission to guess causes. The goal is not to decide whether it’s “a carb” or “a stator” before diagnosis; it’s to collect evidence that makes diagnosis efficient. If you want to ensure your shop is a good fit for your ATV category and diagnostic style, the next step is reviewing choose the right ATV for how service teams handle differences like carburetion, EFI, and 2-stroke vs 4-stroke fuel delivery complexity.
Engine symptoms triage: what to document before your ATV engine repair appointment
Before you book, document your ATV engine symptoms as a timeline (when it starts, how it behaves, and how it changes) so the shop can triage what systems to test first.
Why this matters is that “engine symptoms” are not equally informative. Two ATVs can both “won’t start,” yet one cranks and never fires while another fires briefly and then stalls. Those differences point to different test branches and reduce wasted labor on the wrong diagnostic track. From a commercial standpoint, a well-built symptom timeline reduces rework and repeat visits because the technician has a reproducible description aligned to the shop’s test plan.

How to do it: build a symptom timeline that captures cold vs hot conditions and frequency. Record whether the engine fails on the first attempt, only after sitting, only under load, or only after water/mud exposure. Include performance details such as hard start vs no-start, misfire under load, stalling, loss of power, and any unusual noise or vibration. If you can, note whether the problem is consistent or intermittent—especially for heat-related or fuel-delivery problems.
Practical application means including riding context and recent maintenance. Add altitude/temperature/humidity notes, trail conditions (mud, water crossings), and what you changed last: fuel type and age, spark plug brand/date/gap if known, battery service, carb cleaning, belt/valve-related work, or any storage changes. “What changed” triggers matter because many failures begin right after a service event: a filter not seated properly, an incorrect fuel additive, a vacuum line pinched, or a carb float adjustment out of range.
Deeper insight: distinguish “starting issue” from “run issue.” For example, “cranks but won’t fire” suggests spark/fuel delivery/air restriction at cranking, while “fires then dies” can indicate idle circuit problems, air leaks, fuel pressure decay, or enrichment/starting circuit failure. A common mistake is reporting only the final state (“won’t start”) without explaining the sequence. That omission increases the chance of misdiagnosis and unnecessary part swaps because it removes the clue about which system is dropping out first.
For additional prep ideas that reduce back-and-forth before service, align your intake with ask before off-road service to ensure you’re capturing the details the technician actually needs (especially if the shop also supports other off-road equipment).
Quick checks that help shops diagnose faster (spark, fuel, air, compression basics)
Quick external checks before your visit—especially spark plug condition, fuel freshness/contamination signs, intake/air filter status, and symptom linkage to heat or load—help shops diagnose faster by narrowing the test order.
These basics matter because they reduce the diagnostic search space. Shops typically start with simple, observable checks before doing expensive measurements. If you bring clear evidence—like whether the plug is wet (fuel), dry (no fuel or poor atomization), or oily (oil control/compression)—technicians can select the correct next test and avoid labor spent confirming what you could have already documented.
How it works externally: spark verification prep usually starts with recording plug details (brand, last replacement date if known, approximate gap if you measured it, and whether fouling appears wet or dry). Fuel observations include fuel freshness, whether the tank might have contamination (water, debris), and whether you recently stored the ATV without proper fuel stabilization. Air and intake checks focus on the air filter condition, intake blockage evidence, and signs of water intrusion—because water can cause misfire or “won’t start” symptoms that resemble ignition failure.
Compression/valvetrain indicators are where you must be careful. You generally shouldn’t attempt internal teardown before a shop visit, but you can describe symptoms linked to low compression: weak cranking vs normal, loss of power under load, persistent stalling, or smoking/blow-by patterns. The tradeoff is that you cannot confirm compression without a proper gauge and test procedure, but you can still provide symptom correlation that helps the technician prioritize a compression test earlier in the workflow.
Safety/limitations are important: avoid assuming “no spark = ignition module” without tests. Spark absence can be caused by battery/charging weakness, a bad ground, a sensor/ECU input issue, or wiring problems. A real-world scenario is a weak battery that still produces enough voltage to crank, but under load it collapses and interrupts ignition energy—making the symptom look like a fuel or ignition component failure. Good notes about starting behavior (for example, cranks slower when hot, or requires multiple attempts) help prevent that pitfall.
If you want to ensure your shop’s diagnostic process matches evidence-based testing, it helps to compare service expectations and communication norms using faster fixes lower downtime as a lens: do they document what they tested, in what order, and what each result means?
Checklist for parts and evidence: what photos, measurements, and test results to bring
Bring photos of key components and a concise measurement/evidence sheet (even if you only have visual condition info) so your technician can interpret symptoms and run tests efficiently.
Why this matters commercially: evidence reduces clarification loops. When a technician can immediately see the spark plug condition, filter housing state, visible leaks, or exhaust discoloration, the diagnostic plan becomes more targeted. That decreases diagnostic time and helps you negotiate a quote based on likely root causes, not uncertainty.
Start with a photo list. Include the spark plug (removed or at least the current visible condition), the air filter housing and filter element, visible leaks (oil/fuel/coolant where applicable), exhaust discoloration that suggests combustion/engine management problems, and any dashboard fault lights or instrument warnings. If you have an instrument cluster that can display codes, photograph the code screen. Also take pictures of the routing for fuel lines and any vacuum hoses that are accessible, especially if symptoms appeared after service.
Measurements to record depend on what you can safely access. If you have a multimeter or battery tester, note battery voltage before cranking. For models with coolant systems, record coolant level status. For fuel quality, capture grade and whether additives were used, plus how old the fuel is and whether the ATV was stored for extended periods. If you already have scan results, include codes shown on the machine’s display and any handheld scan outputs.
For a maintenance history packet, include receipts and dates for oil changes, coolant service, belt/clutch service, and valve checks (where relevant). Deeper insight: document “negative evidence” too. For instance, if the engine does not smell strongly of fuel after failure, if there is no blue smoke, or if it has not overheated, note that clearly. Negative evidence narrows hypotheses and strengthens your ability to compare estimates.
Common mistake: bringing only parts (like a spark plug) without context. Parts alone can be misleading because a plug can be contaminated after a range of causes. Pair parts with a symptom narrative so the shop can connect the evidence to the failure mode.
Choosing the right repair scope: repair vs inspection vs full teardown decisions
Choose a scope that starts with inspection and targeted testing, then authorizes repair only when results justify it—often preventing unnecessary labor and protecting your budget.
This matters because ATV engine failures frequently have multiple potential causes that share similar symptoms. Without a staged plan, shops may replace components until the machine works, which can produce repeat failures if the root cause remains. A test-driven scope supports better budgeting: diagnosis first, targeted repair second, and only then deeper work if evidence indicates internal failure.
How the decision path should work is an evidence-based sequence. Start with diagnosis/inspection, then run a test workflow aligned to your symptom timeline: spark/fuel/air/compression checks and any available scan tool results. Request “reasonable next step” actions that include test-based justification before parts replacement. For example, the shop should explain how they decided to test fuel delivery or inspect for intake leaks before ordering parts.
When teardown is warranted, it’s usually because symptoms and test results point to internal problems. Persistent burning oil, repeated overheating with confirmed cooling system failure, recurrent low compression indicators, or evidence of major wear can justify deeper inspection. Tradeoffs include higher cost and longer downtime; therefore, the more important commercial decision is to cap risk with staged authorization. Ask for interim authorization thresholds and staged estimates—diagnostic fee first, then partial repair, then confirmation after results.
Deeper insight: the “shop overhead problem” often comes from multiple diagnostic cycles driven by incomplete intake or undocumented test paths. You can reduce that by insisting the shop follows a single documented diagnostic plan. If you want to compare how a shop handles scopes and downtime commitments, consider evaluating them through faster fixes less downtime and their willingness to document results rather than jump to parts changes.
For operators who also maintain other off-road equipment, align your expectations with ask before off-road service so your request includes how they’ll communicate findings before proceeding to the next step.

What should you ask for in a written estimate for ATV engine repair?
Ask for a written estimate that separates diagnosis time, labor, and parts line-items and clearly states the diagnostic tests and pass/fail criteria that lead to each repair decision.
Written estimates matter commercially because they create accountability and reduce “scope drift.” A single lump-sum estimate makes it harder to dispute unexpected add-ons and harder to confirm whether repairs address the root cause. When estimates clearly separate diagnosis from labor and list parts, you can compare shops more fairly and protect your budget if additional testing is required.
How it should be structured: request an estimate that itemizes diagnosis and repair tasks. Ask which diagnostic tests they’ll perform and the criteria they use to decide whether to proceed. For example, they might outline ignition checks, fuel delivery verification, intake inspection, and compression testing—each tied to decision points rather than assumptions.
Practical application includes confirming warranty/guarantee terms. Clarify labor coverage duration, parts coverage, and what happens if the issue persists after repair. Also ask about fluids and consumables: whether they will replace oil/coolant as part of the repair plan, whether gaskets/seals are expected, and what cleaning steps prevent repeat failures. If a carb issue caused contamination, ask what prevents re-contamination (for example, fuel filtration changes, tank cleaning expectations, or storage correction).
Deeper insight: estimates should aim for root cause vs symptom. A machine that “runs better” after a tune but fails again a week later indicates root cause wasn’t addressed. A common mistake is approving component replacement without asking what evidence supports the component being the failure source. Good shops answer with test results and explain why the next step is reasonable.
For additional support in matching your machine to a shop’s capabilities, reference choose the right ATV so the technician’s test approach fits your engine type (carbureted vs EFI, 2-stroke vs 4-stroke).
Common mistakes and misconceptions that increase cost or delay ATV engine repair
Common cost drivers include guessing the cause, skipping documentation, and approving parts replacement without measurements—especially when symptoms could point to multiple systems.
Why this matters commercially is that every missed clue multiplies labor time. ATV engines often fail due to interactions between systems: fuel quality affects combustion stability, intake restrictions can mimic ignition issues, and weak charging can produce intermittent spark-like symptoms. When customers make assumptions, shops may need extra rounds of testing to recover from the wrong diagnostic path.
Misconception #1: “If it cranks, the engine is fine.” Cranking-only checks miss fuel delivery behavior under load and do not confirm ignition timing or compression under operating conditions. Another mistake is replacing parts without measurement—shotgun spark plug, carb, or battery swaps can increase labor while leaving the underlying issue unresolved. If a machine has intermittent symptoms, parts swapping can also mask the pattern, making it harder for the technician to reproduce and confirm the fault.
Another frequent problem is ignoring water/fuel contamination history. If the ATV was submerged or ran through heavy mud, moisture intrusion can contaminate ignition components or affect air/fuel mix. Without that history, the shop may pursue the wrong primary cause and the repair may not hold. Waiting too long to document symptoms is also costly: intermittent failures become less reproducible, which increases diagnostic time and the chance of incomplete conclusions.
Deeper insight: the “recent maintenance contamination” trap. If your last service involved oil changes, fuel additives, filter replacement, or carb cleaning, there’s a chance the symptom started because of an incorrect part, wrong oil type, additive mismatch, or improper filter seating. A common guide mistake is telling readers only what to check on the engine, instead of asking what changed immediately before the failure.
If you’re trying to keep costs predictable, choose a shop approach that aligns with faster fixes less downtime: insist that test results guide each repair decision and that the shop communicates what was checked and why.
Repair options and alternatives: what to compare before you book service
Before you book, compare repair options by service level: diagnosis-first inspection, targeted component repair, system service (carb/fuel/ignition), and internal engine work—each with different time and certainty tradeoffs.
Why comparing options matters is that the “right” choice depends on the evidence you can provide and the severity of symptoms. A shop that offers only full teardown without staged testing can be unnecessarily expensive, while a shop that refuses deeper tests may risk repeat failures if internal causes are present. Commercially, the best decision balances certainty, turnaround, and authorization thresholds.
How to compare: think in categories. (1) Diagnosis-first inspection: best when symptoms are unclear or intermittent. (2) Targeted component repair: best when you have evidence pointing to a specific system (for example, spark plug fouling consistent with fuel delivery failure). (3) Carb/fuel system service: best when you can confirm contamination, clogging, or improper fueling behavior. (4) Ignition/electrical troubleshooting: best when starting behavior suggests charging/ground issues or when fault codes indicate electrical problems. (5) Internal engine work: best when compression indicators, persistent oil burning, or repeated overheating show the issue likely lies within the engine.
Practical alternatives also include mobile diagnosis versus in-shop testing. Mobile diagnosis can validate surface issues and sometimes identify electrical/fuel symptoms, but it may not confirm compression or run certain bench tests. Evaluate DIY-adjacent support options carefully: it can be helpful to let the shop use your evidence package, but attempting partial external checks yourself may waste time if your observation is ambiguous. When comparing cost/time tradeoffs, understand that “faster surface fixes” may reduce downtime temporarily while “longer diagnostics” can reduce total expense by preventing repeat labor.
Deeper insight: what makes a shop “evidence-based” is a clear test order, documented results, and a willingness to revise the hypothesis when evidence contradicts the first guess. Watch for how they handle unexpected results. If their approach is to keep replacing parts until it works, that increases your risk. If they explain test decisions and pass/fail criteria, that supports more predictable budgeting and better outcomes.
If your decision involves matching service scope to communication norms, incorporate the preparation guidance from ask before off-road service so you understand how updates will be provided during staged work.
Advanced considerations and edge cases most guides skip (intermittent faults, electrical, contamination, and liability)
Advanced ATV engine repair readiness includes planning for intermittent faults, electrical edge cases, and contamination history—plus documenting prior repairs so liability and warranty coverage stay clear.
Why this matters commercially is that edge cases drive the longest diagnostic tail. Intermittent and heat-soak failures can be extremely time-consuming because technicians can’t reproduce the fault consistently. Electrical issues can mimic fuel or ignition symptoms, especially when voltage drops under load. Contamination failures can recur if the shop corrects only the symptom rather than preventing re-contamination. Without documentation, you may also have trouble protecting warranty coverage if the problem returns after a prior repair attempt.
How to handle intermittent and heat-soak issues: describe patterns with as much specificity as possible. Note when the problem appears during a ride, after a specific duration of idling, after water crossings, or only after multiple starts. If it happens only when the machine is hot, write down the time and any changes in behavior (for example, starts cold but fails after 20 minutes). Tests that help reproduce the fault are typically structured and may include load tests, controlled warm-up trials, or checking voltage stability—things you can’t easily replicate yourself, but your notes can help the shop reproduce it efficiently.

Electrical edge cases often include charging system weakness, corroded grounds, and bad connections that cause “spark-like” symptoms. Describe starting behavior: slow cranking, dim lights, or inconsistent spark after a short rest. Fuel quality and storage nuance also affects diagnosis. Stale fuel can cause hard starting and rough running, while ethanol-related separation can clog components or change fueling behavior after the ATV sits. Oil/coolant contamination indicators matter too: “runs rough” can be lubrication or cooling dysfunction if you also notice overheating, unusual exhaust odor, or abnormal smoke.
Deeper insight: liability/ethical boundaries when a previous repair attempt is involved. If you or a third party already replaced parts, document the parts and include dates. Use a “chain-of-custody” approach in your notes: what was changed, when, and what symptoms occurred before and after. This helps avoid disputes about causality if the issue persists and supports smoother warranty discussions.
Because some of these issues overlap with service category expectations (youth/utility/sport/trail), use choose the right ATV to match a shop that understands both the hardware and the documentation practices required for complex cases.
Where to get ATV engine repair done (national guidance + local constraints)
Get ATV engine repair from reputable powersports service centers that document diagnostics, provide written estimates, and can match your engine type—while accounting for local distance and downtime constraints.
Why this matters commercially is that the “best” shop is not only about price; it’s about diagnostic competence and communication quality. A shop that records test results and offers staged estimates is more likely to reduce repeat visits. In addition, travel time affects whether the machine is likely to fail again on the way back—especially for intermittent heat-soak issues—so consider logistics when choosing between nearby and farther options.
National guidance should prioritize service centers with consistent processes. Look for shops that can provide written estimates that separate diagnosis and labor and that explain test order and pass/fail criteria. If available, review how the shop communicates during repair: does it describe what was tested and what it means, or does it only say “we replaced parts”? Communication norms are part of service quality and often determine whether you’ll incur avoidable labor cycles.
Practical decision inputs include your ATV category and technician capability. Ask whether they service your ATV category (youth, utility, sport, trail) because procedure differences and priorities can vary. Verify they’ve worked on your configuration: carbureted vs EFI, 2-stroke vs 4-stroke, and any model-specific ignition or fueling system design. Tradeoffs exist: a shop specializing in one type may be less efficient with another, even if they’re experienced with powersports in general. You can also ask what scan tools and test equipment they use; modern diagnosis often relies on proper measurement, not just visual inspection.
Deeper insight: communication should include test results, not just “parts changed.” When problems recur, ask for a written summary of what was tested and why the repair direction was chosen. This supports warranty discussions and prevents the need for multiple overlapping diagnostic cycles.
To connect this to service preparation and expectation setting, align your intake and request style using ask before off-road service. If you’re also comparing shops based on capability fit, revisit choose the right ATV so the shop’s specialty aligns with your ATV’s fuel and ignition system.
For additional authoritative context on how to think about safe, evidence-based automotive/engine service processes, see U.S. Federal Trade Commission and U.S. Department of Energy for consumer-facing guidance on energy and equipment maintenance principles. For diagnostic concepts and wiring/electrical caution, consult manufacturer documentation practices when available from Bosch for general electrical troubleshooting principles used across engine systems.
Frequently Asked Questions About ATV engine repair readiness and booking
What should I do before booking ATV engine repair?
Before booking, write a symptom timeline that distinguishes cold-start vs hot-start behavior, plus a “what changed” list (fuel, spark plug, battery, carb cleaning, belts/valves). Bring a simple photo set of the spark plug, air filter housing, and any visible leaks or fault lights so the technician can start with evidence rather than guesses.
How can I tell if my issue is fuel vs spark vs air?
Use evidence like spark plug condition and starting sequence: a wet plug often suggests fuel delivery issues, while a very dry plug can point away from fuel flooding. Air restriction can show up as rapid fouling or poor running under load after dusty conditions, and spark/ignition issues often appear as no-start or misfire patterns that do not improve with fresh fuel.
Should I bring my old parts to ATV engine repair?
Yes, bring removed parts if you have them—especially the spark plug, filters, carb parts, or any replaced electrical components. Store them in labeled bags or containers and note the install date; this helps the shop verify whether the symptom aligns with a recent change and can support warranty discussions.
What information helps a mechanic give a faster ATV engine repair estimate?
Bring your symptom timeline, photos, and any diagnostic codes or scan tool outputs. Also include fluid/maintenance receipts with dates (oil, coolant, belt/clutch, valve checks) and clearly document “what changed” right before the failure.
Can a weak battery cause ATV engine repair symptoms that look like carb problems?
Yes. A battery that collapses under load can reduce ignition energy or sensor stability, producing symptoms that resemble fuel or carb issues. If you notice slow cranking, dim instrument lights, or failure that improves after charging, that’s a key detail the shop should test early.
How do long-tail symptoms like “cranks but won’t start after it sits” get diagnosed?
Shops often focus on heat-soak and fuel behavior, including fuel pressure/evaporation, pressure decay, and moisture intrusion after the ATV sits. Your documentation should specify how long it sits, whether it fails after a short rest versus overnight, and whether it ever starts after multiple attempts.
What’s the difference between diagnostic fees and ATV engine repair labor charges?
Diagnostic fees typically cover the time spent testing to identify the fault, while labor charges apply to the repair work performed after diagnosis. Ask for a written breakdown so you can confirm whether diagnostic fees apply separately or get credited toward the repair if the issue is found.
How long should ATV engine repair take after diagnosis?
Turnaround depends on parts availability, whether additional tests are needed, and how quickly you approve staged work. If the shop requires interim authorization, ask for likely timelines for each stage and whether they’ll retest before moving from partial repair to confirmation.
Will ATV engine repair warranties cover repeat issues?
Often yes, but coverage varies by shop policy and the documented root cause of failure. Confirm whether the warranty covers labor and parts for the same system, and keep your symptom notes objective so the shop can evaluate whether a repeat issue is within warranty scope.
What questions should I ask about parts quality in ATV engine repair?
Ask whether they use OEM or reputable aftermarket parts and what compatibility and return terms apply. Also ask how they handle critical consumables like gaskets, seals, fuel filters, and fluids—because correct sealing and proper cleaning help prevent re-contamination and repeat failures.
Is it worth paying for deeper tests before parts replacement?
Usually, yes when symptoms are intermittent or when early checks suggest multiple possible causes. Deeper tests can reduce total expense by preventing shotgun parts replacement, but it’s reasonable to stage authorization so you only pay for deeper work when evidence supports it.
Conclusion
ATV engine repair goes faster and costs less when your appointment starts with clear evidence: a symptom timeline, a photo/documentation package, and “what changed” context that points technicians toward the right test order. When you communicate this way, you usually get a more accurate estimate, a test-driven repair scope, and fewer repeat visits.
Commercial readiness also means process clarity: request written line-item estimates that separate diagnosis and labor, ask for staged authorization thresholds, and confirm warranty terms before committing to parts and repairs. Pair your preparation with shop-selection thinking so your technician is equipped for your engine type—especially when you may face edge cases like heat-soak failures or electrical mimics.
Next step: prepare your symptom timeline and photo set, then use it as a compare-and-contrast tool when you call or visit. Stay objective and avoid guessing causes; focus on observations and documentation so ATV Engine Repair can be resolved efficiently in 2026.
Updated May 2026